Overview: Getting a fully new Samsung Galaxy Tab S8/S8+/S8 Ultra to replace your old Galaxy Tab or other Android tablet and ever iPad, so you wanting a effective way to sync all your personal data to Samsung Galaxy Tab S8/S8+/S8 Ultra, and looking for a reliable method to recover the deleted and lost data on Samsung Galaxy Tab S8/S8+/S8 Ultra, right? After reading this article, all your questions will be solved.
Samsung recently released the first tablet that equipped with Qualcomm Snapdragon 8 Gen1 processor, namely Samsung Galaxy Tab S8 series, which includes Galaxy Tab S8, Galaxy Tab S8+ and Galaxy Tab S8 Ultra. Galaxy Tab S8 is almost identical to Galaxy Tab S8+ in terms of design, color matching, memory combination, shooting performance and even core performance. Only in terms of screen, Galaxy Tab S8 uses an 11-inch LCD display with a resolution of 2560×1600, while Galaxy Tab S8+ uses a 12.4-inch Super AMOLED display with a resolution of 2800×1752, and Galaxy Tab S8+ supports optical fingerprint unlocking under the screen. In addition, the Galaxy Tab S8+ is equipped with a larger capacity battery, and its endurance is better than that of the Galaxy Tab S8.
As for Samsung Galaxy Tab S8 Ultra, it comes standard with 16GB of RAM + 512GB of ROM, equipped with 11,200 mAh of large-capacity battery, and equipped with the 14.6-inch Super AMOLED display, the largest size of Samsung tablet to date.

Samsung Galaxy Tab S8 series has also customized many functions for efficient office and video social interaction, which will surely bring you comfortable experience and fine control feeling. So you can't wait to get a Samsung Galaxy Tab S8/S8+/S8 Ultra to replace your old Galaxy Tab, or other brands of Android tablets, or even iPad, right? According to our experience and the understanding of users' habits of new Galaxy devices, we guess that you should be interested in data transfer and data recovery. Next, we will explain to you how to transfer the data to Samsung Galaxy Tab S8/S8+/S8 Ultra and how to recover the lost data from Samsung Galaxy Tab S8/S8+/S8 Ultra in 10 different ways from two aspects.
Transfer Data to Samsung Galaxy Tab S8/S8+/S8 Ultra
- Sync Data from Samsung/Android to Galaxy Tab S8/S8+/S8 Ultra (Recommended)
- Sync Data from iPhone/iPad/iCloud to Galaxy Tab S8/S8+/S8 Ultra (Recommended)
- Sync WhatsApp/Wechat/Line/Kik/Viber Messages to Galaxy Tab S8/S8+/S8 Ultra (Recommended)
- Sync Data from Backup to Galaxy Tab S8/S8+/S8 Ultra
Recover Data from Samsung Galaxy Tab S8/S8+/S8 Ultra
- Recover Data to Galaxy Tab S8/S8+/S8 Ultra without Backup (Recommended)
- Restore Data from Backup to Galaxy Tab S8/S8+/S8 Ultra
- Restore Data from Samsung Cloud to Galaxy Tab S8/S8+/S8 Ultra
- Restore Data from Samsung Kies to Galaxy Tab S8/S8+/S8 Ultra
- Restore Backup to Galaxy Tab S8/S8+/S8 Ultra Using Smart Switch
- Restore Data to Galaxy Tab S8/S8+/S8 Ultra Using Best Data Recovery
Transfer Data to Samsung Galaxy Tab S8/S8+/S8 Ultra
Firstly, we will introduce you with how to transfer the data from your old device to Samsung Galaxy Tab S8/S8+/S8 Ultra. There are four effective methods in this part, and you need to use a professional data management software to complete these four methods, which is the famous Mobile Transfer.
Mobile Transfer is a user-friendly software, which is deeply trusted and loved by smartphone and tablet users around the world. With the help of this software, you are allowed to directly transfer all data from phone to phone, directly sync apps data between any two smartphones/tablets, backup all your phone data, extract data from previous backup and restore to any supported devices, etc.. Now, please click to free download the Mobile Transfer to your computer, and follow the on-screen prompts to install it to your computer.
Sync Data from Samsung/Android to Galaxy Tab S8/S8+/S8 Ultra
Mobile Transfer enables to directly transfer all data like contacts, contact blacklist, text messages, photos, videos, audio, call logs, music, voicemail, notes, calendar, reminders, apps, bookmark, alarm, wallpaper and more from any Samsung/Android device to Galaxy Tab S8/S8+/S8 Ultra.


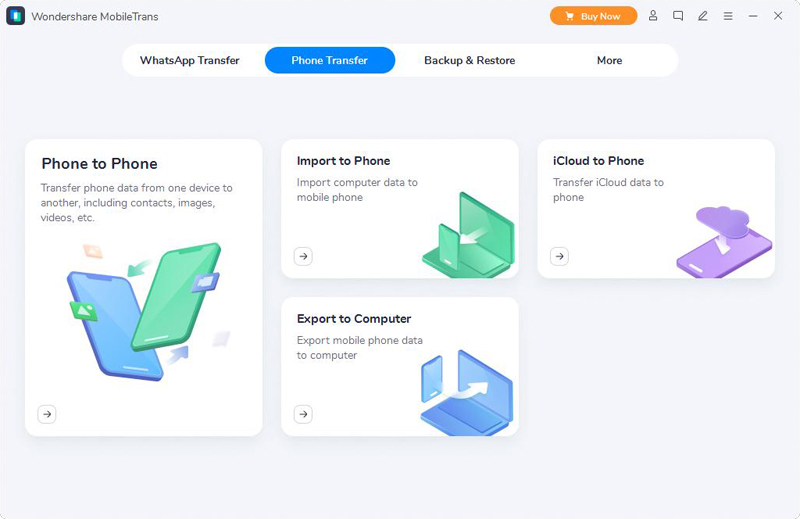
Step 1. Launch Mobile Transfer, then tap on "Phone Transfer" -> "Phone to Phone".
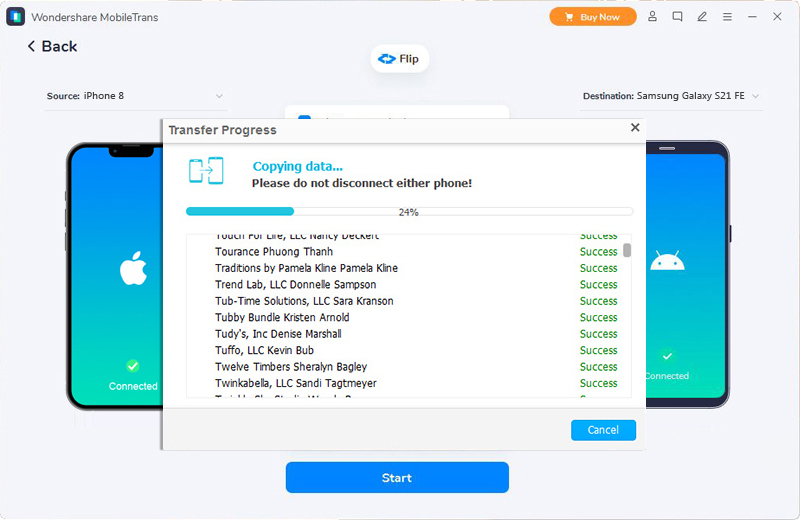
Step 2. Connect both of your old Samsung/Android device and the new Galaxy Tab S8/S8+/S8 Ultra to the same computer via their USB cables. And use the "Flip" button to display them in the corresponding position on the page after being recognized.
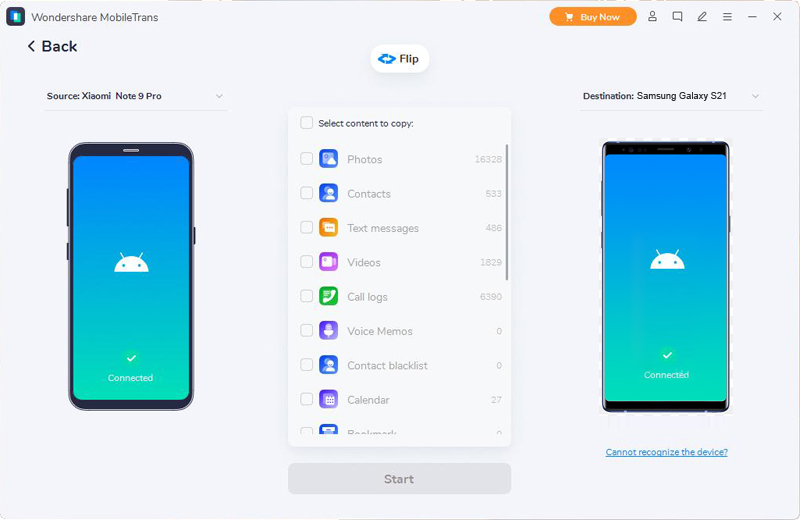
Step 3. Wait for your devices to be detected, select the file types to be transmitted, then click on "Start" to begin moving the selected files to your Galaxy Tab S8/S8+/S8 Ultra.

Sync Data from iPhone/iPad/iCloud to Galaxy Tab S8/S8+/S8 Ultra
Sync iPhone/iPad Data to Samsung Galaxy Tab S8/S8+/S8 Ultra with Mobile Transfer
Of course, Mobile Transfer can easily transfer various user data between Samsung and iOS, the two most widely used formations in the world.
Step 1. As the same, after running Mobile Transfer, you need to tap on "Phone Transfer", and then tap on "Phone to Phone".
Step 2. Connect both of your old iPhone/iPad and new Galaxy Tab S8/S8+/S8 Ultra to the same computer via their USB cables.
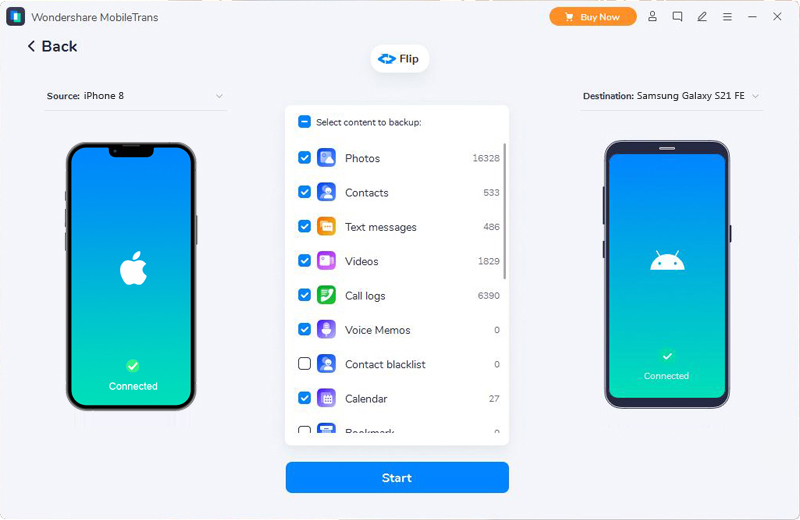
Step 3. Once the program has detected your devices, after confirming that their displayed positions are correct, then select the file types that you wish to transfer, and tap on "Start" to complete the transfer process.
Sync Data from iCloud to Samsung Galaxy Tab S8/S8+/S8 Ultra with Smart Switch
In addition to Mobile Transfer, Samsung Smart Switch, a data management tool independently developed by Samsung, can also be used here for old Samsung Galaxy phones or Galaxy Tab users.
Step 1. Download, install and run Smart Switch mobile app on your Samsung Galaxy Tab S8/S8+/S8 Ultra.
Step 2. Tap on "Import from iCloud", then you will be noticed to connect your device to a stable WIFI network, if done, tap "OK".
Step 3. Enter your Apple ID and password to sign in to your iCloud account.
Step 4. After that, it will take some time to load the data that you were synced to the loginned iCloud account. If done, check the items to be transmitted, then tap "Import".
Step 5. In the process of data import, please pay attention to the relevant prompts on your screen and operate as required. Once it is finished, please click "Done".
Sync WhatsApp/Wechat/Line/Kik/Viber Messages to Galaxy Tab S8/S8+/S8 Ultra
If you need to transfer the messages of the social softwares like WhatsApp, Wechat, Line, Kik, Viber and so on on your old devices, you can also do it through the powerful data transfer capability of Mobile Transfer.
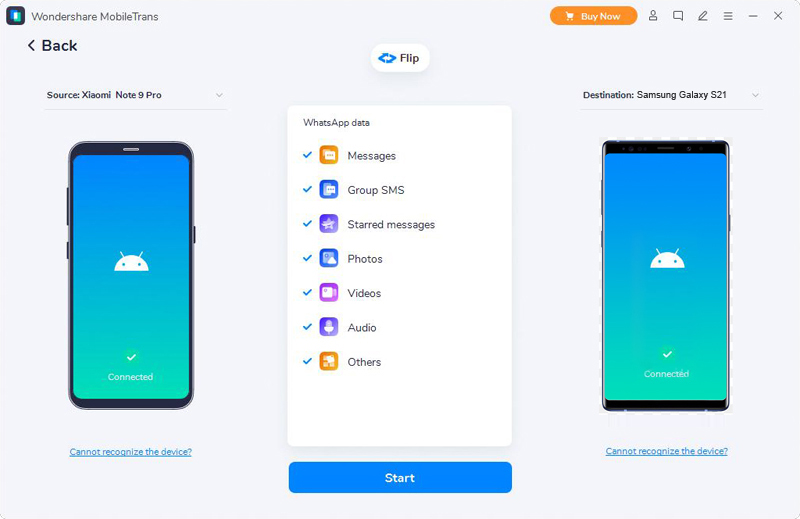
Step 1. Run the program and click "WhatsApp Transfer", then you can see four options in the page, namely "WhatsApp Transfer", "WhatsApp Business Transfer", "GBWhatsApp Transfer" and "Other Apps Transfer".
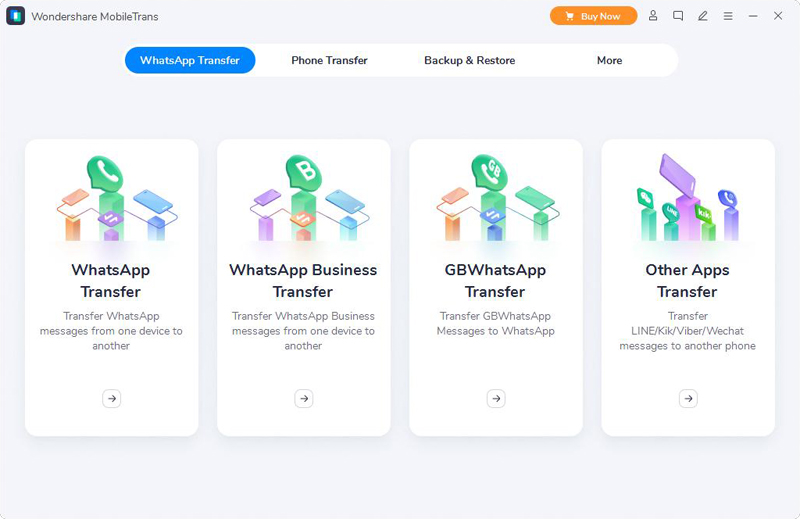
- If you want to transfer your WhatsApp messages, then you can choose the first three option according to the WhatsApp version you used.
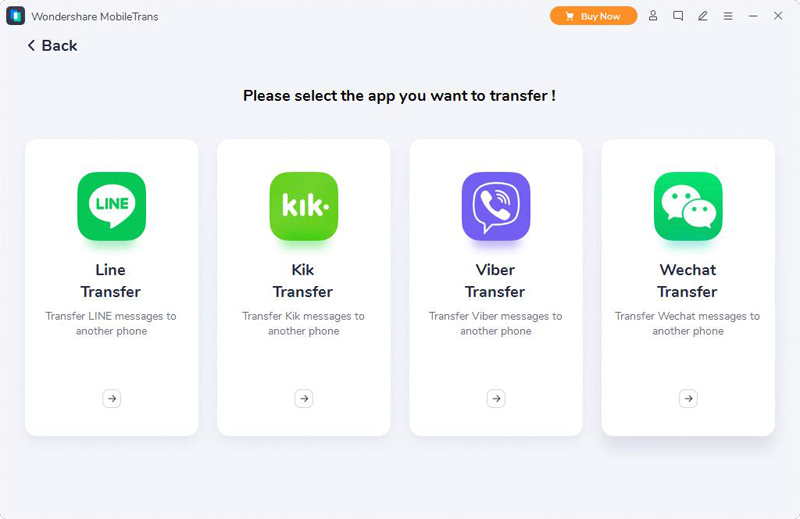
- If you want to transfer your Wechat/Line/Kik/Viber messages, you can need to tap "Other Apps Transfer" and choose the corresponding item as you need.
Step 2. Connect both your old and new phone to computer, and confirm the displayed position of your phones after they are detected.
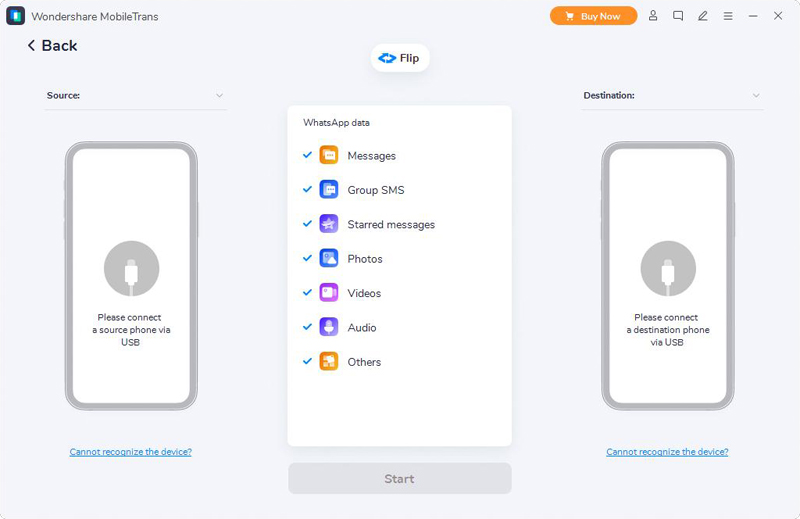
Step 3. After selecting the file types that you need to transfer, and then tap "Start" to complete the transfer process.
Sync Data from Backup to Galaxy Tab S8/S8+/S8 Ultra
Thanks to the powerful data backup capability of Mobile Transfer, as long as you have previously backed up your mobile phone data through it, you can use it to extract data from the backup file and easily transfer it to any supported device.
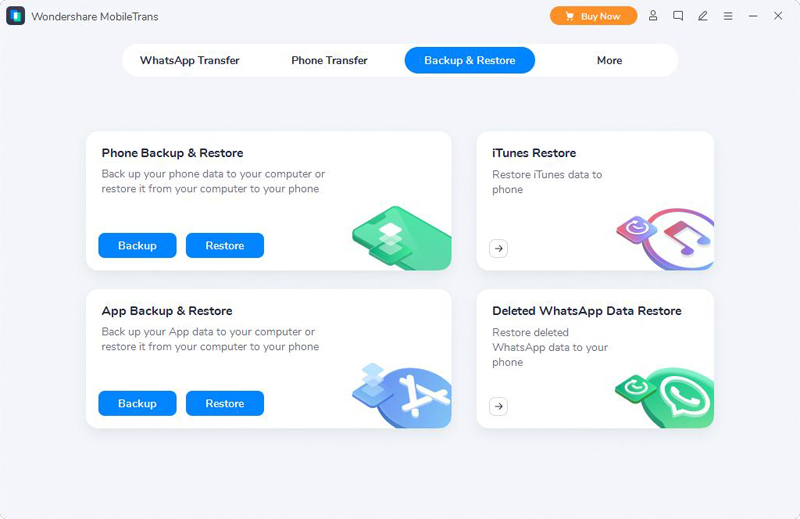
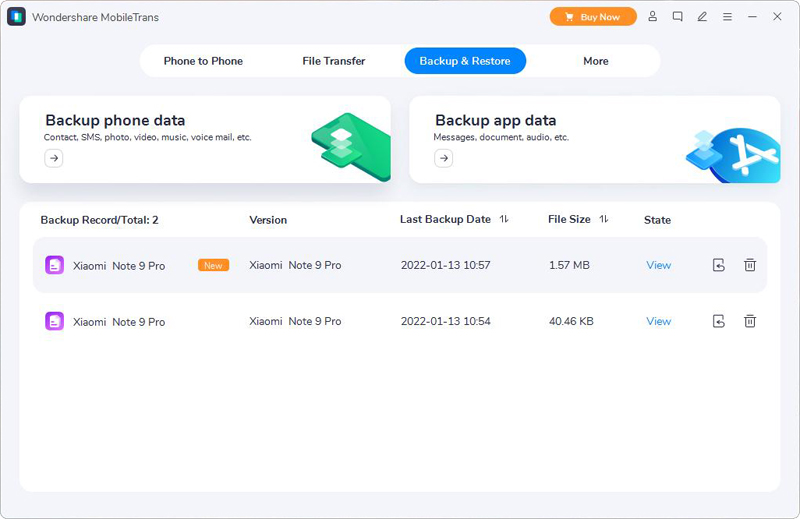
Step 1. Run Mobile Transfer, then tap "Backup & Restore" > "Phone Backup & Restore" > "Restore".
Step 2. Choose the backup file from the list and tap the "Restore" button that following the selected backup.
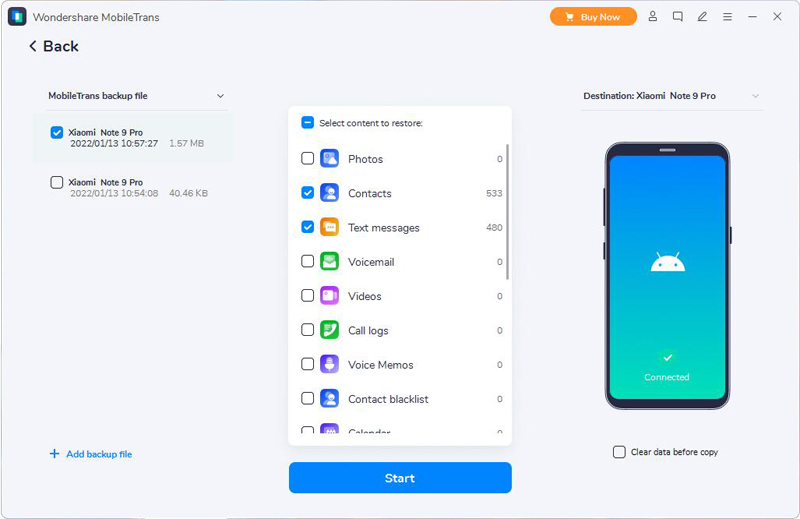
Step 3. Connect your Galaxy Tab S8/S8+/S8 Ultra to computer via its USB cable.
Step 4. Choose the file types that you want to restored, then tap on "Start" to complete the restore process.
Recover Data from Samsung Galaxy Tab S8/S8+/S8 Ultra
Having demonstrated all the above methods about data transfer, next, we will show you how to recover the lost and mistakenly deleted data from your Samsung Galaxy Tab S8/S8+/S8 Ultra. In this section, we will list six common methods, please wait and see.
Recover Data to Galaxy Tab S8/S8+/S8 Ultra without Backup
Most users who think it is difficult to recover lost phone data have not backed up their phone data. In fact, as long as you master the correct method, it is very simple to recover lost data from Galaxy Tab S8/S8+/S8 Ultra without backup, and Samsung Data Recovery software is your best choice.
The reasons why choose the Samsung Data Recovery software:
- One click to get back your lost or deleted SMS, contacts, photos, videos, call logs, audio, music, WhatsApp messages, documents and more in an easy and safe way.
- Perfect compatibility with any Samsung Galaxy phone and Galaxy Tab, including the latest Samsung Galaxy Tab S8/S8+/S8 Ultra.
- Recover lost data from many scenarios, not only limited to accidental deletion, system crash, factory reset, OS/rooting error, SD card issue, etc..
- Recover data from a broken Samsung Galaxy device.
- Fix crashed, frozen or broken Samsung device to normal and extract data for backup.
- Highest success rate of retrieving rate in the industry.
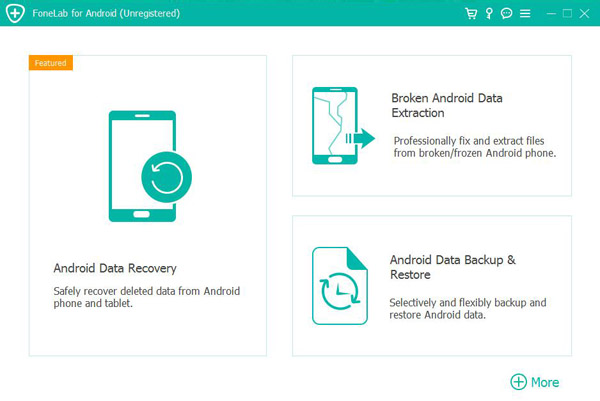
Step 1. Download, install and run Samsung Data Recovery on your computer, then tap on "Android Data Recovery" in the primary interface.
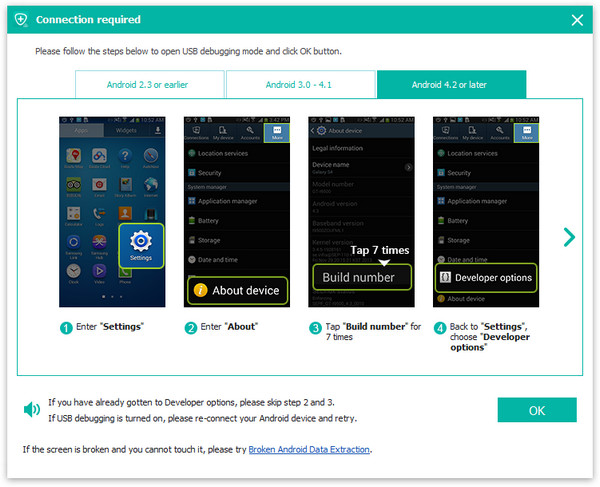
Step 2. Connect your Galaxy Tab S8/S8+/S8 Ultra to computer via a USB cable, then follow the on-screen prompts to enable the USB debugging on your device and tap "OK".
Step 3. Once your device is recognized, select the file types that you want to recover and tap "Next" to begin analyzing your device and scanning the lost contents.

Step 4. Please wait patiently until all the scanning results are listed. The scanning time depends on the amount of data you selected. Click the category in the left to preview the details in the right. After choosing whose what you needed, then tap "Recover" the save the selected files back to your Galaxy Tab S8/S8+/S8 Ultra.
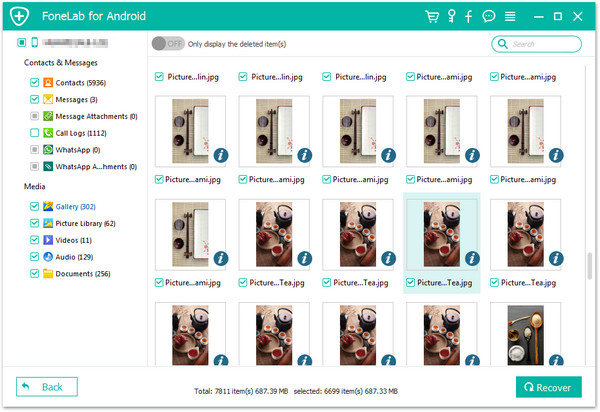
Tip: If you can not find the data you needed, please click on "Deep Scan" to re-scan your device again, which will find more lost contents.
Restore Data from Backup to Galaxy Tab S8/S8+/S8 Ultra
Samsung Data Recovery enable you to backup and restore your phone data, if you have ever backed up your data for the old phone or Galaxy Tab S8/S8+/S8 Ultra, then you can easily restore data from backup to Galaxy Tab S8/S8+/S8 Ultra when data loss occurs.
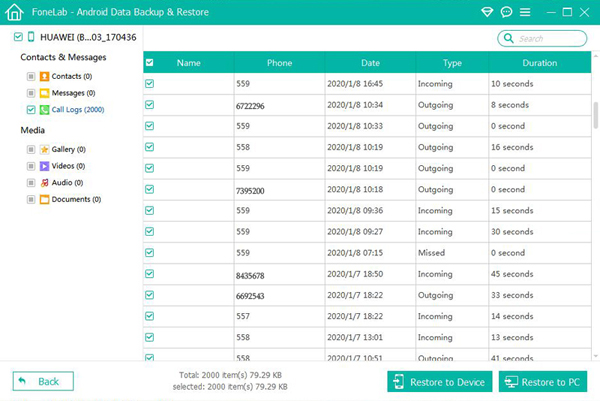
Step 1. Run Samsung Data Recovery, then tap on "Android Data Backup & Restore".
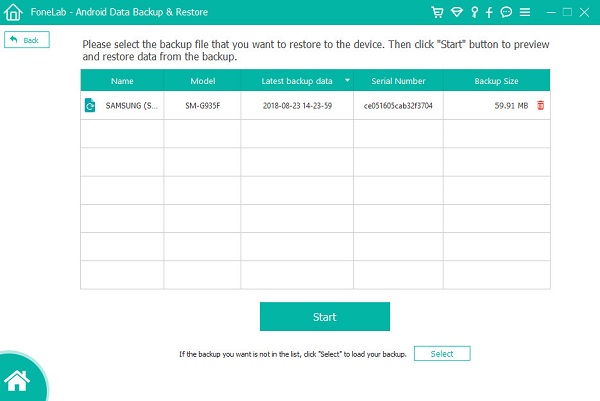
Step 2. Use the USB cable to connect your Galaxy Tab S8/S8+/S8 Ultra to computer, then tap "Device Data Restore" to load all the available backup.

Step 3. Choose a backup file from the list and press "Start" to begin to extract all the restoreable files from the selected backup.
Step 4. Wait for the extraction to complete, choose the files that you wish to restored, then click "Restore to Device" to directly restore them back to your Galaxy Tab S8/S8+/S8 Ultra, or click "Restore to PC" to save them back to your computer.
Restore Data from Samsung Cloud to Galaxy Tab S8/S8+/S8 Ultra
If you've backed up a lot of devices to Samsung Cloud, then you can easily restore data from Samsung Cloud to your Galaxy Tab S8/S8+/S8 Ultra using the Restore feature.
Note: Before using this method, please login your Samsung Cloud account on your Galaxy Tab S8/S8+/S8 Ultra first, then connect your Galaxy Tab S8/S8+/S8 Ultra to a stable WIFI network, and ensure your device is fully powered.
Step 1. Unlock your Galaxy Tab S8/S8+/S8 Ultra, then run the "Settings" app, and tap your name at the top of the screen.
Step 2. Tap "Samsung Cloud", and then tap "Restore data" to go on.
Step 3. Choose the latest backup or the one you need to restore, and select your desired files.
Step 4. Next, tap "Restore", and tap "Install" if necessary. Then the selected contents will be downloaded to your device, please wait patiently.
Step 5. When the restoration is finished, tap "Done" and you can view all the files on your device.
Restore Data from Samsung Kies to Galaxy Tab S8/S8+/S8 Ultra
With the continuous progress of software technology, although fewer and fewer users will use Samsung Kies to manage their devices, if you have a backup file of Samsung Kies, it is also a good choice for data recovery.
Step 1. Run the Samsung Kies on your computer, then connect your Galaxy Tab S8/S8+/S8 Ultra to the computer, the program will detects your device soon.
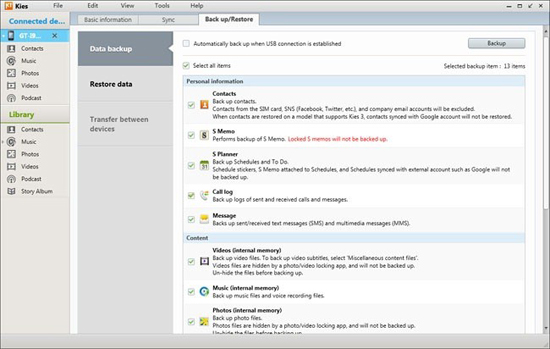
Step 2. Once your device is recognized, click on “Back up/Restore” tab at the top of the window. Scroll down to the bottom of the page and click on “Restore” button.
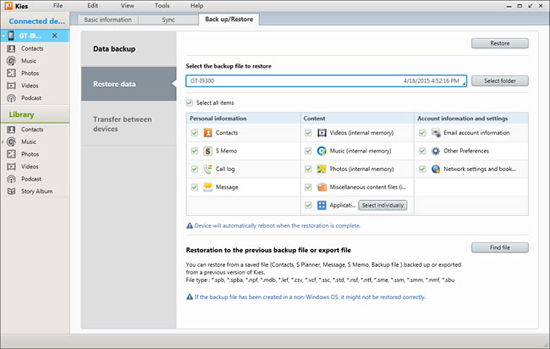
Step 3. Now, select your desired backup from the list and tap the “Next” button.
Step 4. Select the file types that you want to restore and tap on “Next” to begin restoring the selected files.
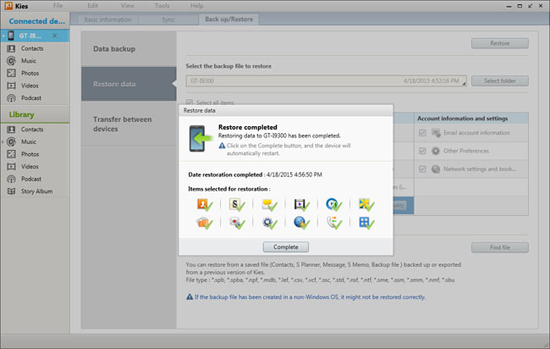
Note: Please be patient. The recovery time is directly proportional to the amount of data you choose to recover. Once it’s done, you will get notification dialog box.
Restore Backup to Galaxy Tab S8/S8+/S8 Ultra Using Smart Switch
Smart Switch allows you to create a backup for any of your Galaxy phone/Tab using your PC or Mac, and then transfer or sync your data from backup onto your new Galaxy phone/Tab with ease.
Step 1. Launch the Samsung Smart Switch on your computer, then connect your Galaxy Tab S8/S8+/S8 Ultra to the computer via its USB cable. Once it's detected, it will be displayed in the screen of Smart Switch.
Step 2. Next, tap the "Restore" button to go on. If you want to select other backup files on your computer, you can click "Select your backup data" to choose specific data to restore, otherwise, the program will choose the latest one by default.
Step 3. When everything is ready, click "Restore now" to begin the restoration. Wait for the recovery process to complete, tap "OK".
Note: You may need to allow permissions on your Galaxy Tab S8/S8+/S8 Ultra to complete the backup.
Restore Data to Galaxy Tab S8/S8+/S8 Ultra Using Best Data Recovery
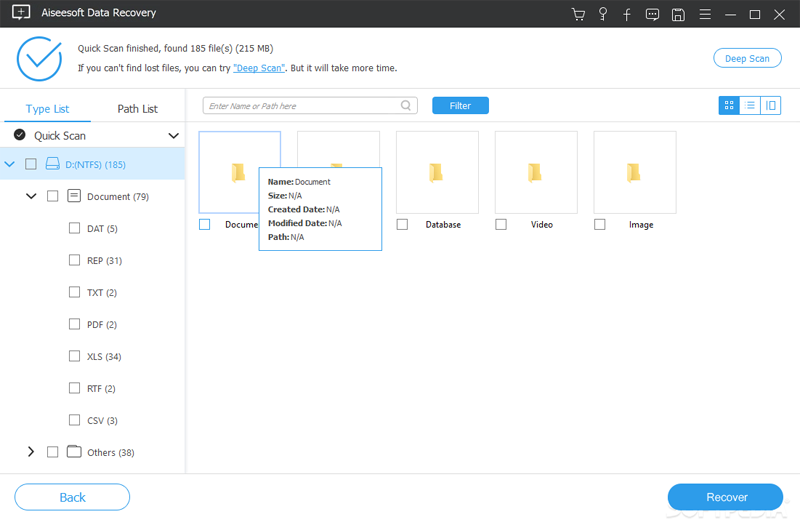
Best Data Recovery is another popular data recovery software that allows you directly recover deleted and lost file including photos, videos, audio, Email, documents and more from your Samsung Galaxy Tab S8/S8+/S8 Ultra.
Step 1. Download, install and run Best Data Recovery on your computer, and connect your Galaxy Tab S8/S8+/S8 Ultra to computer using a USB cable.
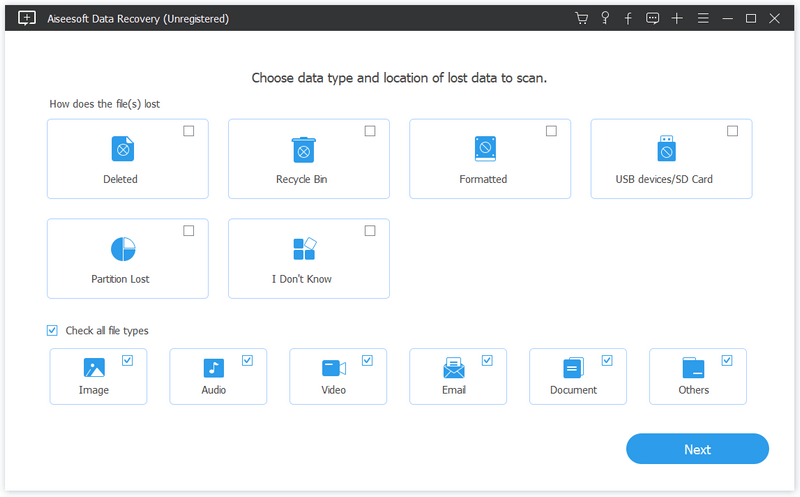
Step 2. Once it's connected, you will be asked to choose the lost reason of your data and file types that you want to restore, then tap "Next".
Step 3. Choose the location of your lost data, that is, the disk drive of your Galaxy Tab S8/S8+/S8 Ultra, then tap "Scan" to begin scanning your device for the lost contents.
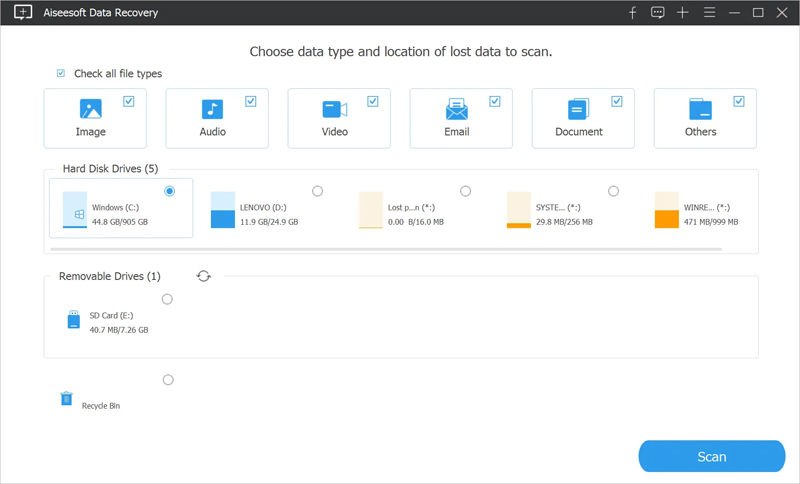
Tip: In fact, the program offers two scanning ways for you, namely "Quick Scan" mode and "Deep Scan" mode. Clicking "Scan" button will give you a quick scan on the chosen disk drive. If you want to find more lost contents, you can click the "Deep Scan" button. Of course, it will take more time to complete the whole scanning process.
Step 4. Once the scan is finished, all the found result will be listed as categories, you can click to preview all of them in details. After choosing whose what you need, then click on "Recover" to save them back to your computer.