Overview: This article will be divided into five parts, which will introduce the methods for users to safely transmit and synchronize data including pictures, videos, music, software, contacts and information on different devices to ZTE nubia Red Magic 7S/7S Pro under different requirements. As well as telling you the best ways to get back the deleted and lost files on ZTE nubia Red Magic 7S/7S Pro. Please read patiently.
ZTE nubia Red Magic 7S uses a 6.8-inch ultra-high definition AMOLED full screen, and supports a screen refresh rate of up to 165Hz. ZTE nubia Red Magic 7S is equipped with a new generation of Snapdragon 8+ flagship processor, with a built-in 4500mAh battery, which supports charging separation technology and 120W fast charging. The machine is equipped with a 64-megapixel ultra-high definition AI triple camera and a front-facing 8MP camera.
ZTE nubia Red Magic 7S Pro is equipped with a 6.8-inch AMOLED full HD screen with a refresh rate of 120Hz. ZTE nubia Red Magic 7S is equipped with Qualcomm Snapdragon 8+ Gen 1 processor and built-in 5000mAh battery. The camera is equipped with a rear 64 million main camera++8MP super wide angle++2MP macro lens, and a front 16MP camera.
ZTE nubia Red Magic 7S/7S Pro these two phones have excellent performance in terms of processor, battery and screen, which is worth starting. After users start ZTE nubia Red Magic 7S/7S Pro, I believe that the first thing many people do is to synchronize the data on their original Android/Samsung phones to ZTE nubia Red Magic 7S/7S Pro.
Mobile Transfer is a professional data transmission software, which can transfer all data between different devices, saving users' time and energy in data synchronization. The data transmission mode is simple, only the old and new devices need to be connected to the same computer at the same time. We recommend that you install Mobile Transfer to your computer, and refer to the following tutorial to synchronize data.


Part 1 Directly Sync All Data from Android/Samsung to ZTE nubia Red Magic 7S/7S Pro
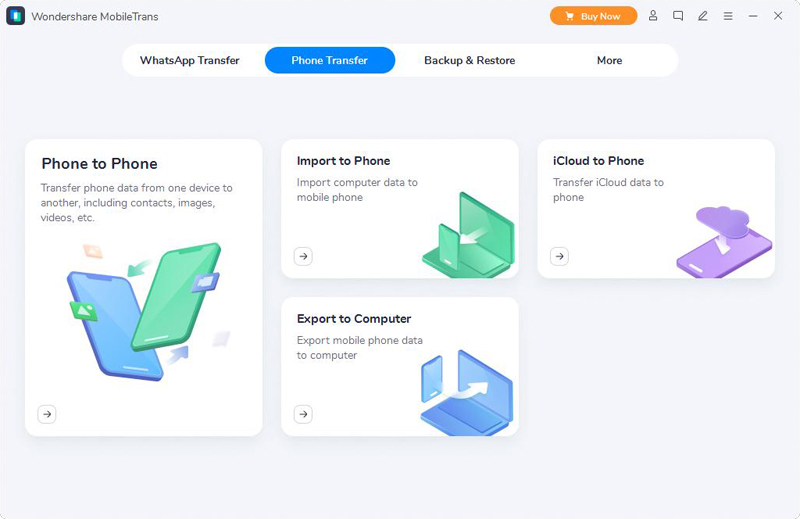
Step 1. Run Mobile Transfer, then click on "Phone Transfer" > "Phone to Phone" on the welcome page.
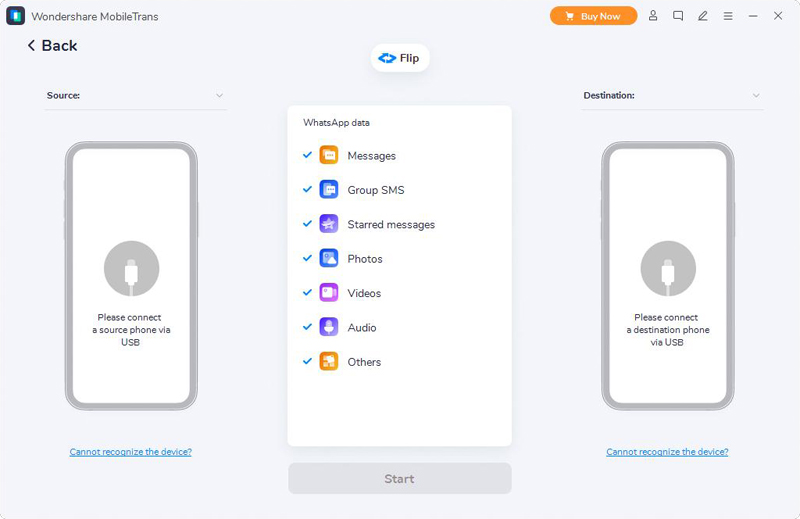
Step 2. Use the USB cables to connect the old device and ZTE nubia Red Magic 7S/7S Pro to the same computer.
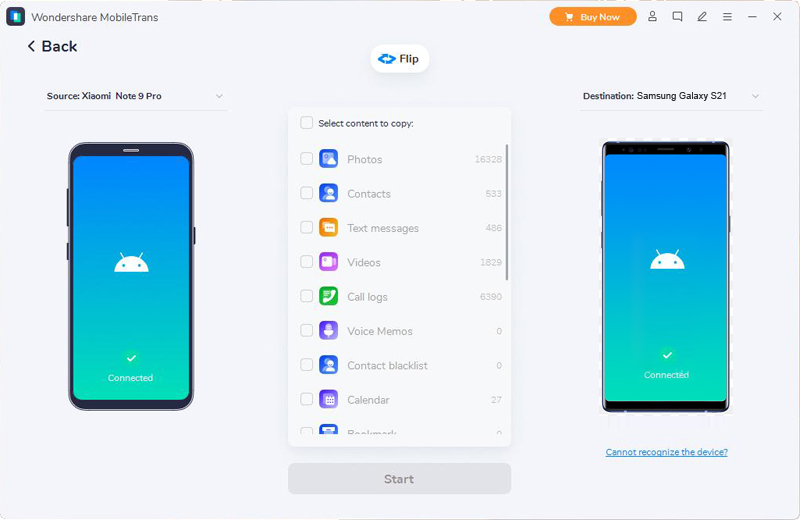
Tip: If the software can't recognize your device, click "cannot recognize the device?" then follow the instructions on the page to operate your device. And please click the "Flip" button to exchange the display position of your old phone and ZTE nubia Red Magic 7S/7S Pro to make sure they are on the right track.
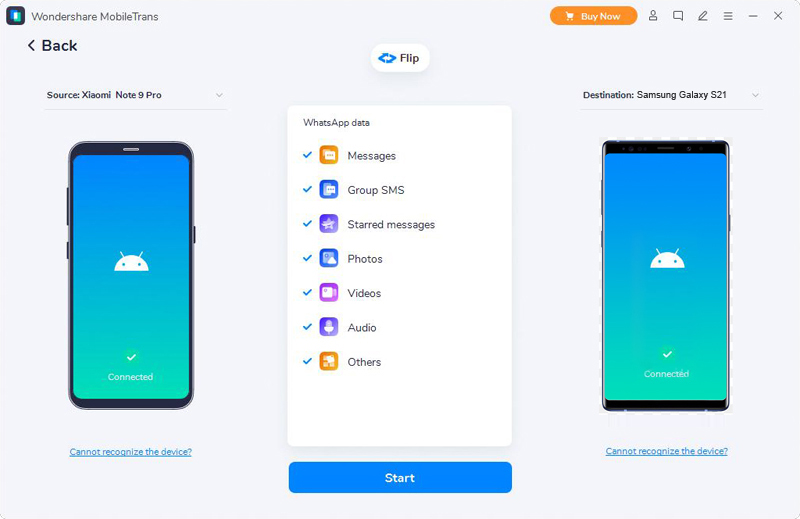
Step 3. Select the data you need to transfer, then click on "Start" button to begin transfering data to ZTE nubia Red Magic 7S/7S Pro.

Part 2 Sync Data from Backup File to ZTE nubia Red Magic 7S/7S Pro
In addition to completing the transfer of data from old devices to new devices, Mobile Transfer can also directly synchronize the data in backup to ZTE nubia Red Magic 7S/7S Pro newly purchased by users, which is simple and fast to operate.
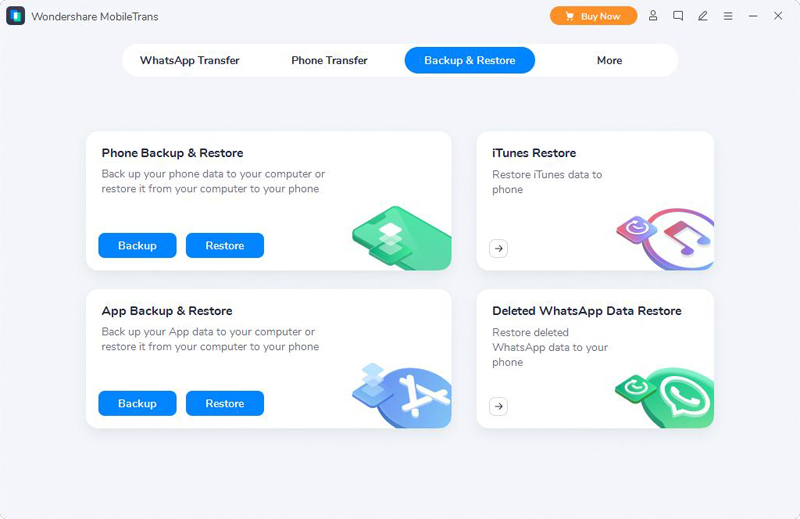
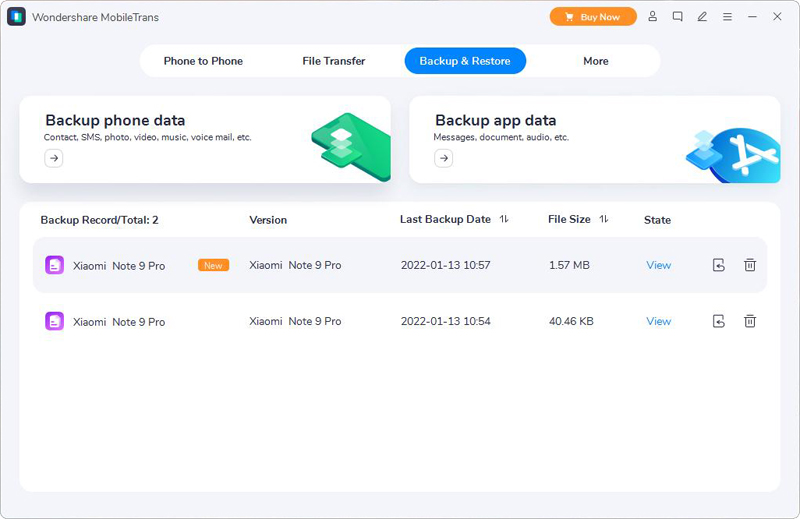
Step 1. Run the Mobile Transfer, click "Backup & Recovery" > "Phone Backup & Recovery" then tap on the "Restore" button to continue.
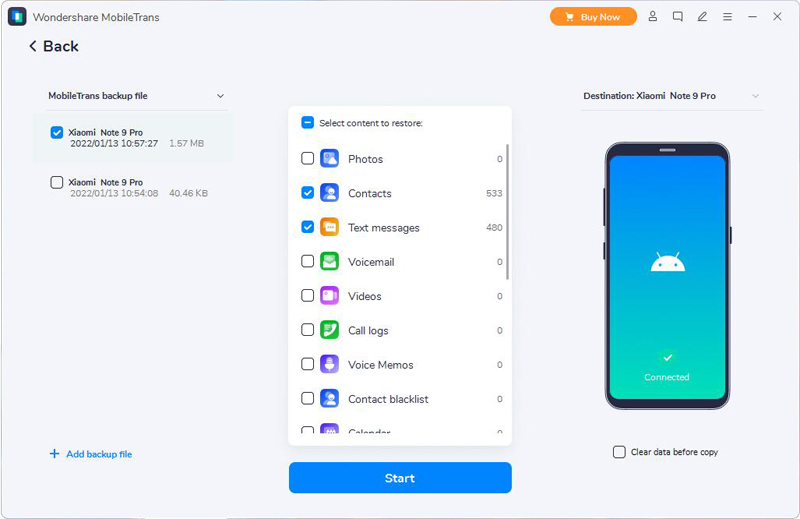
Step 2. Select the required backup file from the list, then click "Restore".
Step 3. Connect the ZTE nubia Red Magic 7S/7S Pro to your computer by USB cable.
Step 4. Check the data you need, and then click "Start" to sync data to vivo X80/X80 Pro/X80 Pro+.
Part 3 Transfer WhatsApp/Wechat/Line/Kik/Viber Messages to ZTE nubia Red Magic 7S/7S Pro
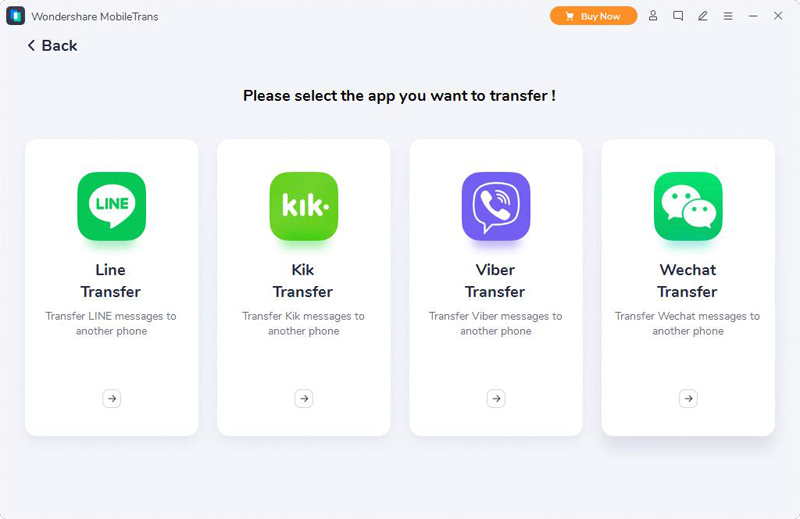
WhatsApp/Wechat/Line/Kik/Viber is the most frequently used communication and social software in the world, and work and study often depend on these softwares. Mobile has special functions for WhatsApp/WeChat/Line/Kik/Viber Messages. Here's a tutorial for users.
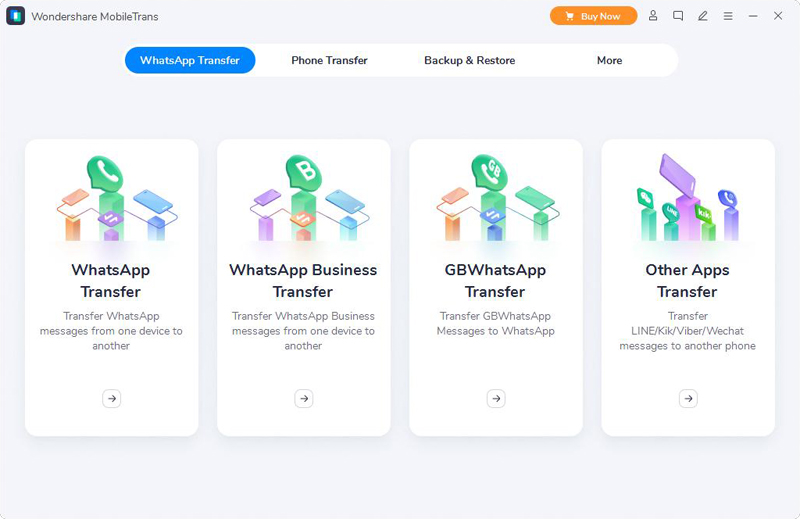
Step 1. Run Mobile Transfer, click the "WhatsApp Transfer" option. Then choose as you need from "WhatsApp Transfer", "WhatsApp Business Transfer", "GBWhatsApp Transfer" and "Other Apps Transfer" buttons.
Step 2. Select the items needed to sync messages to ZTE nubia Red Magic 7S/7S Pro, then connect the old Android/iPhone device and ZTE nubia Red Magic 7S/7S Pro to the same computer using USB cables.
Note: To sync Viber chats you need back up data from old devices to computer then restore them to ZTE nubia Red Magic 7S/7S Pro.
Step 3. After selection, click "Start" so you will finish syncing data.
Part 4 Directly Restore Data on ZTE nubia Red Magic 7S/7S Pro without Backup
Have you ever been in a situation where your mobile phone was stolen, lost, failed to turn on, or accidentally deleted data and formatted your mobile phone? Don't worry, what you need is just an Android Data Recovery, a wonderful data recovery software, users can stop worrying. Android Data Recovery can recover the data required by users, whether the phone can run normally with or without backup. Android Data Recovery also has good security, so users don't have to worry about data leakage.
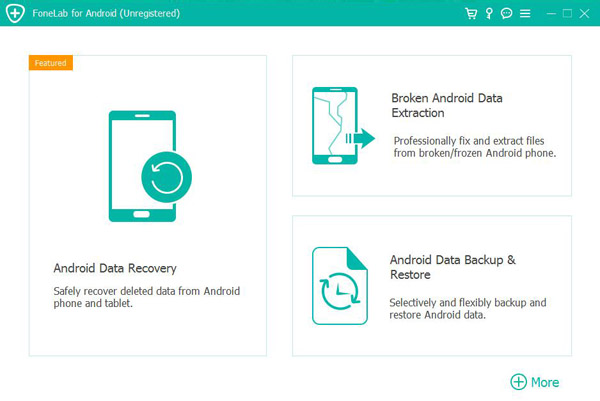
Step 1. Run Android Data Recovery, then click "Android Data Recovery".
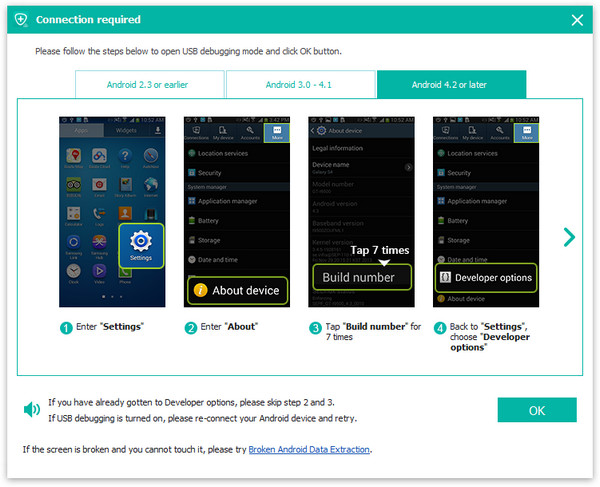
Step 2. Connect your ZTE nubia Red Magic 7S/7S Pro to the computer via USB cable, please enable the USB debugging mode on your phone, then after the software detect your device, click "OK".
Tip:
- The method of enabling the USB debugging on your phone: Enter "Settings" > Click "About Phone" > Click "Build number" for several times until getting a note "You are under developer mode" > Back to "Settings" > Click "Developer options" > Check "USB debugging".
- If this software cannot recognized your device, you can click "Device connected, but can't be recognized? Get more help" to follow the on-screen prompts to fix it.
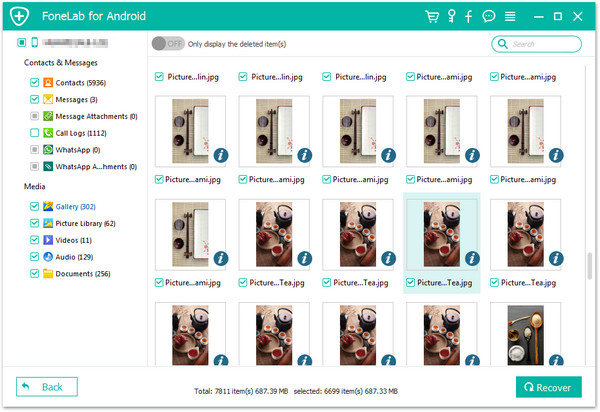
Step 3. After recognize your phone, check the files needed to be restored. Then click "Next".

Step 4. After th scanning has been finished, select the files to be recovered, click "Recover" to recover them to ZTE nubia Red Magic 7S/7S Pro.
Part 5 Restore Data from Backup to ZTE nubia Red Magic 7S/7S Pro
As the same, if you have ever backed up your phone data with this powerful data recovery software, then you can also syncing to restore data from backup file to your ZTE nubia Red Magic 7S/7S Pro.
Step 1. Run the software, then click on "Android Data Backup & Restore".
Step 2. Connect your ZTE nubia Red Magic 7S/7S Pro to the your computer through USB cable, and then click on "Device Data Restore".

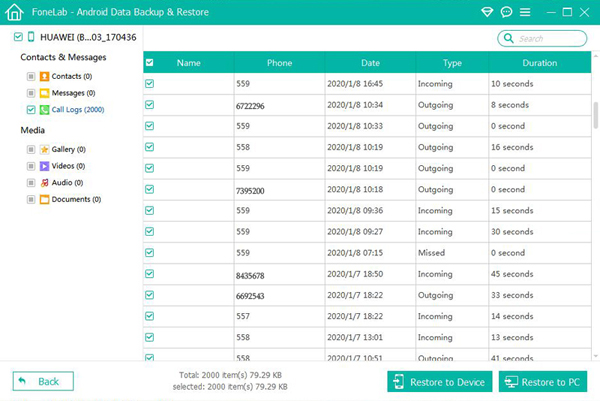
Step 3. After your ZTE nubia Red Magic 7S/7S Pro has been recognized, select the backup files needed to restore, and click "Start" to execute restoring.
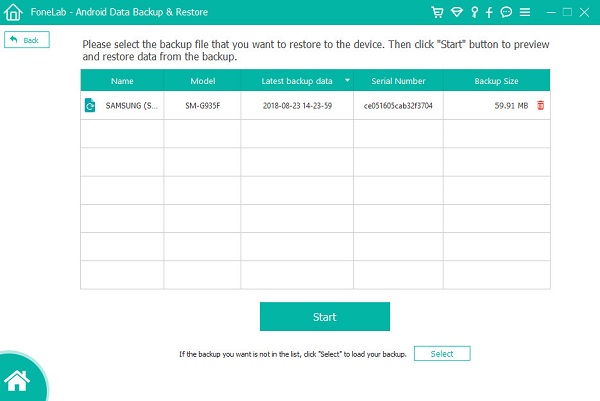
Step 4. After all recoverable files will be listed by category, select data you want to be restored, then click "Recover to Device" to complete the data recovery process.