Overview: The update speed of mobile phones is getting faster and faster. Everyone is changing mobile phones more and more frequently. The biggest problem when changing mobile phones is to transfer data from old phones to new phones. This article will introduce you to the efficient and simple method of transferring data to OPPO Find X3/X3 Pro and the safe and simple method of how to recover deleted and lost data in OPPO Find X3/X3 Pro .
OPPO Find X3 is equipped with 1 billion color dual main cameras, a front 6.7-inch 120Hz flexible screen, supports dynamic frame rate, and also realizes the full link of 10bit picture and video shooting in the mobile phone industry. In terms of appearance, Find X3 uses complex processes such as hot forging and OC0 curved glass coating to achieve "impossible curved surfaces" and a natural round feel. At the same time, it also has a weight of less than 200g and a thin feel of less than 9mm, realizing mobile phone design New breakthrough. Find X3 adopts an integrated streamlined body and a crater imaging lens group, which provides three colors of mirror black, fog blue and condensed white.
OPPO Find X3/X3 Pro has been released on March 11. Such an excellent phone must have attracted many customers. If you want to buy it, then the following content is worth reading. It will quickly answer your doubts about how to transfer data from an old phone (Android/Samsung/iPhone) to OPPO Find X3/X3 Pro , and solve it faster in the future. You may encounter the problem of OPPO Find X3/X3 Pro data being deleted and lost. Next, I will introduce various solutions in detail for you.
- Part 1 Transfer Data from Android/iPhone/Samsung to OPPO Find X3/X3 Pro
- Part 2 Sync Data from Backup to OPPO Find X3/X3 Pro
- Part 3 Recover Deleted and Lost Data on OPPO Find X3/X3 Pro without Backup
- Part 4 Extract Data from Backup and Restore to OPPO Find X3/X3 Pro
- Part 5 Back Up Data from OPPO Find X3/X3 Pro to Computer
The first part and the second part will answer you how to transfer data from your old phone to OPPO Find X3/X3 Pro. The first part is applicable to all data, and the second part is for data that has been backed up.
Part 1 Transfer Data from Android/iPhone to OPPO Find X3/X3 Pro
If the data you need to transfer has not been backed up using any channel, then you can use a third-party data transfer software to transfer the data. I recommend you to use Mobile Transfer, which is currently a very popular data transfer software.
Mobile Transfer is widely used and highly praised. It can not only transfer between various Android devices, but also between any two iOS devices, and between Android and iOS devices. In addition, it can transfer data such as contacts, text messages, photos, videos, audios, music, call logs, applications, apps data, etc. The most important thing is that it has a high safety factor, it will not cause any harm to your phone during the data transmission process, and will not leak your data.


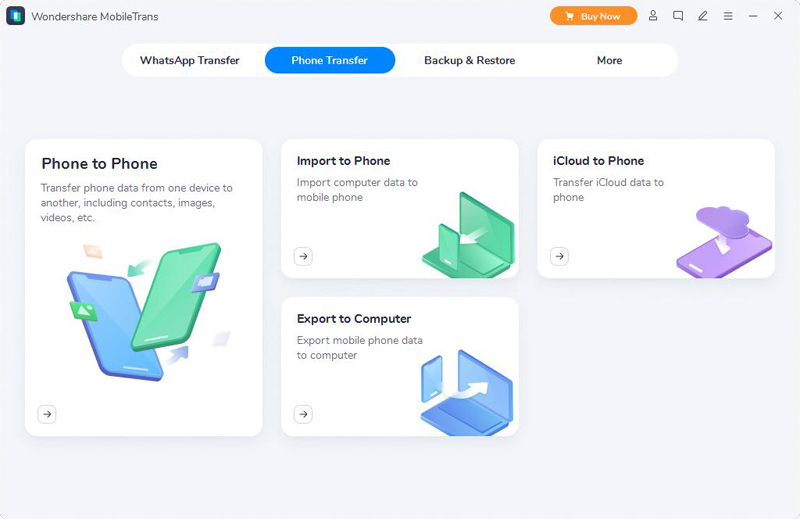
Step 1: First download, install and run Mobile Transfer on your computer. Choose the "Phone To Phone Transfer" option on the main interface, and then click on "Start".
Step 2: Now, please use the USB cables to connect both of your old Android/iPhone/Samsung device and OPPO Find X3/X3 Pro to the same computer. After the connection is successful, the old will be displayed on the left panel of the main interface, and OPPO Find X3/X3 Pro will be displayed on the right panel.
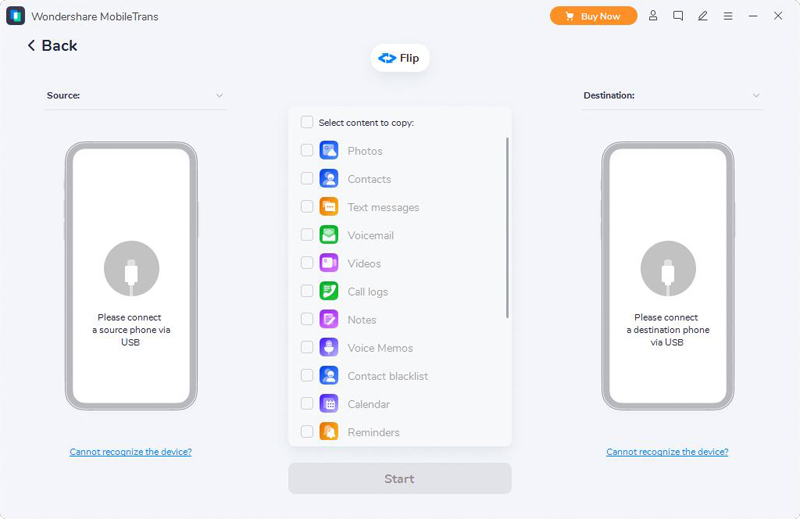
Note: If the order is not correct, in order to ensure that the next steps can be carried out, you need to click the "Flip" button to swap the positions of the two phones.
Step 3: Next, the data types that can be transferred on your old phone will be listed in the middle panel of the page. Please select the data you need to transfer, and click "Start Transfer" to transfer the selected data to your OPPO Find X3/X3 Pro . At this time, you can see the progress bar of the transfer on the main interface.
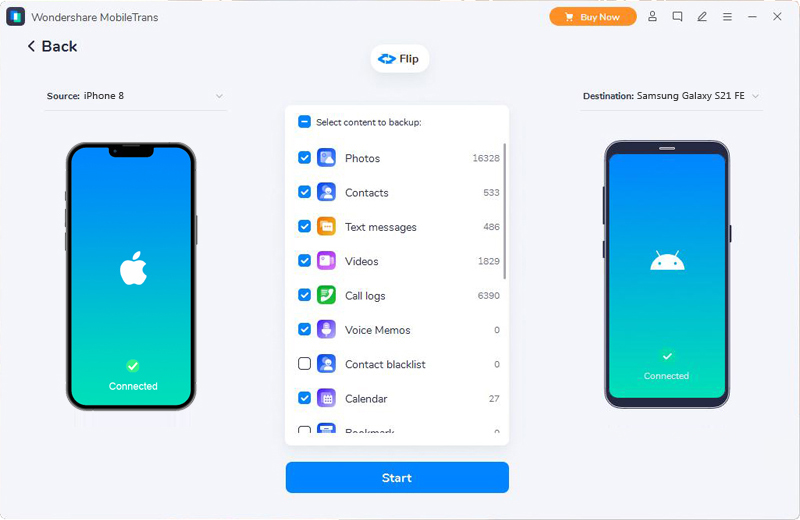
Note: If you want to delete the existing data of OPPO Find X3/X3 Pro before transferring, you can select the "Clear data before copy" button. Please do not interrupt the connection between the phone and the computer during the transfer. Please be patient, the transmission speed depends on the amount of the selected data.
Part 2 Sync Data from Backup to OPPO Find X3/X3 Pro
If your phone data has been previously backed up by Mobile Transfer or other backup software just like Samsung Kies, iTunes, iCloud and so on, the operation is even easier. The following will introduce you the different operations of Android and iPhone. The specific steps are as follows:
Transfer Data from Local Backup to OPPO Find X3/X3 Pro
Step 1: Run the software, then click on the "Restore from Backups" mode, and then select "MobileTrans" among all the options.
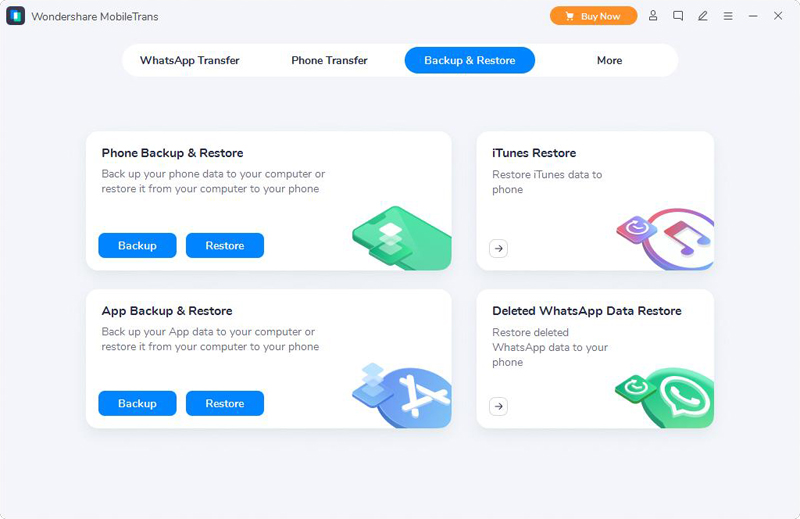
Note: The reason for choosing "MobileTrans" is because you have ever used this Mobile Transfer software to back up the data from your previous phone. Of course, the program also supports other backup file types, If you have ever backed up your Samsung phone with Samsung Kies, or backed up your BlackBerry phone with BlackBerry Desktop Software, then you can also choose Kies or BlackBerry here.
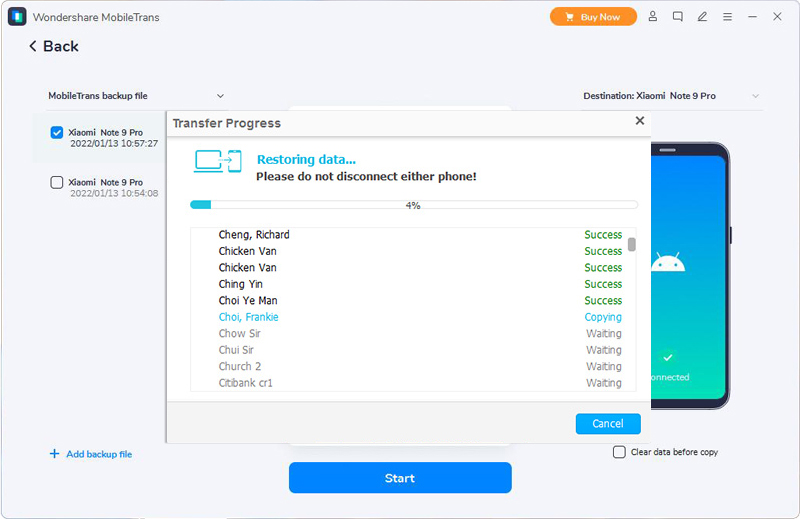
Step 2: Please select a backup file according to your needs, and then use a USB cable to connect your OPPO Find X3/X3 Pro to the computer.
![]()
Step 3: After the computer detects your device, select the file types as needed, and then click on "Start Transfer" to sync them to your OPPO Find X3/X3 Pro. At this point, you can see the transfer progress bar on the interface, please be patient.
Transfer Data from iTunes Backup to OPPO Find X3/X3 Pro
For iPhone users, synchronizing data to iTunes is very common. If you have done this before, you can choose the following method to restore the backup to OPPO Find X3/X3 Pro.
Step 1: Run Mobile Transfer, then click on "Restore from Backups" and choose "iTunes".
Step 2: Connect your OPPO Find X3/X3 Pro to your computer via a USB cable.
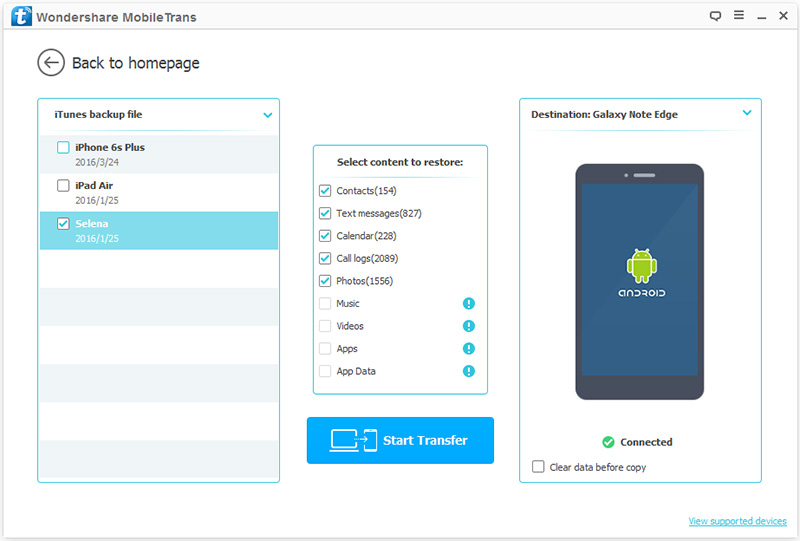
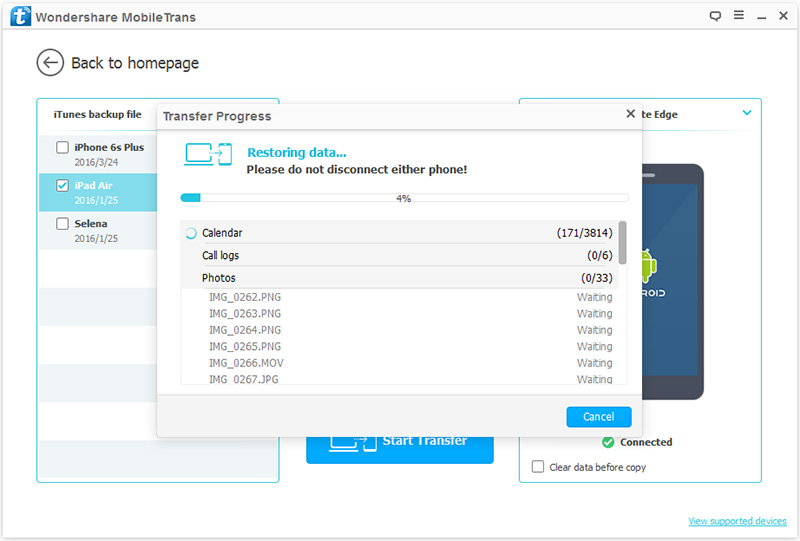
Step 3: Now, all the backup files will be displayed on the left panel, select one of the backup files according to your needs. The software will extract all transferable files from the selected backup file and display it to you. Please select the file type(s) that needs to be transferred. After the computer detects your device, click "Start Transfer" to synchronize them to your OPPO Find X3/X3 Pro. At this time, you can see the progress bar of the transfer on the main interface.
Restore Data from iCloud Backup to OPPO Find X3/X3 Pro
As the the same, if you've ever synced your iPhone or iPad data to iCloud, then you can try restoring your data from iCloud backup by following the below steps:
Step 1: Run Mobile Transfer on the computer, then click "Restore from Backups" on the page, and finally select its "iCloud" option.
Step 2: Now, log in to your iCloud account which was used to backed up your iOS device(s), and then connect your OPPO Find X3/X3 Pro to the computer.
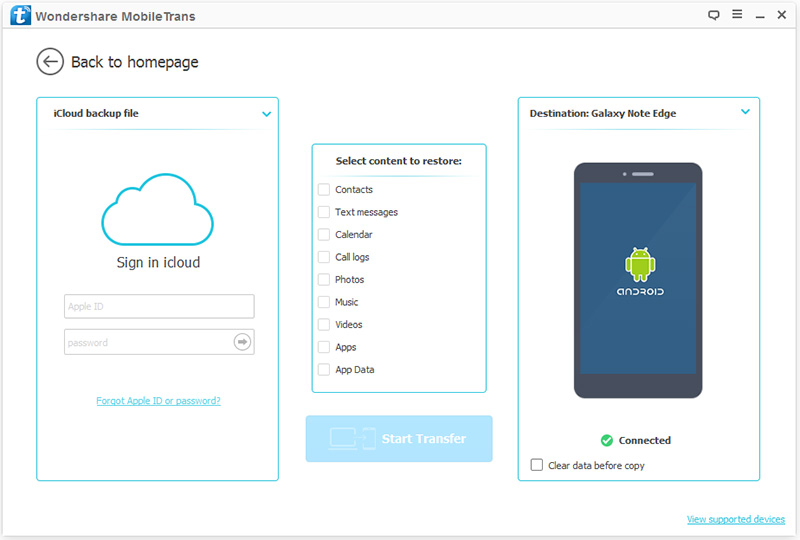
Step 3: After loging in, check an iCloud backup file as needed, and then click "Download" to download it to the computer. After downloading, the program will automatically extract all the transferable files from the downloaded backup file.
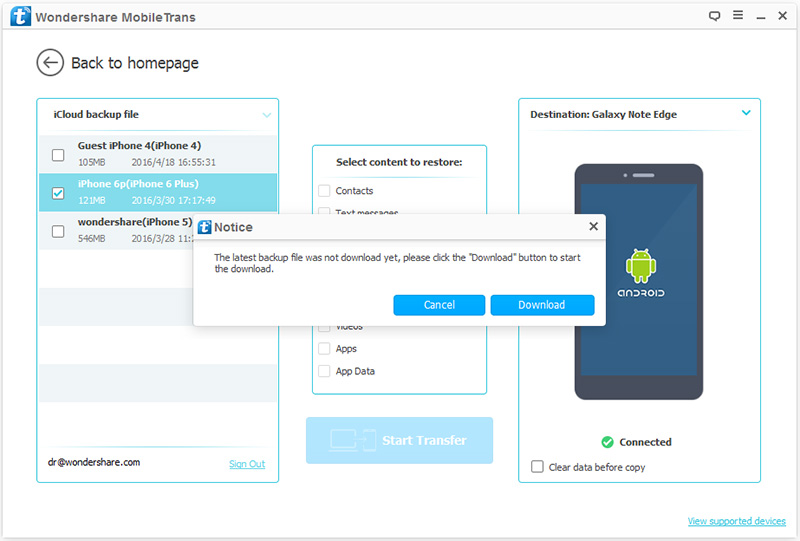
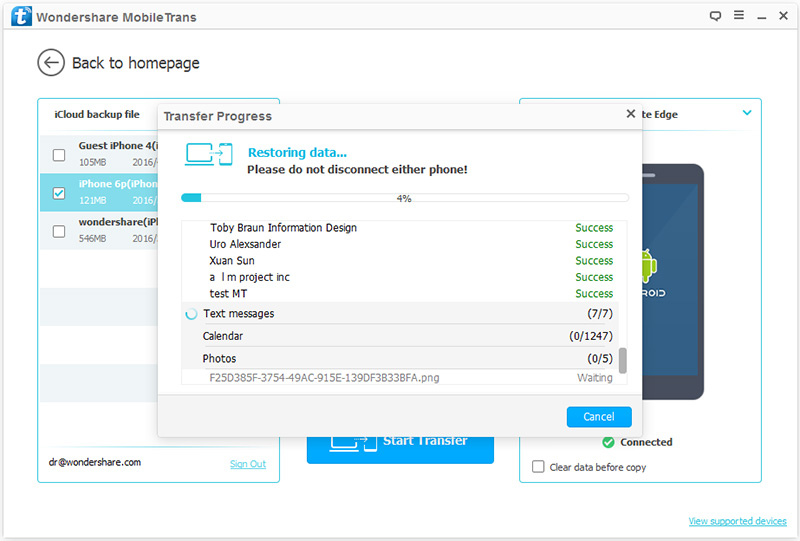
Step 4: Select the file type(s) that you want to transfer, and then click on the "Start Transfer" button to synchronize them to your OPPO Find X3/X3 Pro. You need to be patient, the speed of transmission depends on the amount of data.
The third and fourth parts will introduce you to the easy ways to recover deleted and lost data from your OPPO Find X3/X3 Pro, regardless of whether you have a backup file.
Part 3 Recover Deleted and Lost Data on OPPO Find X3/X3 Pro without Backup
Have you ever encountered a situation where data that has not been backed up but were lost or deleted by mistake? In fact, don't worry, you can recover these data from your OPPO Find X3/X3 Pro through Android Data Recovery.
Android Data Recovery is a secure and effective third-party data recovery software that can help you recover deleted and lost data faster, more efficiently, and more safely. It can restore contacts, text messages, call logs, WhatsApp messages, audio, videos, documents, pictures, photos and so on from over 7000 popular Android smartphones and tablets. In other words, ss long as your lost data is not completely overwritten by other new data, it can be restored. And whether you deleted data accidentally or they were lost due to human or non-human factors, it can be recovered quickly. In addition, it has high compatibility and is suitable for all Android phone brands. Most importantly, it is very safe. It neither leaks your information nor damages your data.
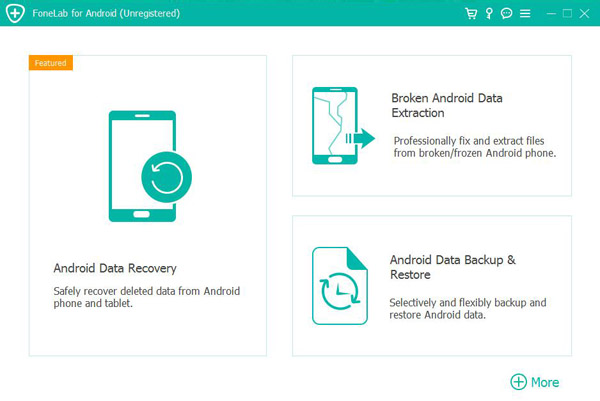
Step 1: First download, install and run the program on your computer. After entering the program, please check the "Android Data Recovery" mode on the main interface. Then use a USB cable to connect the OPPO Find X3/X3 Pro to the computer.
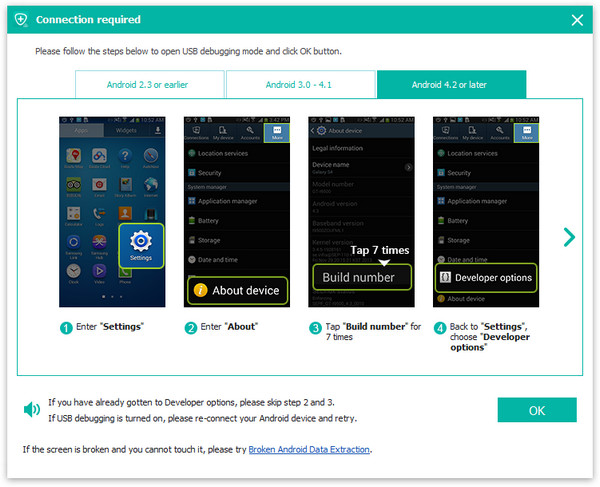
Step 2: After fully entering the program, it will automatically detects your device soon. You need to turn on the USB debugging on your OPPO Find X3/X3 Pro according to the steps provided by the program, and then click on "OK".
Step 3: Once your phone is detected, please check the type of data you need to recover in the main interface, and click "Next" after confirmation. Then the program will scan your phone.

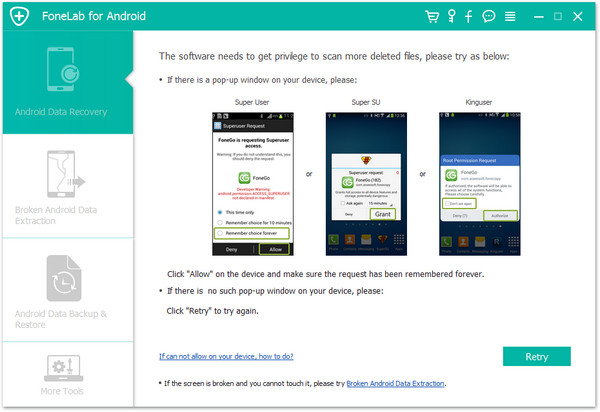
Note: Here, the program needs permission to scan for deleted and lost data, please agree to the relevant authorization according to the prompts on the software interface and the screen of your phone. If your device does not pop up such a window, please click "Retry" to try again.
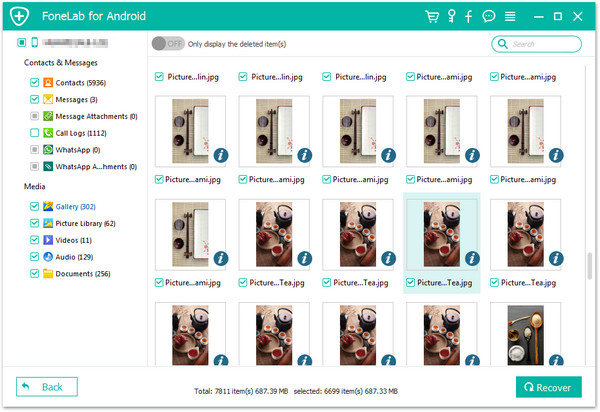
Step 4: After the scan is successful, the main interface displays the type of data that can be recovered. Wait for you to preview and confirm the data type, and then click on "Recover". All the data that needs to be recovered will be saved on your computer. Please be patient, the length of time required for recovery is directly proportional to the amount of recovered data.
Part 4 Extract Data from Backup and Restore to OPPO Find X3/X3 Pro
Data backup and data recovery are always complementary to each other. Once you have backed up your mobile phone data, it will be handy to restore the relevant data from the corresponding backup file. So, if you've ever use Android Data Recovery to back up your OPPO Find X3/X3 Pro or other device(s), the speed of restoring data will be faster. The specific operations are as follows:
Step 1: Run Android Data Recovery, and then click on "Android Data Backup & Restore".
Step 2: Connect your OPPO Find X3/X3 Pro to the computer using USB cable. Then, select a restore mode as needed, namely "Device Data Restore" or "One-click Restore".

Note: If you are not restoring all the data, we recommend that you select the "Device Data Restore" mode here, because it will take less time and take up less phone memory.
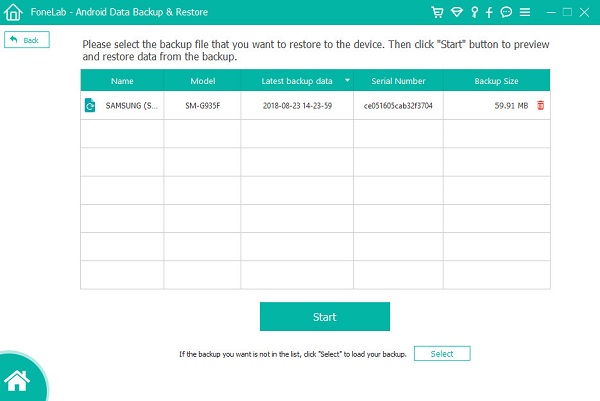
Step 3: Select a backup from the list, and then press "Start" to extract all recoverable files from the selected backup file.
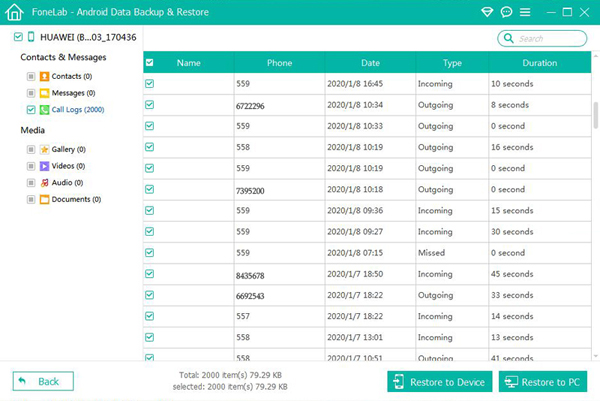
Step 4: Wait for all the contents to be extracted, select the required files, and then click "Restore to Device" or "Restore to PC" to save them backup to your OPPO Find X3/X3 Pro directly or to your computer.
Part 5 Back Up Data from OPPO Find X3/X3 Pro to Computer
No matter in any situation, we always recommend that users regularly back up mobile phone data, so that they can transfer or restore these important data at anytime and anywhere. To back up your data on OPPO Find X3/X3 Pro, just follow the steps as below:
Step 1: Run Android Data Recovery, and then click on "Android Data Backup & Restore".
Step 2: Connect your OPPO Find X3 to computer and choose a backup option, either "Device Data Backup" or "One-click Backup".
Step 3: Select the files you need, and choose a save path for the backup file, then tap on "Start" to begin backing up your phone data.
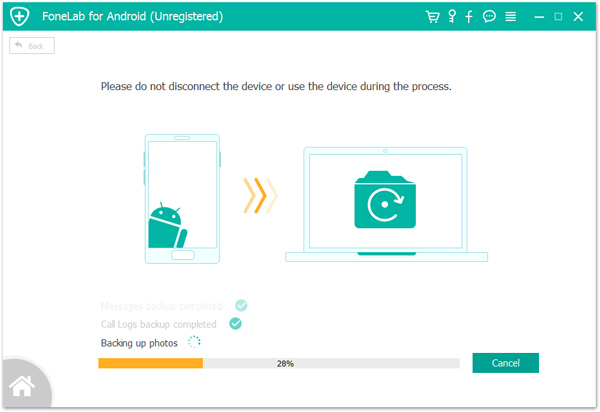
Tips: Do not use or disconnect your phone during the backup process. The time required for the backup depends on the amount of data you select.