Overview: Whether you are a new Redmi Note 9(Pro) player or have been using Redmi Note 9(Pro) for a while, you will definitely be interested in how to transfer data from any Android phone to Redmi Note 9(Pro), as well as how to restore deleted and lost data on Redmi Note 9(Pro), this article can meet any of your needs.
Redmi has just released a brand new Note 9 series, among which Redmi Note9 Pro is the most shining. It uses Qualcomm Snapdragon 750G processor and is equipped with a rear-mounted full-scene four-camera (100 million pixel main camera, 8 million ultra-wide angle, 2 million macro , 2 million people like depth of field), and the world's first third-generation 100 million pixel Sensor HM2. The screen uses a 120Hz high brush, and supports 6-speed smart transmission, with a resolution of 2400 x 1080, a maximum storage combination of 8GB+256GGB, and a maximum support for 240Hz ultra-high sampling rate. In addition, Redmi Note9 Pro is also equipped with dual speakers and a 4820mAh super-capacity battery, and supports 33W wired fast charging.
With such a high cost performance, the Redmi Note 9 series is destined to be favored by many users. Are you eager to buy this new phone, so you need an effective way to solve the migration of large amounts of data from your old Android phone? Or you encountered some troubles such as data loss while using it? Please don't worry, the following are some practical methods, they can definitely help you solve problems.
Part 1 Directly Transfer Data from Android to Redmi Note 9/Note 9 Pro(Recommended)
Part 2 Sync Data from Backup to Redmi Note 9(Pro)
Part 3 Move Data to Redmi Note 9(Pro) with Mi Mover
Part 4 Transfer Data from Computer to Redmi Note 9(Pro)
Part 5 Directly Recover Deleted/Lost Data from Redmi Note 9(Pro) without Backup
Part 6 Restore Data from Backup to Redmi Note 9(Pro)
Part 7 Backup Data from Redmi Note 9(Pro) to Computer
Part 1 Directly Transfer Data from Android to Redmi Note 9/Note 9 Pro(Recommended)
As long as speaking data migration, users may think of Mobile Transfer at the same time. There's no doubt that Molile Transfer is the best in this industry.
Mobile Transfer is a practical, efficient, safe and professional mobile phone data management software that can help you easily solve difficult problems such as data migration between mobile phones, data backup and data recovery. With help of this software, you can directly transfer all data including contacts, call logs, text messages, photos, videos, music, calendar, documents, apps, app data and so on from any Android and iOS devices to Redmi Note 9/Note 9 Pro in a click, and vice versa. And you are allowed to backup your Redmi Note 9/Note 9 Pro, and restore data from backup to Redmi Note 9/Note 9 Pro or any other supported devices. Next, let's show you how to use this powerful software.


Step 1. Click the above buttons to download a corresponding version to your computer, then install and run it.
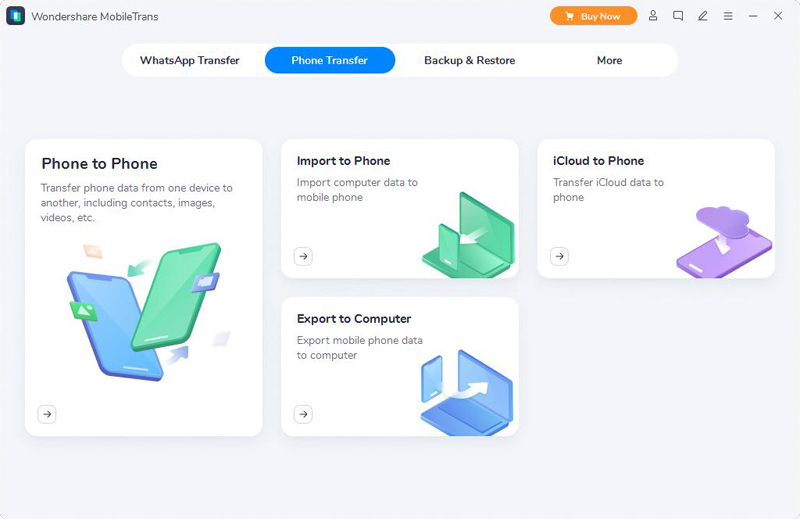
Step 2. Tap "Phone to Phone Transfer" and press "Start" in the primary interface of this software.
Step 3. Connect both your old Android device and Redmi Note 9(Pro) to the same computer, and make sure that the old Android device is shown in the left panel, and the Redmi Note 9(Pro) is shown in the right panel.
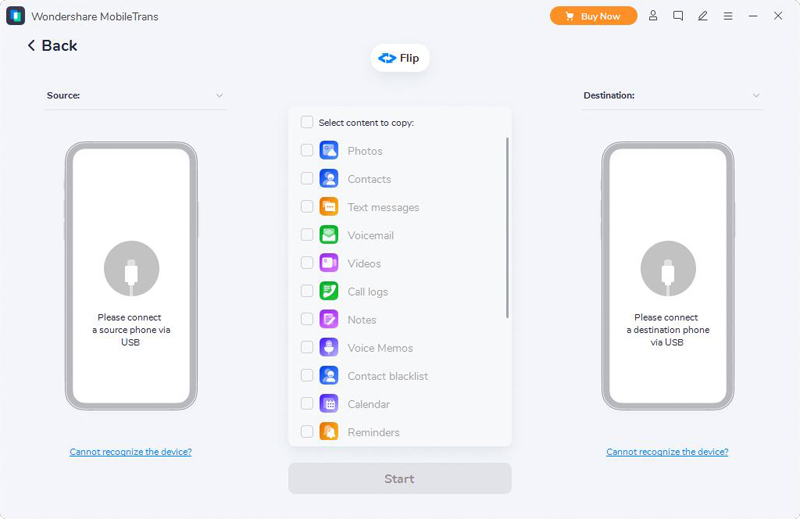
Tips: The location of your phone determines the direction of data transmission, you can click the "Flip" button to change their location.
Step 4. Wait for your phones are recognized, the data types that can be synced from the old Android device will be listed in the middle panel. Just mark the box of data that you need to transfer to the Redmi Note 9(Pro), and click on "Start Transfer" to continue.
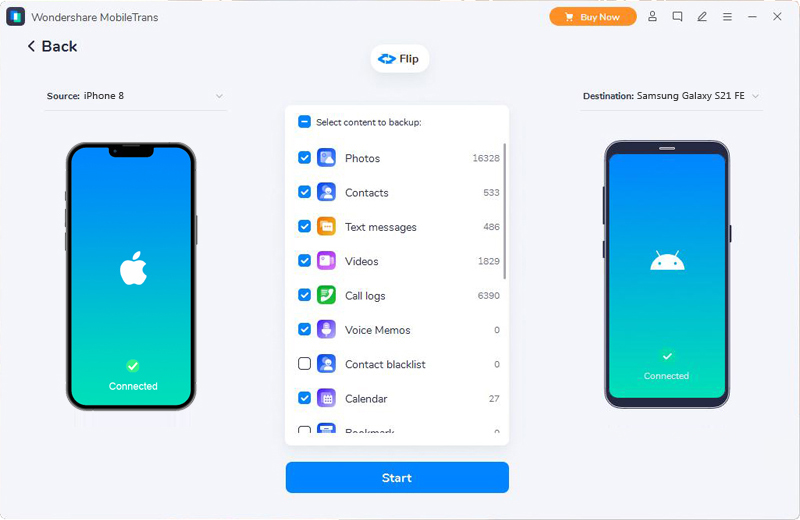
Tips: The progress bar will reflect the progress of the data transfer. Please be patient and ensure that the phones connection are not interrupted. Of course, the time of the data transfer depends on the amount of transferred data. In addition, if you want to empty the storage of your Redmi Note 9(Pro), please tick out the "Clear data before copy" option befeore transfer.
Part 2 Sync Data from Backup to Redmi Note 9(Pro)
If you get a backup file of your old Android device, or you've ever backed up your old Android devies with Mobile Transfer, then you can follow the below steps to sync data from backup file to your Redmi Note 9 or Redmi Note 9 Pro using Mobile Transfer.
Step 1. Run Mobile Transfer, then tap "Restore from Backups" and choose a backup file carrier, just like MobileTrans, Kies, iTunes, iCloud and so on.
Tips: Which carrier you choose, depend on the program that you used to backed up your device, for example, if you were backed up with Mobile Transfer, choose "MobileTrans" here.
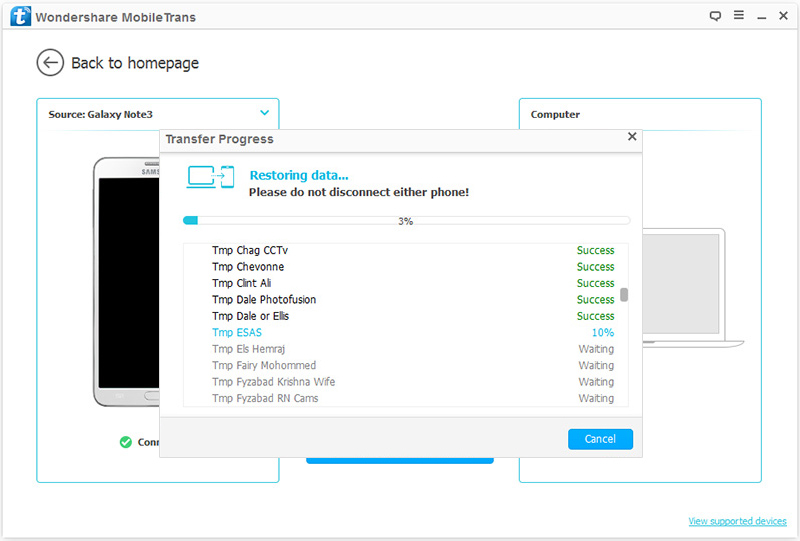
Step 2. After that, choose a backup file in the form on the left to extract all the transferable file types. At the same time, pleaes connect your Redmi Note 9(Pro) to computer using a USB cable.
![]()
Step 3. Once your phone is detected, select the data you want and tap "Start Transfer" to sync the selected data to your Redmi Note 9(Pro).
Part 3 Move Data to Redmi Note 9(Pro) with Mi Mover
Mi Mover is a brand new data migration APP that can transfer data from any old Android and iOS devices to Xiaomi's mobile phone. The mobile phone supports the migration of a variety of data, including contacts, text messages, pictures, music, videos and other data. Now, let's learn using this app.
Step 1. Download, install and run Mi Mover on both your old Android device and Redmi Note 9(Pro). In fact, the system has pre-installed this app for Redmi Note 9(Pro).
Step 2. Tap "I'm a sender" on your old Android device, and tap on "I'm a recipient" on your Redmi Note 9(Pro).
Step 3. Bring up the viewfinder of your old phone to scan the QR code that display on the Redmi Note 9(Pro).
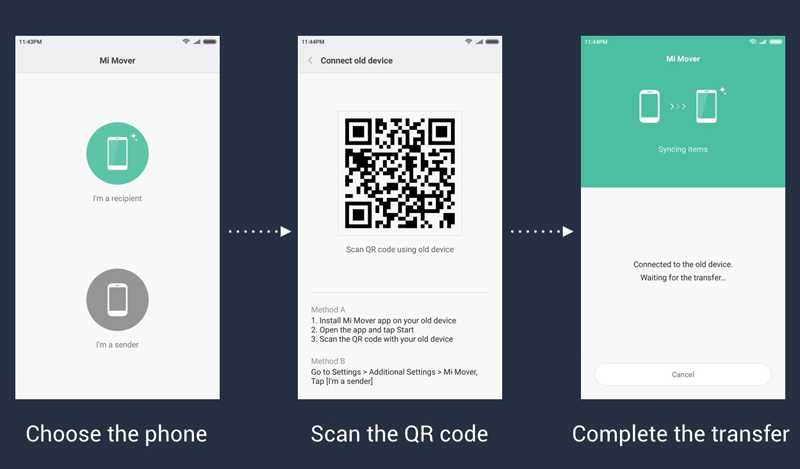
Step 4. Wait for the connection between your phones is successfully, select the data you want to transfer and tap "Send" to sync them to your Redmi Note 9(Pro).
Once the migration is finish and you don't have any more information to transfer, tap on "Finish" to enjoy your new phone.
Part 4 Transfer Files from Computer to Redmi Note 9(Pro)
For Windows Computer User
- Unlock both of your phone.
- Connect your phones to your computer using their USB cable.
- On your phones, tap the "Charging this device via USB" notification.
- Under "Use USB for," select "File Transfer".
- The file transfer window will open on your computer. Just drag and drop files such as videos, pictures, songs, documents, etc. from the old Android phone to the corresponding storage path of your Redmi Note 9(Pro).
- Wait until the progress bar is filled, eject your phones from Windows and unplug the USB cable.
For Mac Computer User
Make sure that your computer must be using Mac OS X 10.5 or later.
- Download, install and run Android File Transfer on your Mac computer.
- Unlock your phones, and connect your phones to your Mac computer.
- When the "Charging this device via USB" notification pops up, click on it on both your phones.
- Then select "File Transfer" option under the "Use USB for," dialog box.
- The Android File Transfer windows will open on your computer. Use it to drag and drop files between your phones.
- If done, disconnect your phones and unplug the USB cables.
Part 5 Directly Recover Deleted/Lost Data from Redmi Note 9(Pro) without Backup
There are too many possibilities for data loss, is it possible to recover the deleted and lost data from your Redmi Note 9(Pro) without backup? The answer is of course yes, as long as you with the help of Android Data Recovery.
Android Data Recovery is specially developed for data recovery, you can directly restore deleted and lost data including contacts, text messages, message attachments, WhatsApp messages, WhatsApp attachments, call logs, photos, videos, documents and more from your Redmi Note 9(Pro) by using this software, even if without any backup file. What's more, it also perfectly compatibles with almost all popular Android smartphones/tablet on the market. Without delay, click to free download the software and follow our tutorial to have a try now.
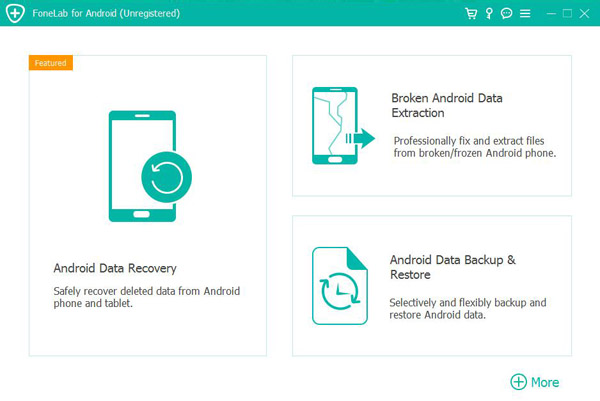
Step 1. Install and run the software on your computer, then tap "Android Data Recovery" on the homepage.
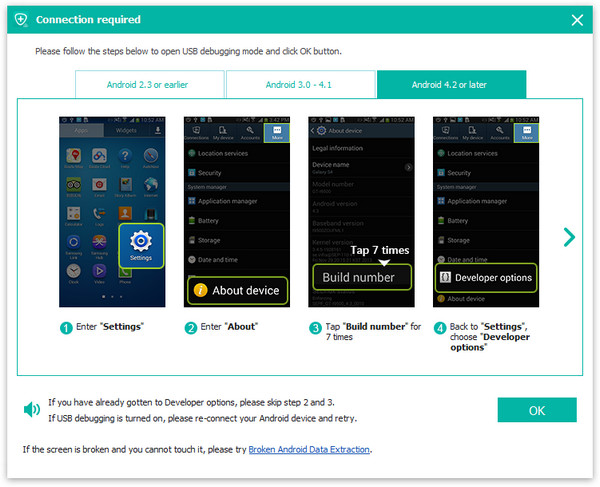
Step 2. Connect your Redmi Note 9(Pro) to computer via its USB cable, and enable the USB debugging on your phone's screen.
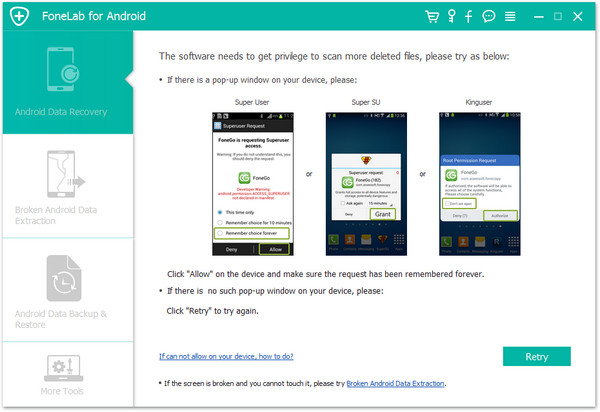
Step 3. Choose the file types that you want to scan and recover, then press "Next" to continue.

Tips: During the scanning precess, the program needs to get privilege to scan more deleted files, please follow the prompts to complete authorization on your phone screen, etc.
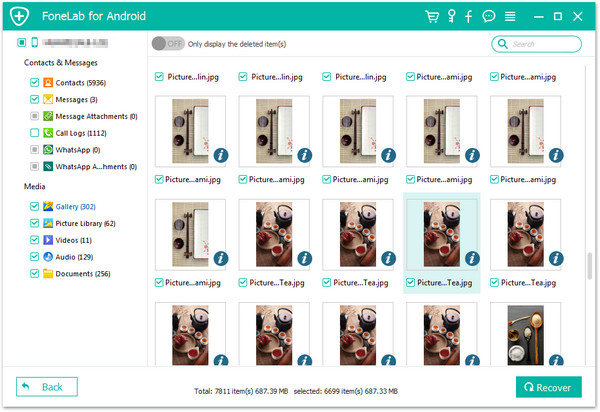
Step 4. Once the scan is finish, you can preview all the scan result one by one, just choose the files you need and tap "Recover" to save them back to your computer or Redmi Note 9(Pro).
Note: During the entire data recovery process, please make sure that your phone is fully charged and the connection is not interrupted.
Part 6 Restore Data from Backup to Redmi Note 9(Pro)
Similarly, Android Data Recovery also allows user to backup and restore phone data, if you've ever backed up your Redmi Note 9(Pro) with this software, then you can easily restore data from backup to Redmi Note 9(Pro) or any other supported devices selectively.
Step 1. Run the software then select "Android Data Backup & Restore" among all the items.
Step 2. Connect Redmi Note 9(Pro) to your computer by using its USB cable.
Step 3. When your phone is detected, tap "Device Data Restore" or "One-click Restore" to go on.

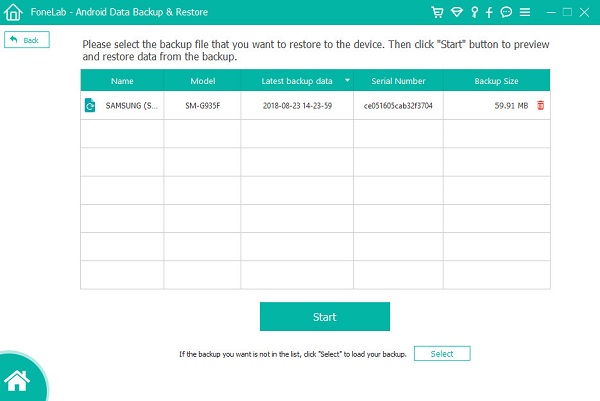
Step 4. Select a backup file from the list according to your need, and press “Start” to extract all the recoverable files from the selected backup file.
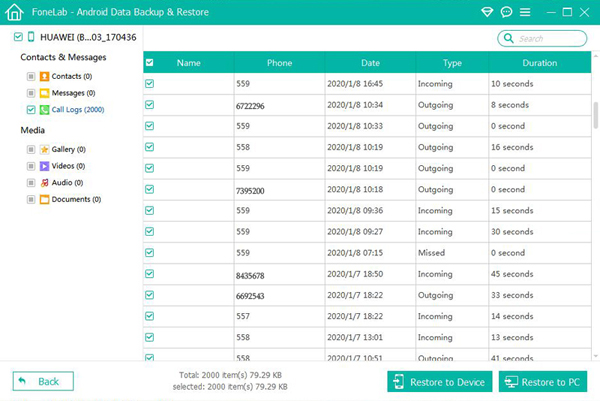
Step 5. Wait until all the scan result is displayed, select the file you want to recover after previewing, then click on "Restore to Device" to save them back to your Redmi Note 9(Pro), or click on "Restore to PC" to save them back to your computer.
Part 7 Backup Data from Redmi Note 9(Pro) to Computer
Backup with Moible Transfer
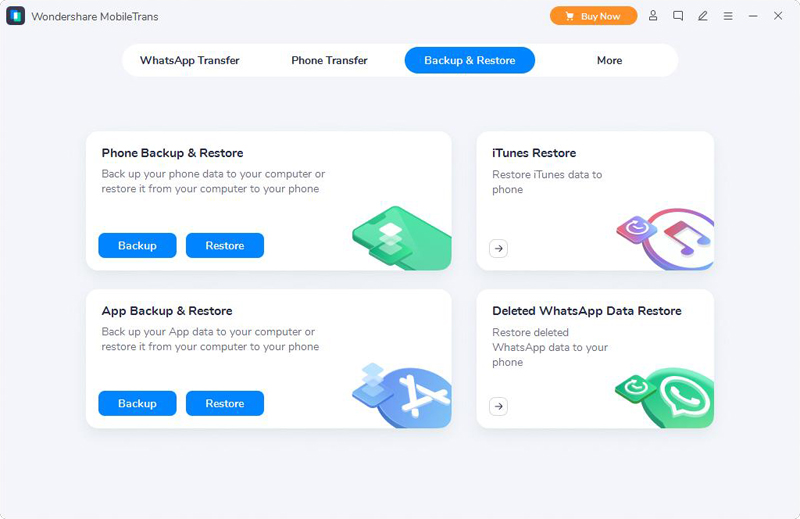
Step 1. Launch Mobile Transfer and tap "Back Up Your Phone".
Step 2. Connect your Redmi Note 9(Pro) to computer.
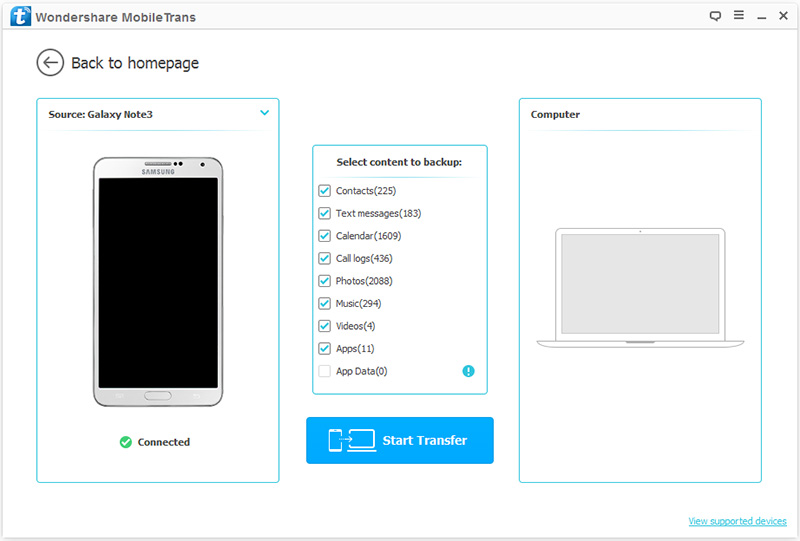
Step 3. Choose the data as you need and click on "Start Transfer" to sync them to your computer.
Backup with Android Data Backup & Restore
Step 1. Run the software and tab "Android Data Backup & Restore".
Step 2. Using a USB cable to connect your Redmi Note 9(Pro) to computer.

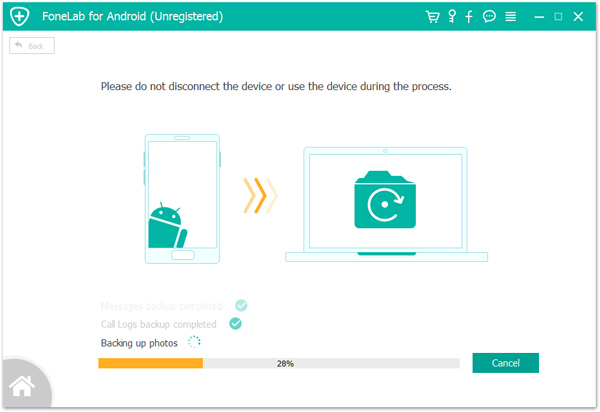
Step 3. Tap "Device Data Backup" or "One-click Backup". "Device Data Backup" option allows you selecting to back up the data you need, which will save more of your time. "One-click Backup" can help you to get a complete backup of your device. If you choose "Device Data Backup", then you need to select the files that you want to backup.
Step 4. If everything is ready, select a save path for the backup file and click on "Start" to start backing up your phone data.
Backup your Redmi Note 9(Pro) to Google Cloud
- Open "Settings" app on your Redmi Note 9(Pro).
- Tap "System" and then press "Backup".
- Enable the "Back up to Google Drive" option.
- You will be able to see the data that is being backed up.