Overview: When you buy a new ZTE Axon 40 Pro/40 Ultra, do you often worry about how the new mobile phone transmits and recovers data? Don't worry, this article will introduce you to the method of transmitting and restoring data to ZTE Axon 40 Pro/40 Ultra in five parts. After reading the following instructions patiently, we believe that this article can solve your problem perfectly.
On the screen, ZTE Axon 40 Pro is equipped with a 6.67-inch FHD+(2400×1080) AMOLED flexible curved screen with a screen refresh rate of 144Hz. In terms of cameras, ZTE Axon 40 Pro is equipped with 4 cameras, specifically configured as a 108MP main camera +8MP super wide-angle camera +2 2MP cameras; In terms of hardware, ZTE Axon 40 Pro is equipped with Snapdragon 870 processor. In terms of battery, it is configured as a 5000mAh battery and supports 66W fast charging. And it also has full-featured NFC.
On the screen, ZTE Axon 40 Ultra is equipped with a 6.8-inch FHD+(2400×1116) AMOLED flexible screen with a screen refresh rate of 120Hz. For the rear camera, ZTE Axon 40 Ultra is equipped with three main cameras, specifically configured as a 64-megapixel custom wide-angle camera+64-megapixel custom humanistic camera+64-megapixel periscope telephoto camera, and a 16MP front camera. In terms of hardware, ZTE Axon40 Ultra adopts Snapdragon 8Gen1+UFS3.1+LPDDR5. In terms of battery, it is configured as a 5000mAh battery and supports 80W wired fast charging.
In addition to the above two points, ZTE Axon 40 Pro/40 Ultra is also very good in other aspects. Considering that when users use/buy them, they often have the need to recover and transmit data. Next, we will introduce you to different methods of transmitting and recovering data in five situations.
Mobile Transfer is a professional data transmission and backup software. By installing this app, you can easily transfer and recover all data including pictures, music, videos, WhatsApp/WeChat/Line/Kik/ Viber messages from various types of Android/iphone to ZTE Axon 40 Pro/40 Ultra or from backup to ZTE Axon 40 Pro/40 Ultra. The software page is concise and easy to operate, and at the same time, the privacy of users will not be revealed during data transmission and recovery. We strongly recommend that you install it and then follow the instructions below to recover and transfer the data of ZTE Axon 40 Pro/40 Ultra.


Part 1 Directly Sync Data from Android/iPhone to ZTE Axon 40 Pro/40 Ultra
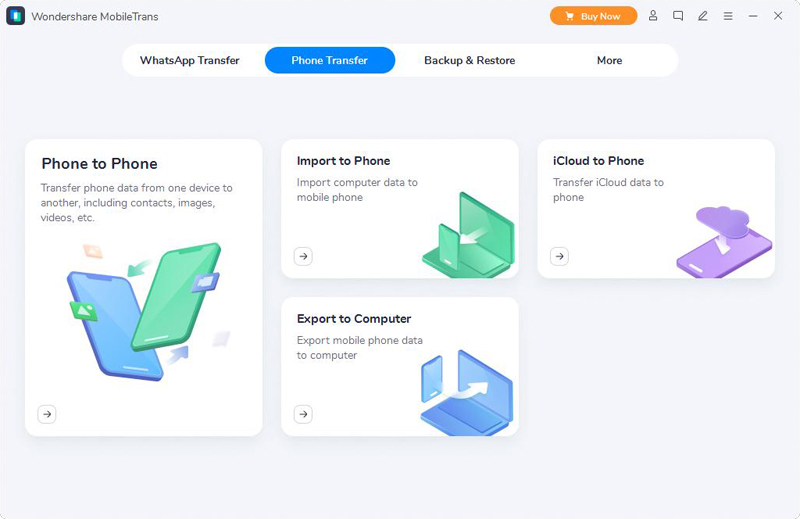
Step 1. Run the installed Mobile Transfer on your computer, and then click "Phone Transfer" > "Phone to Phone" at the top of the homepage.
Step 2. Use the USB cables to connect your ZTE Axon 40 Pro/40 Ultra and the old Android/iPhone to the same computer.
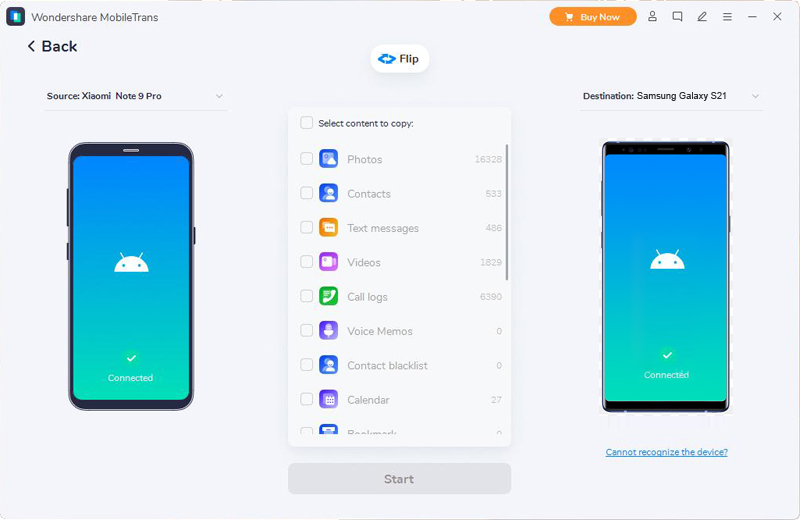
Tip: If your device is connected but can not be recognized, you can click "Can't recognize the device?" Button to seek for help. Please click the "Flip" button to make sure that ZTE Axon 40 Pro/40 Ultra is displayed on the target panel.
Step 3. After software successfully detects your phone, please select the file types needed to transfer, and then click "Start" to transfer them to ZTE Axon 40 Pro/40 Ultra.

Part 2 Sync Data from Backup to ZTE Axon 40 Pro/40 Ultra
Sometimes users may encounter the dilemma of lost, stolen or damaged mobile phones, and worry about the data in their mobile phones. Therefore, users need to synchronize data from backup to ZTE Axon 40 Pro/40 Ultra directly. As a powerful software, mobile transmission can quickly and easily recover data from backup to mobile phones by following the following four steps.
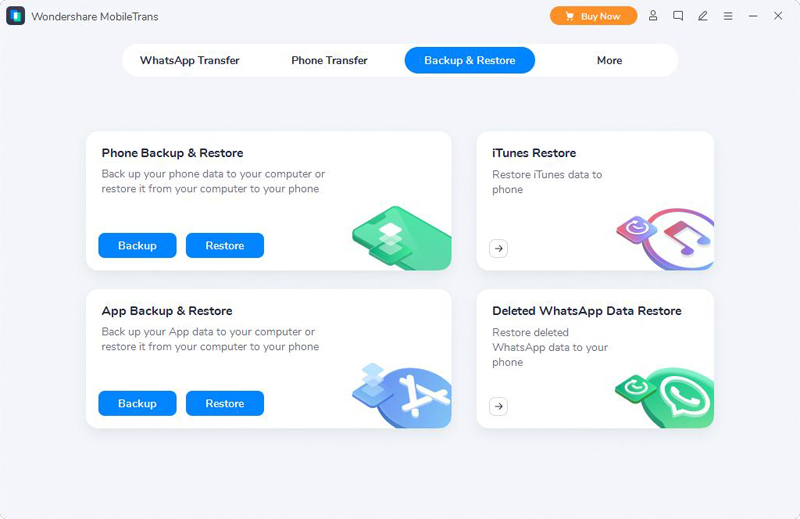
Step 1. Run Mobile Transfer, click "Backup & Restore", and then choose "Restore" option in the "Phone Backup & Restore" interface.
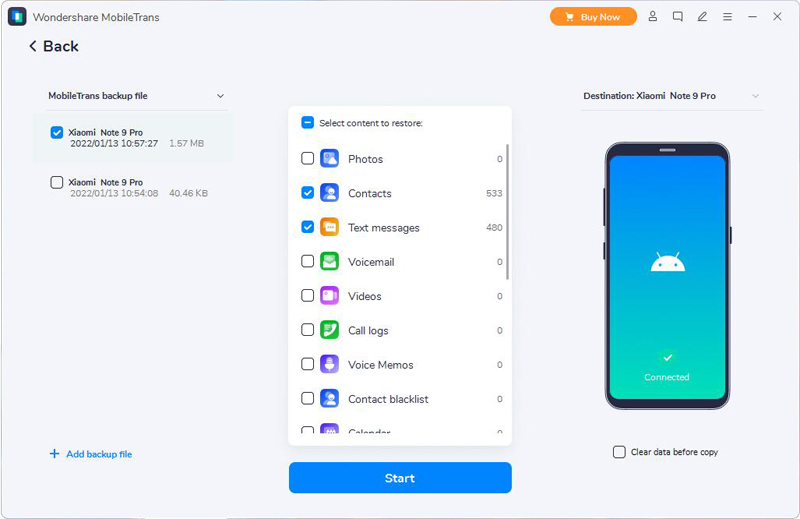
Step 2. Select backup files from the list, and then click "Restore".
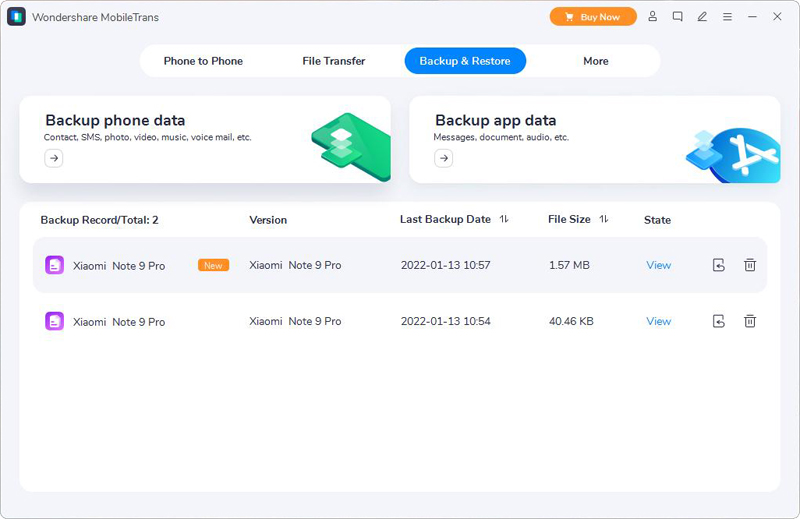
Tip: If you can't find the required backup, you can click to load it from the specified save path.
Step 3. Connect ZTE Axon 40 Pro/40 Ultra to your computer with USB cable, then select the data you need to restore, and click "Start" to sync them to your phone.
Part 3 Sync WhatsApp/Wechat/Line/Kik/Viber Messages to ZTE Axon 40 Pro/40 Ultra
WhatsApp/WeChat/Line/Kik/Viber are the most widely used communication software in the world. When replacing a new device, users often need to synchronize chat records and important files on these applications. This article still recommends users to use mobile transfer application to operate. You can easily synchronize WhatsApp/WeChat/Line/Kik/Viber messages just by completing the next few steps.
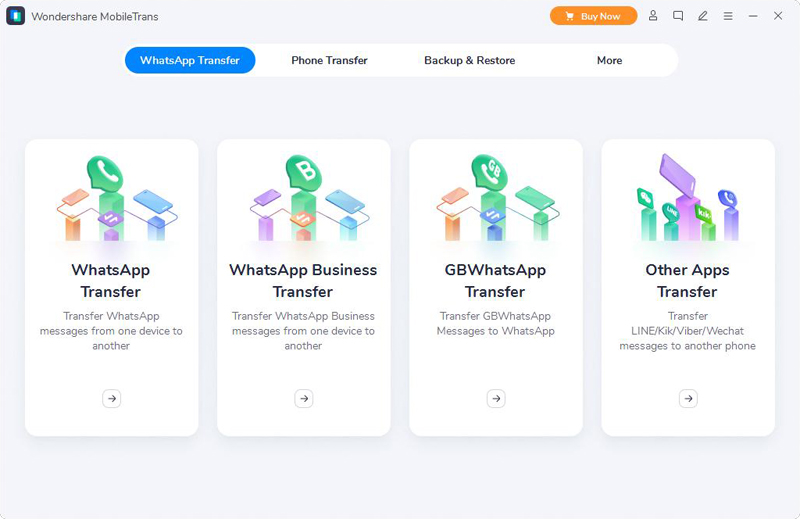
Step 1. Run Moblie Transfe and click on "WhatsApp Transfer" located at the top of the homepage. You will see four options. If you want to transfer WhatsApp messages, please choose the first three options, or click "Other Apps Transfer" to transfer your Wechat/Line/Kik/Viber messages, and then select the corresponding item as needs.
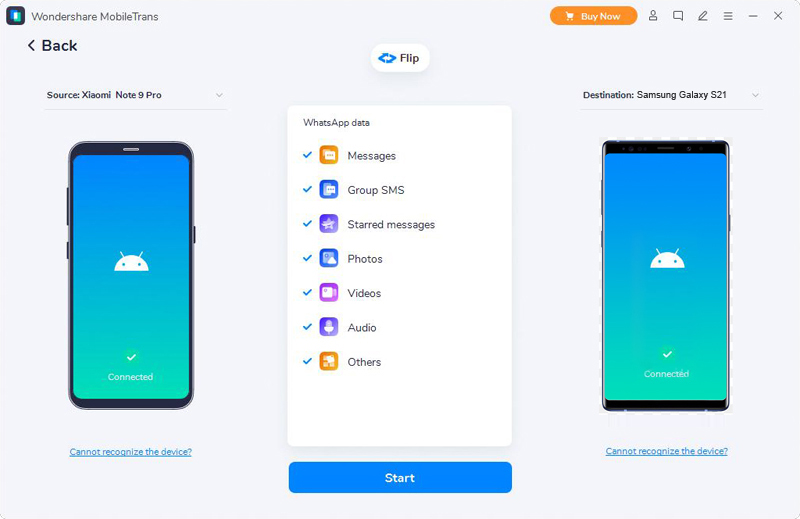
Step 2. Use USB cables to connect the old mobile phone and ZTE Axon 40 Pro/40 Ultra to the same computer, and the software will automatically detect them.
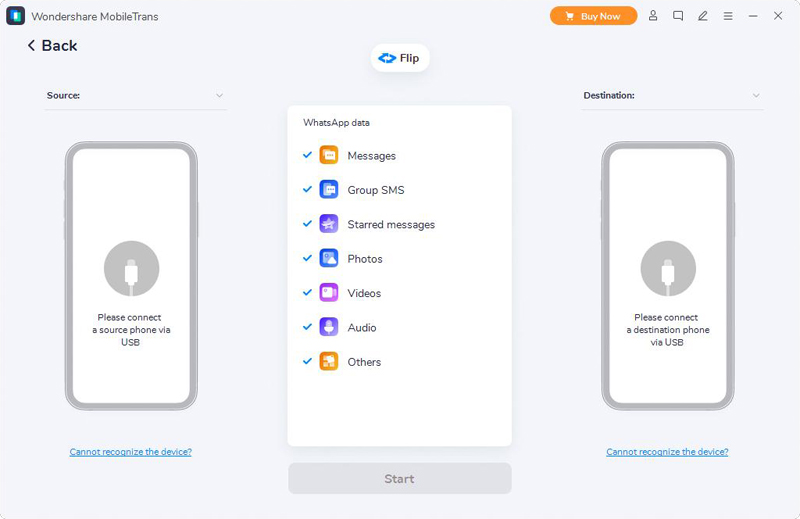
Step 3. When the data is displayed in the middle of the interface, select the data type as needed, then click "Start" to complete the data transmission process.
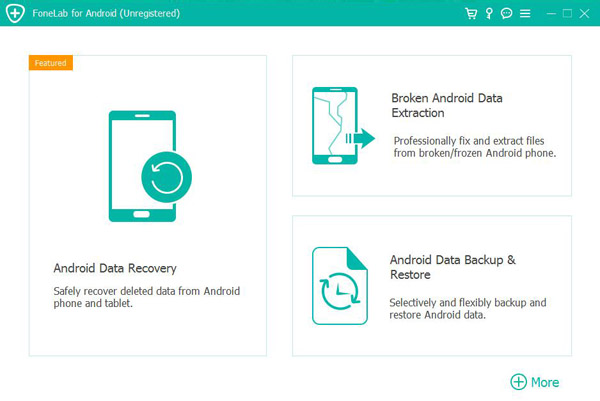
Android Data Recovery is an excellent software for data recovery and restoration. It is one of the best software of its kind. It can recover data, recover damaged mobile phone data and backup and restore Android system. Powerful and easy to operate, and with good data confidentiality, the data transmitted by users can only be seen by themselves. By installing it, users can recover and restore data without any obstacles to ZTE Axon 40 Pro/40 Ultra, whether they have a backup or not.
Part 4 Directly Recover Data on ZTE Axon 40 Pro/40 Ultra without Backup
Step 1. Run the installed Android Data Recovery, and then click "Android Data Recovery" on the homepage.
Step 2. Connect your ZTE Axon 40 Pro/40 Ultra to computer by USB cable, then open USB debugging mode on your phone's screen (click "Settings" > "About" > Tap 7 times "Build number" > Back to"Settings" > "Developer options") and click "OK".
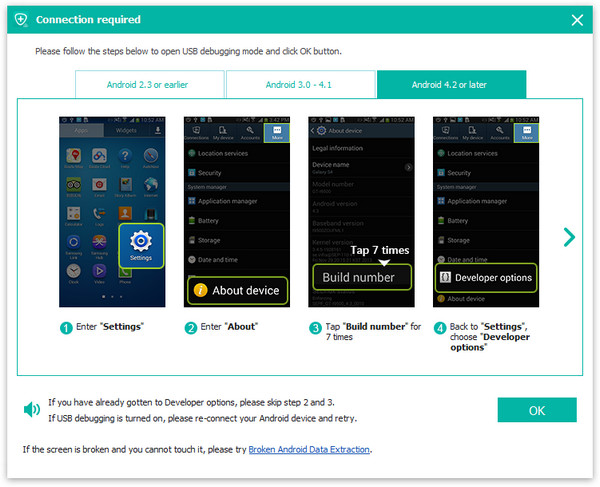
Tip: If the screen is broken and you cannot touch it, you can click "Broken Android Data Extraction" to get solutions. If your ZTE Axon 40 Pro/40 Ultra is connected but not detected successfully, please try to click "Device connected, but can't be recognized? Get more help." to get more ways to establish a successful connection between your device and software.
Step 3. Select the file types you wish to scan from the list, then click "Next" to start scanning your ZTE Axon 40 Pro/40 Ultra in the standard scan mode.

Tip: Before scanning mobile phone data, you will be prompted to install a root tool to root your mobile phone and grant you permission to read the data.
Step 4. After selecting the files you want to recover, then click "Recover" to save them back to your ZTE Axon 40 Pro/40 Ultra.
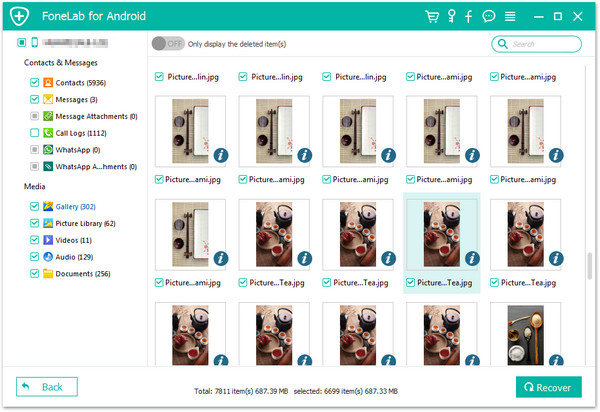
Tip: the "Deep Scan" button can help you rescan device to find more contents when you fail to find the files needed.
Part 5 Restore Data from Backup to ZTE Axon 40 Pro/40 Ultra
For the user who have ever backed up your phone data with Android Data Recovery, then you can follow the below steps to extract and restore data from backup to your ZTE Axon 40 Pro/40 Ultra.
Step 1. Run Android Data Recovery, then click "Android Data Backup & Restore".
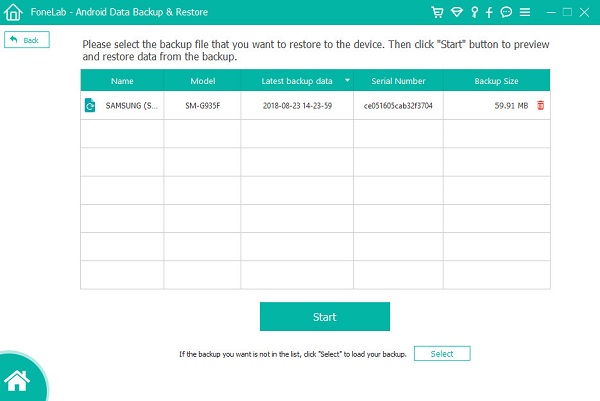
Step 2. Click "Device Data Restore" after connect the ZTE Axon 40 Pro/40 Ultra and computer by USB cable.

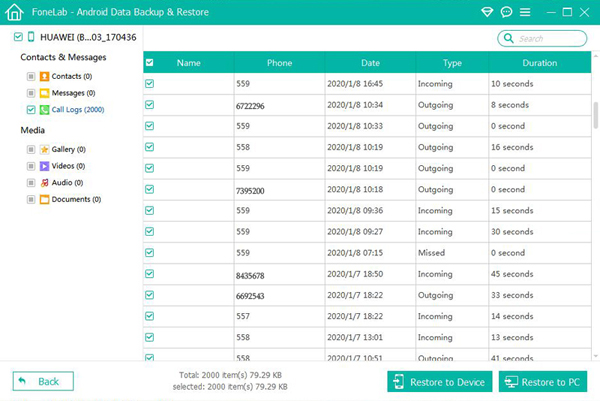
Step 3. When the ZTE Axon 40 Pro/40 Ultra is recognized, choose the backup files you need to restore and then click "Start" to extract all the restoreable data from the selected backup file.
Step 4. After the extraction, select the files you need to restore, then click "Restore to Device" to restore the selected data to your ZTE Axon 40 Pro/40 Ultra.
Part 6 Retrieve Data to ZTE Axon 40 Pro/40 Ultra with Best Data Recovery
Best Data Recovery is a simple and convenient recovery software. With it, you can simply restore the lost or deleted videos, photos, audio, email, documents and other data from the supported smartphones. Now I will introduce you to recover lost or deleted data in ZTE Axon 40 Pro/40 Ultra with the help of Best Data Recovery.
Step 1: Download and install Best Data Recovery on your computer, and run it.
Step 2: Use a USB cable to connect your ZTE Axon 40 Pro/40 Ultra to the computer.
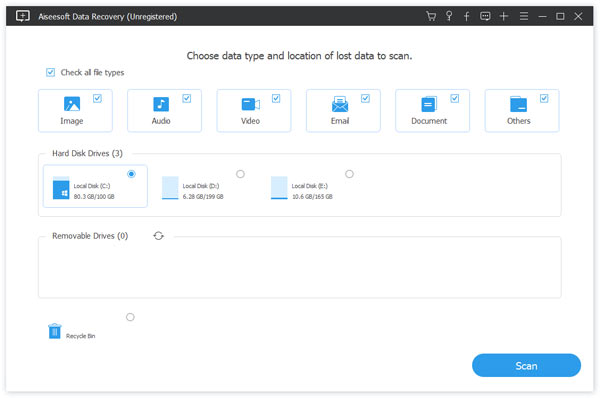
Step 3: Select the file types and disk name of your device on the software's primary page, and then click "Scan" to begin scanning your phone for the lost contents.
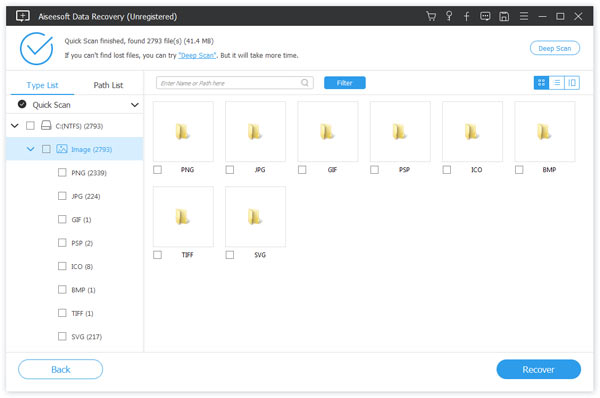
Step 4: After completing the scan, you can preview all recoverable data on the page. Select the data you need to recover, and then click "Recover" to retrieve the lost or deleted data in ZTE Axon 40 Pro/40 Ultra.