Overview: This article will tells the best way for you to recover the deleted and lost data including image, video, audio, document, email and more from your iMac, hard drive, flash drive, memory card, etc., as well as backing up data on your iMac.
iMac is a very good device, it has brought great convenience to my life and work. It can communicate with my iPhone. For example, when I use the iPhone to shoot objects nearby or scan documents, they can automatically appear on my iMac. Just choose to insert photos from the iMac File menu, and then choose to take photos or scan documents. So I can take a picture of what's on the table and look it up directly in the Pages manuscript, or scan an invoice and a flat PDF scan will immediately appear in the visit. However, because of its utility, I will store a lot of data on my iMac. I can say that I am very dependent on my iMac. So when I found that some data was lost on the iMac, I was very anxious. How can I retrieve the lost data?
Many users will also encounter data recovery problems on their computers. We can use a professional software to solve these problems. Among all data recovery softwares on the market, Best Data Recovery is the software I strongly recommend here. Best Data Recovery can recover multiple data types, including files, photos, videos, audio, e-mail in various formats, etc. And it can retrieve data from various lost scenarios, for example, unexpectedly crashed software, computer crashed, wrong formatted drives, unexpectedly operations, partition deleted, virus attack, etc. In addition, it can be used for data recovery of any Computer, Hard Drive, Flash Drive. It can help us scan and find deleted data according to specific data types and hard drives.
More important, no matter you data lost due to accidental deletion, emptying recycle bin, RAW hard drive, RAW partition, partition loss, operating system crashed, bootable problems or other reasons, you can easily recover your data with this powerful data recovery tool.


Part 1 Directly Restore Deleted/Lost Data on Your iMac without Backup
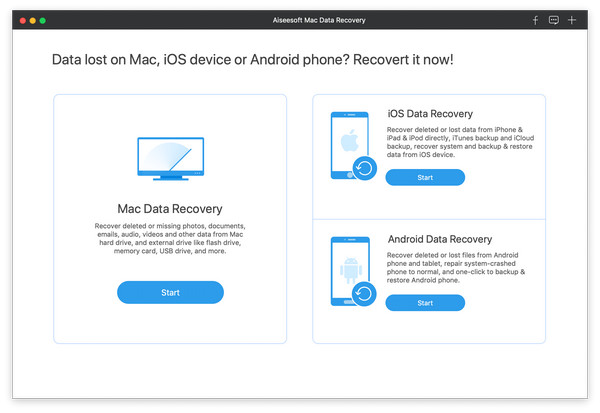
Step 1. Download, install and run this data recovery on your iMac, then you can see a window as below.
Tips: For Mac which is running Mac OS X El Capitan or later, you will be asked to disable System Integrity Protection firstly before you can use this data recovery on your iMac.
If done, please click "Start" button which under the "Mac Data Recovery" option.
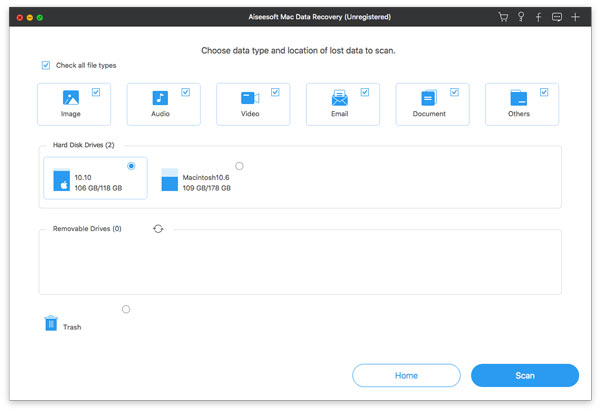
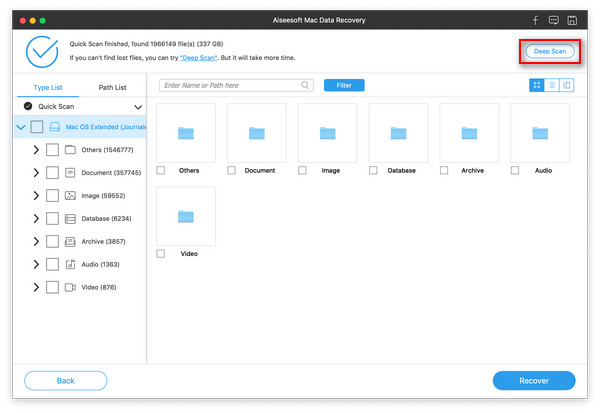
Step 2. Skip to next screen, please select the type of data and the disk drive that you need to scan, click "Scan" directly. The program starts scanning your iMac. In fact, the scanning here is fast scanning, so it takes relatively short time.
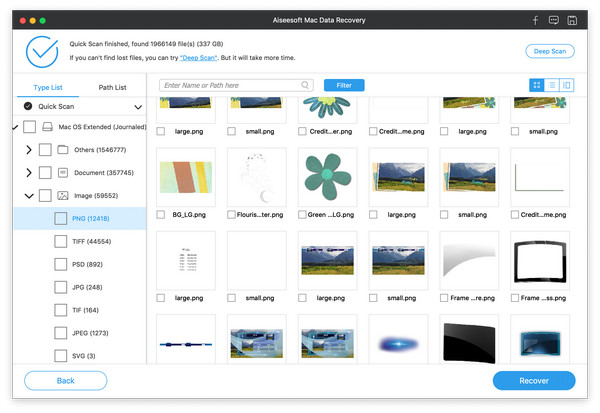
Step 3. After the scan is completed, the interface lists all deleted or missing files. You can use the "Filter" function to quickly locate the files to be recovered. At the same time, the list on the left is divided into two categories, the type list and the path list. You can also click on them to preview the scan results.
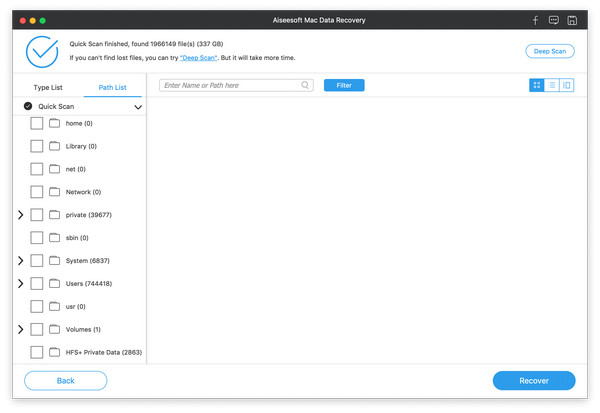
Tips: If you can't find the missing data, you can click "Deep Scan" in the upper right corner to retry. Of course, the deep scan mode will take more time to complete the whole scanning process, but it will provide all possible results that can be restored.
Step 4. Finally, select the data you need to recover and click "Recover" to save them back to your computer.
Part 2 Backup Data from iMac to External Hard Drive with Time Machine
In fact, there are a lot of ways to help us avoid data loss, and data backup is one of the easiest and most effective methods. Let's talk about how to back up your iMac with Time Machine.
Step 1. Connect a external hard drive to your iMac via a data cable (usually a USB, Thunderbolt, FireWire drive or eSATA cable, etc.).
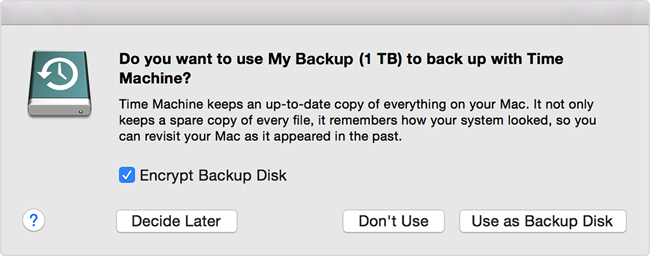
Step 2. When your external hard drive is detected, by defult, a dialog will pop up automatically and ask you whether want to use this external hard drive to back up with Time Machine. Now, please click on "Use as Backup Disk" to go on.
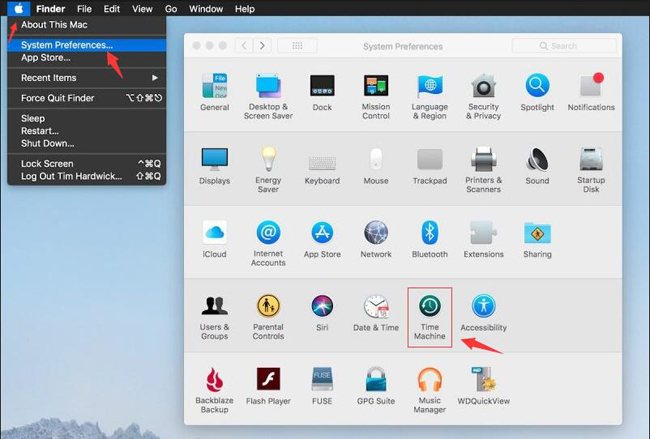
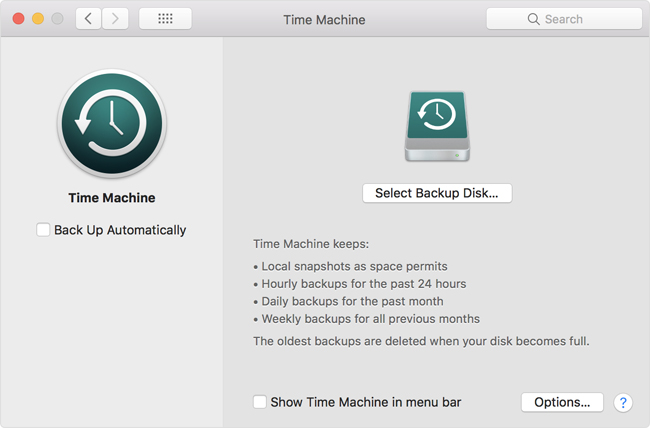
If Time Machine doesn't ask to use your drive, please go to Apple menu > System Preferences…, then click on "Time Machine".
Tips: For older versions of the macOS system and Time Machine, please make sure the "Time Machine" button is enable.
Step 3. Skip to next screen, please click "Select Backup Disk…" (or Select Disk, or Add or Remove Backup Disk).
Step 4. Select a available external hard drive as you like. Then tick the "Encrypt backups" box according to your need and click on "Use Disk".
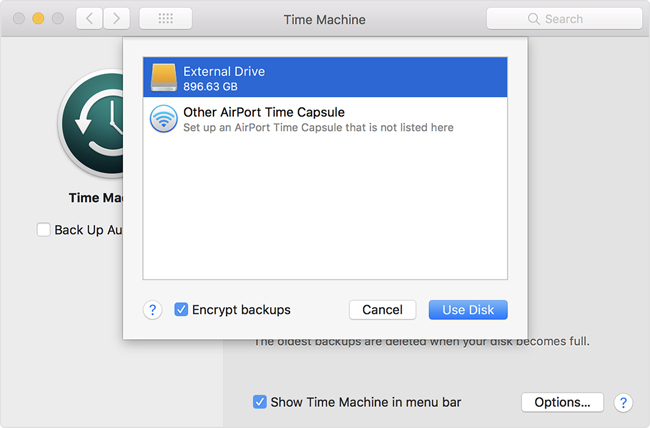
Note: You will be asked to erase the disk first if the selected disk is not formatted as required by Time Machine, just click "Erase" to proceed. If done, the program will automatically back up your iMac, the time it takes to back up will depend on the amount of data you have, please wait patiently until the backup is complete.
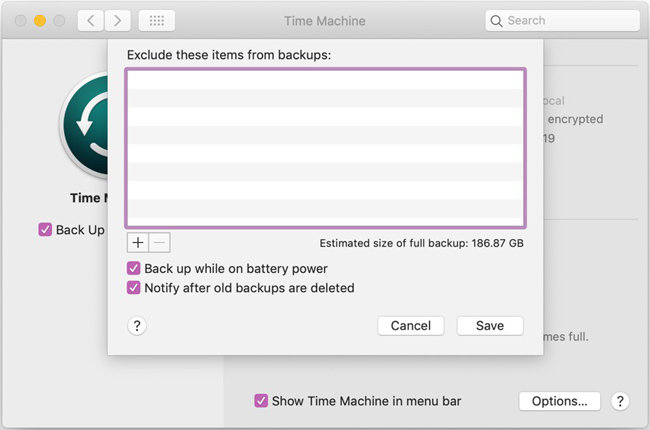
Besides, you can click "Back up automatically" in the main window of Time Machine to activate automatic backup option, and click "Options…" > click "Back up while on battery power" > click "Notify after old backups are deleted" > click "Save".