Overview: This article will tells the best way for you to recover the deleted and lost data including image, video, audio, document, email and more from your MacBook Pro, hard drive, flash drive, memory card, etc., as well as backing up data on your MacBook Pro.
MacBook Pro is equipped with touch bar, which replaces the function key at the top of the keyboard in the past, and has more functions and more practicality. It will automatically adjust according to your current operation, presenting intuitive and easy-to-use related tools. For example, when opening the system control, there will be control keys such as volume and brightness. When looking at the content, there will be interactive ways to adjust and browse. When inputting, there will be intelligent input functions such as emoticons and text prediction, which is very convenient. So, we were also attracted by the design when we bought MacBook Pro.
However, in the daily use process, we will inevitably encounter a variety of problems from the MacBook Pro, where data loss is one of the most common and difficult problems. You may lose some important data on MacBook Pro due to deletion, formatted partition, hard drive problem, RAW hard drive, crashed computer or other unknown reasons, so, how can we restore the deleted and lost data from MacBook Pro?
Best Data Recovery is a professional data recovery software, which can help you easily recover deleted/lost files from computers, recycle bin, hard disk, flash memory, memory card, digital camera and other devices. It basically recovers lost or deleted data from all unexpected situations. It can recover a variety of data types, including photos, audio, files, videos, emails and compressed packages. It gives us a streamlined list so that users can easily preview and find data. More importantly, it is secure, and all retrieved data will not be stored in other servers.


Supported Storage Media: Internal hard drive (HDD/SSD), External hard drive, Hybrid Hard Drive (SSDH), USB flash drive, SD card, CF Card, digital cameras, etc.
Supported Hard Disk Brands: Seagate, SanDisk, Kingstone, Western Digital, Toshiba, Buffalo, LaCie, Samsung, Adata, G-Tech, etc.
Supported Scenarios: Accidental Deletion, Formatted Hard Drives, Raw Hard Drives, Lost/Resized Partitions, Computer Crash, Virus Attacks, Any Operating System Crash or Starting Problems, or other unknown reasons, etc.
Part 1 Directly Restore Deleted and Lost Files on MacBook Pro without Backup
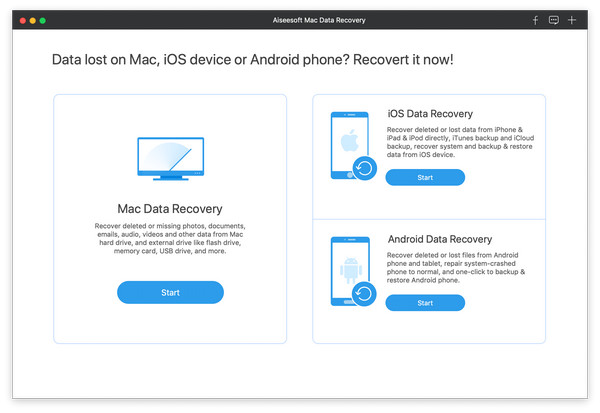
Step 1. Firstly, download, install and launch this data recovery on your MacBook Pro. Then you will see the main interface as below, please choose "Mac Data Recovery" and click "Start".
Tips: For Mac which is running Mac OS X El Capitan or later, you have to disable System Integrity Protection firstly before you can use this data recovery on your MacBook Pro.
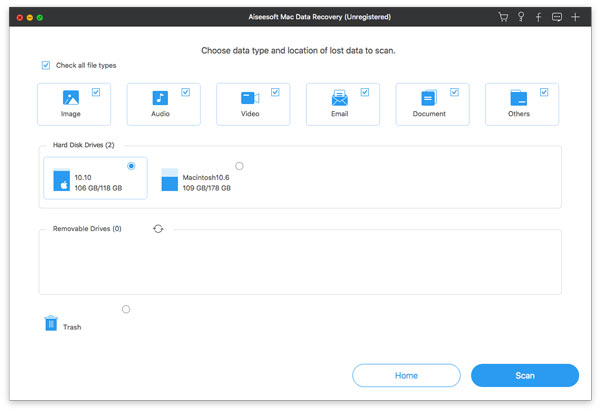
Step 2. The next window then will displays all scannable data types, disk drives, and removable drives. Check the type of data you need to scan. Then choose disk drive(s) where you may find the lost files, and click "Scan".
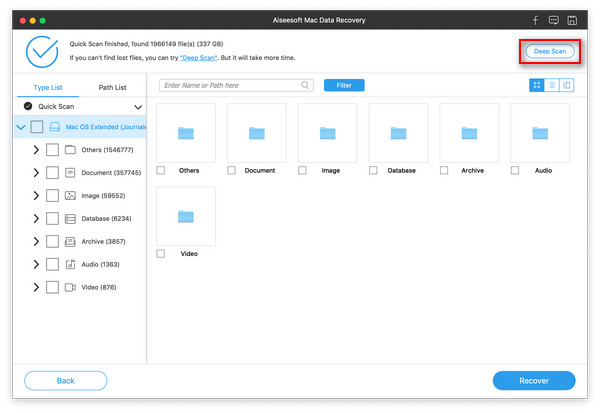
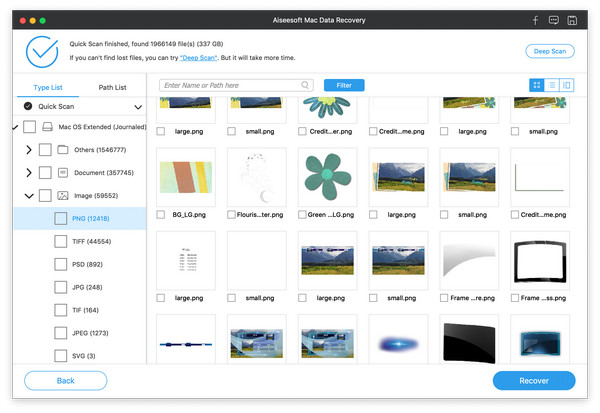
Step 3. The program starts scanning your MacBook Pro. After the scan is completed, the interface shows all deleted or lost files. You can click on the list on the left to preview the scan results, or you can click on the "Filter" function to quickly locate the files to be restored.
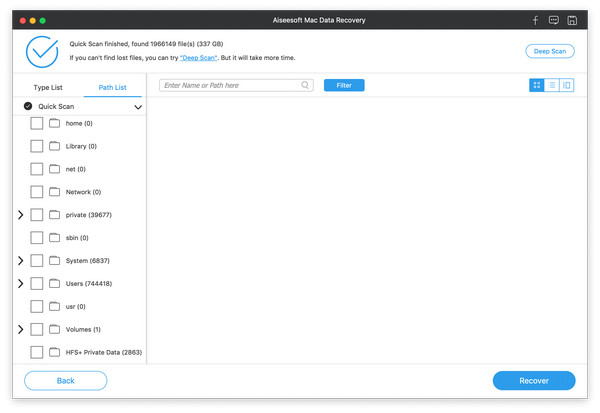
When you can't find the data you need to restore, you can click "Deep Scan" to scan again. At this time, the scanning time will be longer and the scanning will be more detailed.
Step 4. Finally, find and check the data you need to recover, and click "Recover" to save them back to your MacBook Pro. You are able to view the scanning result by selecting "Path List" to locate what you want exactly.
Part 2 Backup Data from MacBook Pro to External Hard Drive with Time Machine
We are always anxious to find a solution when the accident comes. However, many times we don't know how to plan ahead. For example, backup is the best way to circumvent data loss. Why don't we regularly back up our data from our MacBook Pro? Next, let's show you how to do it.
Step 1. Connect a external hard drive to your MacBook Pro via a data cable (usually a USB, Thunderbolt, FireWire drive or eSATA cable, etc.).
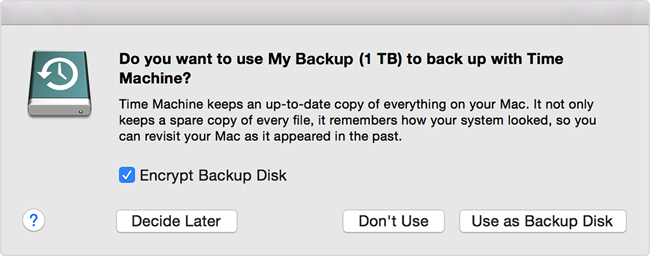
Step 2. When your external hard drive is detected, by defult, a dialog will pop up automatically and ask you whether want to use this external hard drive to back up with Time Machine. Now, please click on "Use as Backup Disk" to go on.
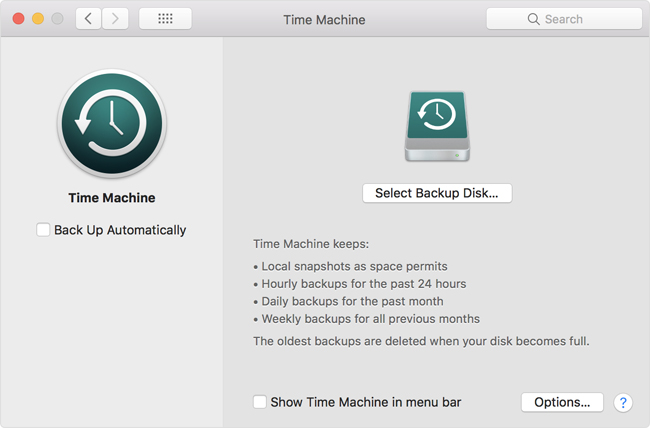
If Time Machine doesn't ask to use your drive, please go to Apple menu > System Preferences…, then click on "Time Machine".
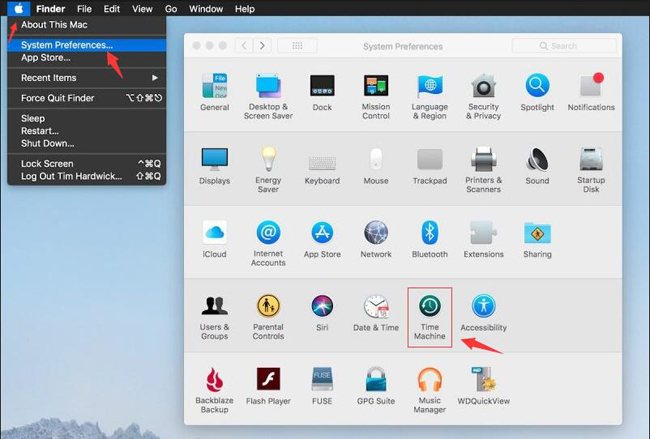
Tips: For older versions of the macOS system and Time Machine, please make sure the "Time Machine" button is enable.
Step 3. Skip to next screen, please click "Select Backup Disk…" (or Select Disk, or Add or Remove Backup Disk).
Step 4. Select a available external hard drive as you like. Then tick the "Encrypt backups" box according to your need and click on "Use Disk".
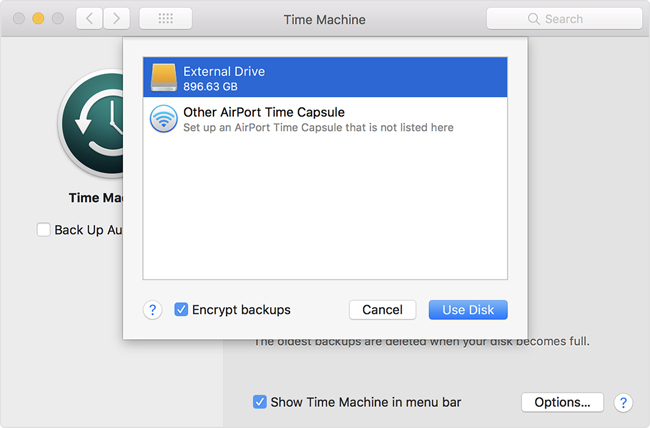
Note: You will be asked to erase the disk first if the selected disk is not formatted as required by Time Machine, just click "Erase" to proceed. If done, the program will automatically back up your MacBook Pro, the time it takes to back up will depend on the amount of data you have, please wait patiently until the backup is complete.
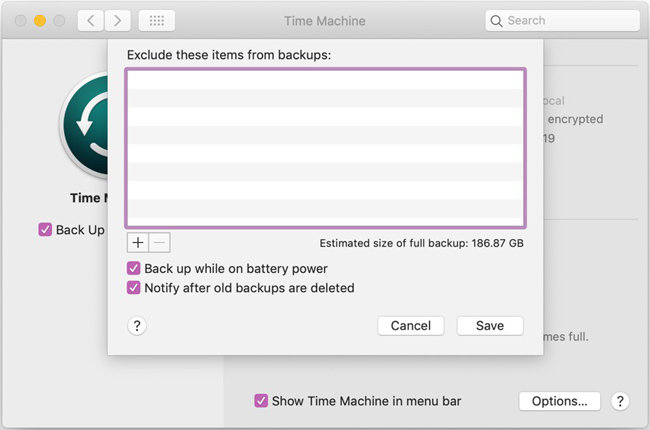
Besides, you can click "Back up automatically" in the main window of Time Machine to activate automatic backup option, and click "Options…" > click "Back up while on battery power" > click "Notify after old backups are deleted" > click "Save".