Overview: Do you want to know how to restore the deleted or lost files on Huawei MateBook X/X Pro? This article prepared a variety of ways to help you find lost or deleted data from your Huawei MateBook X and Huawei MateBook X Pro.
Huawei MateBook X screen is 13 inches, with a resolution of 2160×1440, support 100% SRGB color gamut and 350 nit brightness. The processor it uses is the seventh generation Intel? CoreTM i7-7500U or I5-7200U processor. Hard disk, it supports 256GB/512GB PCIe SSD. MateBook X's memory has 4GB and 8GB optional. The interface has a USB-C×2 and 3.5mm headphone interface. It self-contained operating system Window10 home edition. The MateBook X battery capacity is 41.4Wh, and the local video is played for 10 hours.
Huawei MateBook X Pro uses a display of 13.9 inch 3000 x 2000 pixels. The camera is placed on the keyboard and made a pop-up design. In terms of interface, MateBook X Pro has two USB Type-C ports on the left and a headphone jack, while only one USB Type-A port is available. Performance, MateBook X Pro has 16GB RAM and Intel Core i7-1165G7 processors, using the Intel Iris Xe Graphics chip. In terms of endurance, its battery capacity is 57.4Wh.

Regardless of what equipment we use, we will always be possible to cause data loss or deleted in the device because some reason is not exception. When we use Huawei MateBook X/X Pro, sometimes for more tidy, some data will be removed to the recycle bin, and the recycle bin is emptied. But when we need this data, we are difficult to retrieve these data. Now I will introduce you three ways to restore deleted or lost data to Huawei MateBook X/X Pro. If you need to recover data into your computer, then look down.
- Part 1 Restore Deleted Files from Recycle Bin
- Part 2 Restore Deleted Files with File History
- Part 3 Restore Deleted and Lost Files Without Backup
- Part 4 Backup Files with File History
Part 1 Restore Deleted Files from Recycle Bin
When you don't empty the recycle bin, you can directly return the data in the recycle bin to Huawei MateBook X/X Pro. Now let me show you how to directly resume the data to the computer/laptop.
Step 1: Find the Recycle Bin in the desktop of Huawei MateBook X/X Pro, double-click the icon to open the recycle bin.
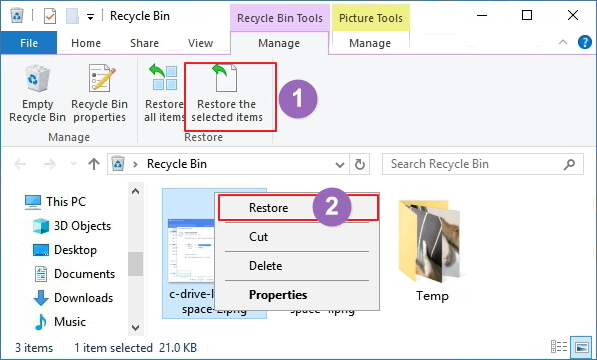
Step 2: In the Recycle Bin, you can check all the data you have deleted and not emptied. Select the data you need to return to the Huawei MateBook X/X Pro, then click the right mouse button, select "Restore" to restore the deleted data to the original path.
Part 2 Restore Deleted Files with File History
If you have already emptied the recycle bin, you can't directly restore the deleted data into Huawei MateBook X/X Pro. However, if you have backed up files using File History, next I will tell you how to recover the deleted or lost files through File History. It is worth noting that using this method, you need to make sure you have used File History to back up the required recovered files.
For Win 7 User:
Step 1: Click the icon in the lower left corner of the screen to open the menu, select the Control Panel button in the menu.
Step 2: After entering the control panel, click System & Safe on the page. Then click on the Backup & Restore button on the right side of the page.
Step 3: Find and click "Restore My Folder" option on the page. Click "Browse File" or "Browse Folder" in the new window to find the file you already back up.
Step 4: After selecting the recovery file on the page, click "Next" to select the location of the recovery file. After selecting the location where the file needs to be recovered, click "Restore" to restore the files in the backup to Huawei MateBook X/X PRO.
For Win 8 User:
Step 1: Tap on Start buttton on your Huawei MateBook X/X Pro, then type “File History” and click on settings in right pane, click on File History icon. Or directly ravigate to “Control PanelSystem and SecurityFile History” in the Control Panel.
Step 2: Click on “Restore personal files” in the File History Control Panel dialog.
Step 3: Browse to the location where you use to save the backup file.
Step 4: Double click on the file or folder that you want to get back
Step 5: Select the version that you wish to restore, then tap on the “Restore” button to begin restoring the selected files.
For Win 10 User:
Step 1: Press the WIN + Q key key to enter "Restore" in the Search Box appearing, click "Restore Your Files With File History" in the options appear.
Step 2: Now the File History window will pop up and list all the backed up folders. Double-click the Documents folder.
Step 3: Find the most recent version of the Business Presentations folder, check the box next to it.
Step 4: Click on the Restore button to begin restore the files back to your Huawei MateBook X/X Pro.
Part 3 Restore Deleted and Lost Files Without Backup
If you delete important data by mistake and empty the Recycle Bin, or "Shift + Delete" files, you can't get them back from Recycle Bin. What's worse is that you don’t have any backup files, how should you restore the deleted and lost data on your Huawei MateBook X/X Pro? This method introduces you how to restore the deleted data in Huawei MateBook X/X Pro without backup. With this method, you need the help of Best Data Recovery.
Best Data Recovery is a very efficient data recovery software. You can quickly return or delete data to HUAWEI MateBook X/X Pro with the help of its help. It can recover the data types, including Office Files, DOC, DOCX, RTF, DOT, DOTX, DOTM, ODT, OTT, Wordml, Books, Project, Visio, And Many More Types and Formats of Documents, Photos, Pictures Images (CRW, JPEG, JPG, PNG, PSD, RAW, RGB), VIDEOS, MOVIES, VLOG (AVI, FLA, FLV, M2TS, M4V, MKV, MOV, MP4, MPEG, MPEG4, MPG, WMV, 3G2, 3GP, 3GP2, 3GPP), AUDIOS, Music, Songs, Emails, Archive and Others. In addition, it can support the system, including Win7, Win8, Win10, Win XP, etc. Now I will tell you in detail.


Step 1: Download and install the Best Data Recovery software on your computer and run it.
Step 2: Choose the data type(s) you want to recover first on the homepage. Then choose disk drive(s) where you may find the lost files.
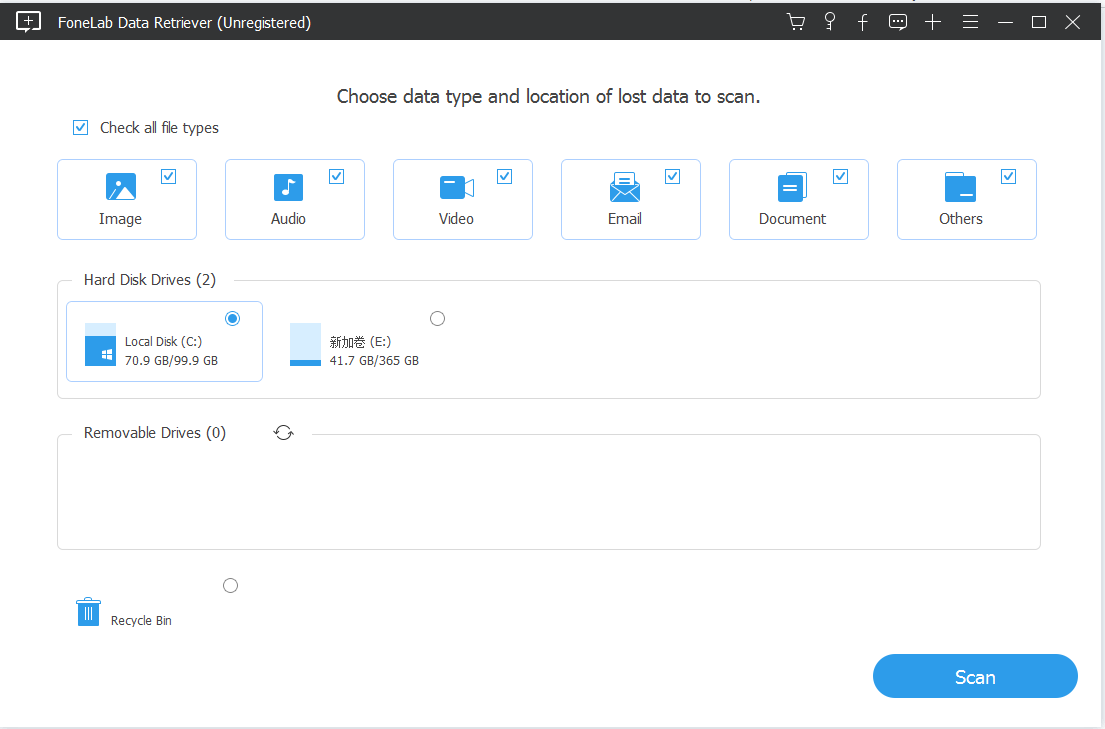
Step 3: If done, click on "Scan" button to begin sacnning your lost files under the "Quick Scan" mode.
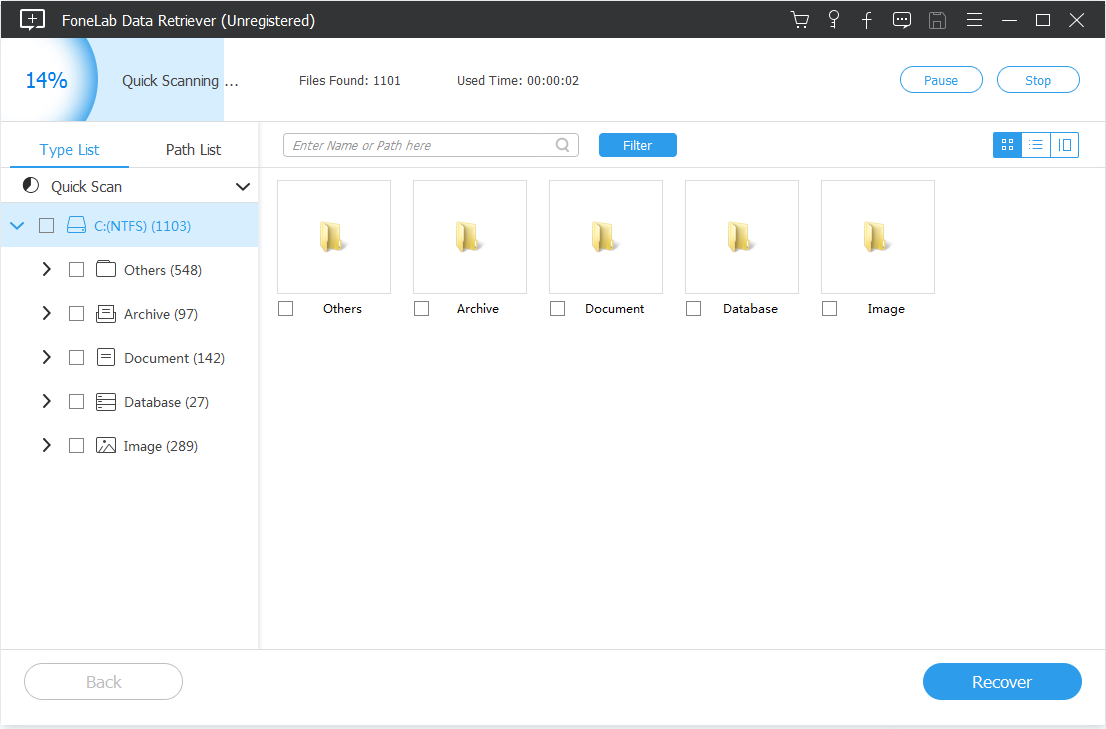
Step 4: After scanning, you can preview and select files that need to be recovered on the page. You can also use the "Filter" feature to quickly locate the files that you want to recover. After selecting it, click "Recover" to restore the selected data to your Huawei MateBook X/X Pro.
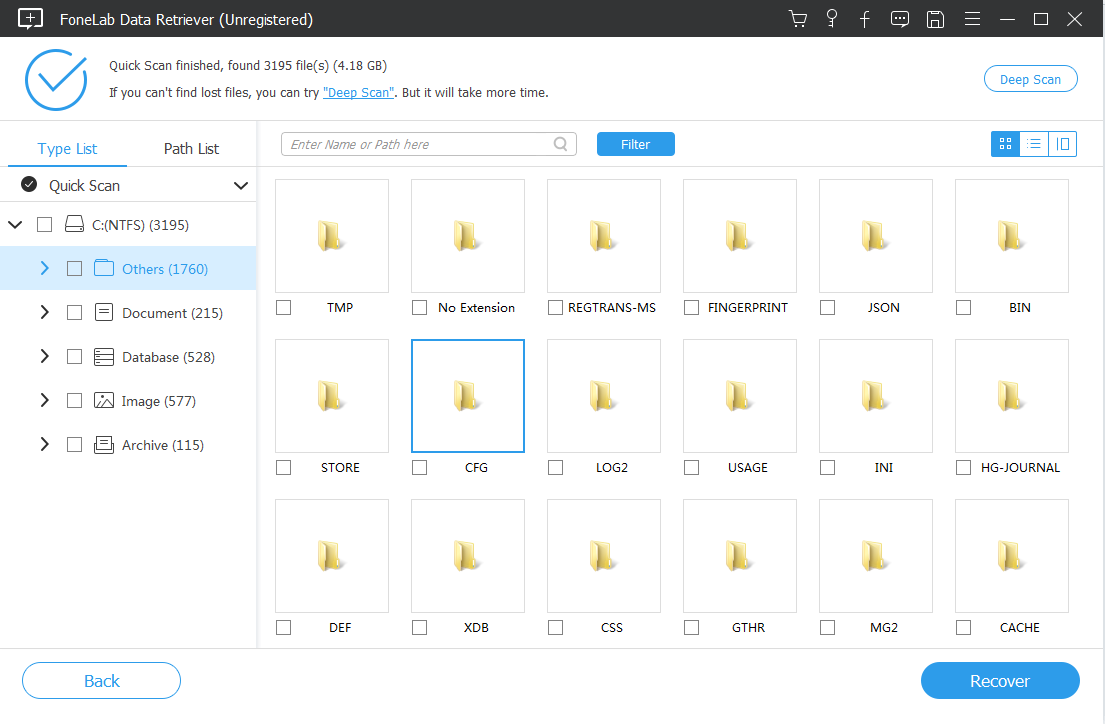
Tip: If you can not find the files you needed, please don't worry, you can click the "Deep Scan" button to scan it again, which will consume more scanning time, but can get more scan results.
Part 4 Backup Files with File History
In order to facilitate you to manage data in Huawei MateBook X/X Pro, I will now introduce a method of data backup. With these backup data, you don't have to worry about the trouble of data loss.
For Win 7 User:
Step 1: Click on the icon in the lower left corner of the screen to open the menu, select the Control Panel button on the menu.
Step 2: After entering the control panel, click "System & Safe" on the page.
Step 3: Click the "Backup and Restore" button on the right side and click "Setting Backup". Then wait for the computer to boot Windows backup.
Step 4: After enabling success, first you need to select the backup location, you can also save your backup to the external hard drive. Then click "Next" to select the contents of the backup in the new window.
Step 5: After selecting the content you need to back up, click "Next" to view the backup setting. After confirming, click the "Save Setup and Run Backup" button to start backing up the desired content to the selected location.
For Win 8 User:
Step 1: Turn on the computer's control panel, select System & Security.
Step 2: Click File History, select the location of the backup file, you can select the external (U disk, mobile hard disk), network location, etc. Then enable this feature on the right side of the page.
Tip: The file history is closed by default, and the drive is selected for the first time.
Step 3: Now you can see the files it backed up on the page, including libraries, desktops, contacts, and favorites. Create a new folder, then select Right-click to include in the library, such a library, desktop, contacts, and favorites are saved. Finally, click "Backup Now" to back up the data of Huawei MateBook X/X Pro.
For Win 10 User:
Step 1: Click the set icon after clicking the start menu.
Step 2: After entering Windows Settings, select the "Update & Security" option on the page.
Step 3: Select "Backup" on the left side of the page. In the right side point "Add A Drive", select the media you want to use the file history function.
Step 4: After clicking the name of the storage medium, the file history will start saving the data on the hard disk.
Step 5: You can click "More Options" to view the Backup Options screen, which lists the folders that are eligible for backup. You can add a folder you want to back up by clicking on "Add A Folder". Now you can back up the data in Huawei MateBook X/X Pro now on "Backing up" immediately.