Overview: This is an useful article that will tells the best way to fix 200+ iTunes errors for your iPhone, iPad and iPod Touch without losing your data.
iTunes is a free digital media player application developed by Apple for Mac and PC. It can manage and play digital music and videos. iTunes integrates media management, data synchronization, software platform, iOS system upgrade/downgrade/repair and other functions. Therefore, for iOS users, the application of iTunes is very extensive. However, when you use iTunes to synchronize, update or restore your iPhone, iPad or iPod Touch, various errors may occur. Common iTunes errors are as follows:
- iTunes error when syncing iOS devices
- iTunes error when backing up iOS devices
- iTunes error when updating iOS devices
- iTunes error when restoring iOS devices
- Cannot connect to iTunes Store on Your iOS devices
- iTunes error when connecting your iOS devices
- The error cannot be restored
- iTunes could not restore the iOS devices because an error occurred
- iTunes download error
- iTunes installer error
- iTunes installer has insufficient privileges
- Apple Mobile Device Service missing
- iPhone won't update on iTunes
- iTunes error 10
- iTunes error 9006
- iTunes error 4000
- iTunes error 3259
- iTunes error 3194
- iTunes error 3600
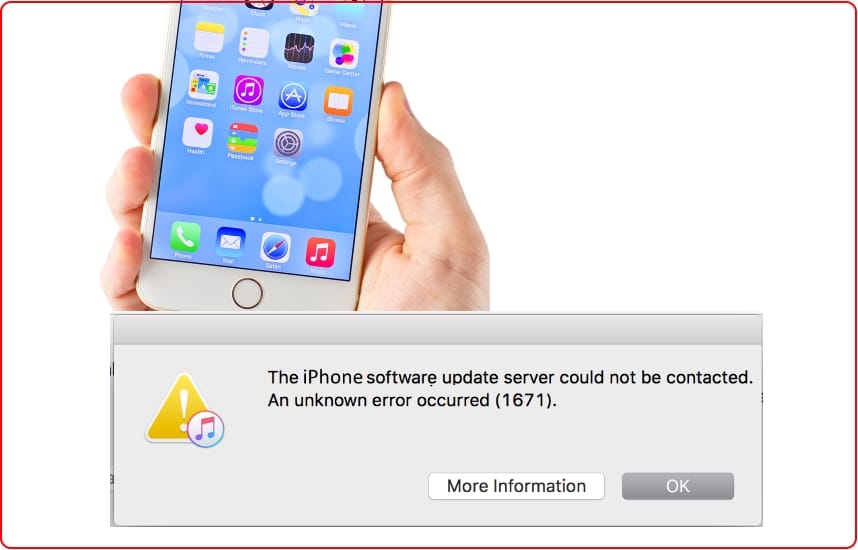
- iTunes error 1671
- iTunes error 3503
- Other iTunes errors or unknown errors
The above errors are only a small part of the process of using iTunes, and there are usually various reasons for these errors, such as third-party software may prevent communication between iTunes/other Apple applications and Apple servers/the resources on the PC, the iOS device is unexpectedly disconnected and communication stops, the USB interface is unstable or third-party software conflicts, and so forth. It is precisely because the reasons that cause iTunes errors are different, is there any effective and safe way to deal with iTunes errors that often occur? The answer is undoubtedly yes, you only need to use the iOS System Recovery tool.
iOS System Recovery is the most professional and secure iOS system recovery software that can helps you fix disabled, frozen or bricked iOS devices to normal, you are allowed to kick out of from recovery/DFU mode or red/black/white/blue death screen for you iOS devices, and one click fix almost all iTunes errors on your iPhone/iPad/iPod Touch. What's more, the program is perfectly compatible with almost all iPhone, iPad and iPod touch, and it is easy to use even for beginners and safe enough to cause no data loss.
Supported Devices
- iPhone: iPhone 12 Pro Max/12 Pro/12/12 mini, iPhone 11 Pro Max/11 Pro/11, iPhone XS, iPhone XS Max, iPhone XR, iPhone X, iPhone 8 Plus, iPhone 8, iPhone 7 Plus, iPhone 7, iPhone SE, iPhone 6s Plus, iPhone 6s, iPhone 6 Plus, iPhone 6, iPhone 5s, iPhone 5c, iPhone 5, iPhone 4S, iPhone 4, etc.
- iPad: All models of iPad Pro, iPad Air, iPad mini and iPad
- iPod: iPod touch 7/6/5/4/3/2/1
To begin fixing the system, you need to download and install the corresponding version of iOS System Recovery on your computer, after that, please follow the below steps to fix iTunes error for your iPhone/iPad/iPod Touch.


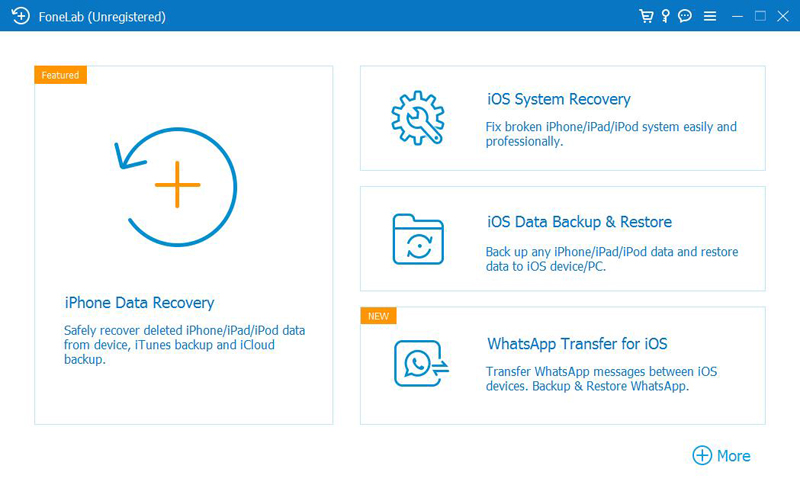
Step 1: Launch the software, then clcik on "More tools" in the left sidebar of the primary interface, then select "iOS System Recovery".
Step 2: Use a USB cable to connect your iPhone/iPad/iPod Touch to computer, and press "Start" to go on.
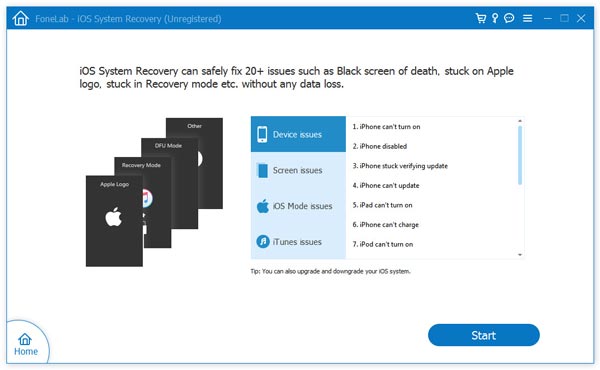
Step 3: Choose a repair type for your device, either "Standard Mode" or "Advanced Mode", after that, press "Confirm".

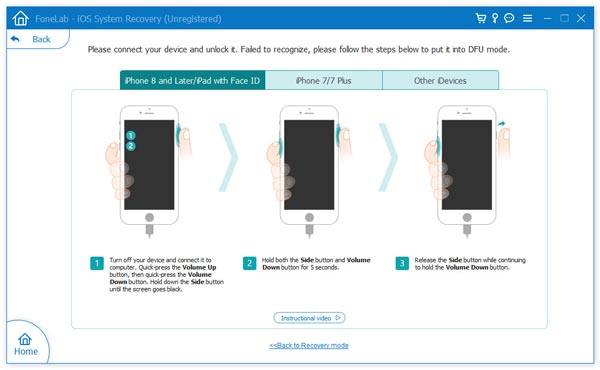
Step 4: Make sure that your device can be detected, if it's not recognized, please follow the onscreen guide to get your device enter the recovery mode.
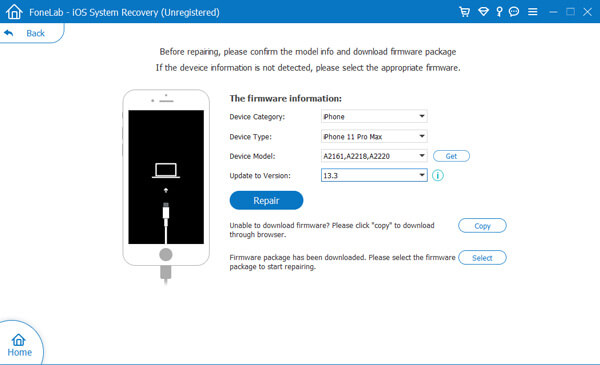
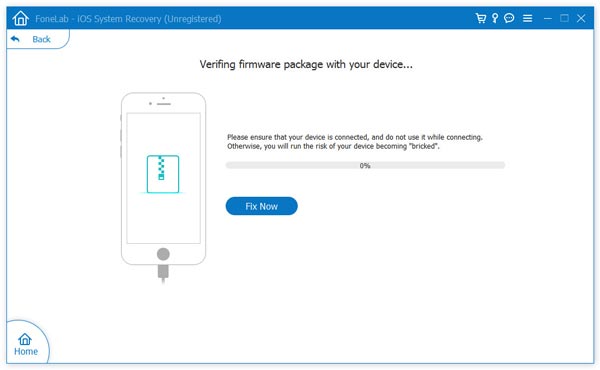
Step 5: Once your device is recognized, you need to confirm the firmware information of your device. If done, click on "Repair" to begin downloading the matched firmware package and fixing the system to normal for your device.
Tips: During this process, please do not disconnect your device until the system is completely repaired.
iOS System Recovery also well-known as a powerful data recovery program that can helps to restore deleted and lost data from iPhone/iPad/iPod Touch. If you find that your data lost after the system return to normal, then you can restore the lost data by using this program.
Directly Recover from Your iDevice
- Return to the homepage of the software, then click on "iPhone Data Recovery" and choose "Recover from iOS Device".
- Connect your device to computer via a USB cable, when it's detected, click on "Start Scan" to begin scanning your device for the lost data.
- When the scanning is complete, select the files that you need, and click on "Recover" to save them back to your computer.

If the above method does not work, and you happen to have an iTunes or iCloud backup file, then you can also try the following two methods.
Restore from iTunes Backup Files
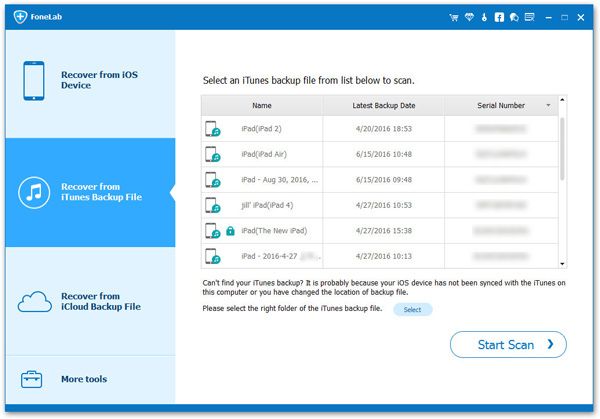
- Click on "iPhone Data Recovery" in the primary interface and select "Recover from iTunes Backup File".
- Select an iTunes backup file from the list and click on "Start Scan" to begin extracting the restoreable files from the selected backup file.
- Wait for the scan to finish, select the file that you want to get back, then click on "Recover" to save them back to your computer.
Restore from iCloud Backup Files
- Click on "iPhone Data Recovery" in the primary interface and select "Recover from iCloud Backup File".
- Enter your Apple ID and passcode to login to your iCloud account.
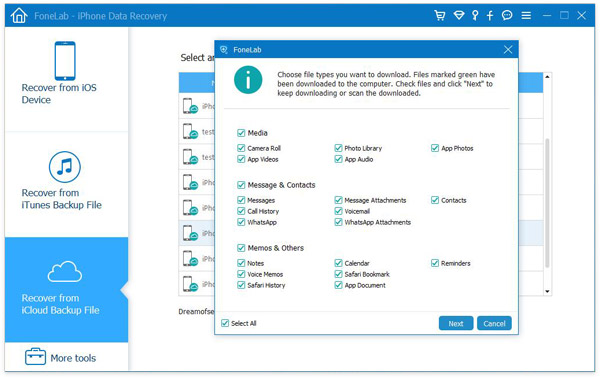
- Select an iCloud backup file from the list and press "Download", then select the file types as you like from the pop up dialog, after that press "Next" to keep downloading or scan the downloaded.
- Once the download and scan is complete, select the files those whatever you need, and click on "Recover" to save them back to your computer.