Overview: Overview: How do I recover lost contact numbers from iPhone 8/X/XR/11/12/13/14? If you're struggling with this, this guide will help you out.
How to recover deleted contacts from iPhone 8 /X/XR/11/12/13/14 Most of our contacts are workmates and friends and relatives, and losing their contact details can be a real problem.
For us, remembering people's contact details is something we always do. However, with the advent of technology, handwritten phone numbers and leaving each other mail addresses are a thing of the past. Everyone adds the contact details of new acquaintances to their mobile phones, a simple and convenient method, but a hassle if the data in the phone is lost. I'm sure we've all had the same problem, so here's a way to solve it.
Methods Outline:
Method 1: Recover contacts from iPhone 8 /X/XR/11/12/13/14 directly using iPhone Data Recovery
Method 2: Extracting lost iPhone data from an iTunes backup
Method 3: Recover iPhone 8 /X/XR/11/12/13/14 phone numbers with iCloud Backup
Mehtod 4: Retrieve your iPhone 8 /X/XR/11/12/13/14 data via iCloud Drive
Mehtod 5: Recover iPhone 8 /X/XR/11/12/13/14 phone numbers with the help of Google Drive
Method 1: Recover contacts from iPhone 8 /X/XR/11/12/13/14 directly using iPhone Data Recovery
iPhone Data Recovery is the first software I'd like to introduce to you. It's quick and easy to use and I'm sure you'll already know how to do it after reading the steps below.
One of the key features of iPhone Data Recovery is its powerful search engine, which is able to scan your device in depth, analyse the file types in the iPhone database and provide a full preview after a successful scan. In addition, users can use it to restore backup files from iTunes/iCloud in order to recover only call logs and not the entire backup overlay of the current content on the iPhone


Step 1: Install the software
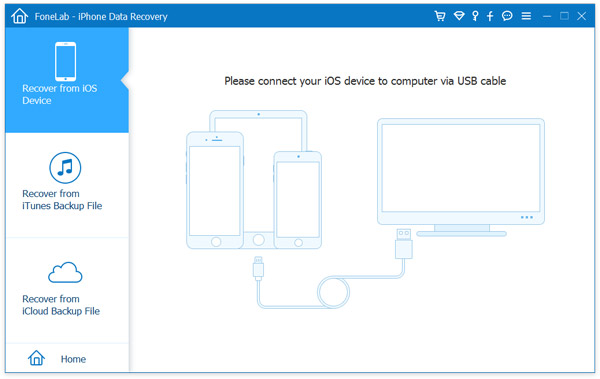
Install the iPhone Data Recovery software on your computer and select "Recover from iOS device" mode on the left-hand side of the software's home page.
Step 2: Connect your phone to your computer
Connect your iPhone to your computer with a USB cable and enable USB debugging, this is to allow the program to successfully detect your device.
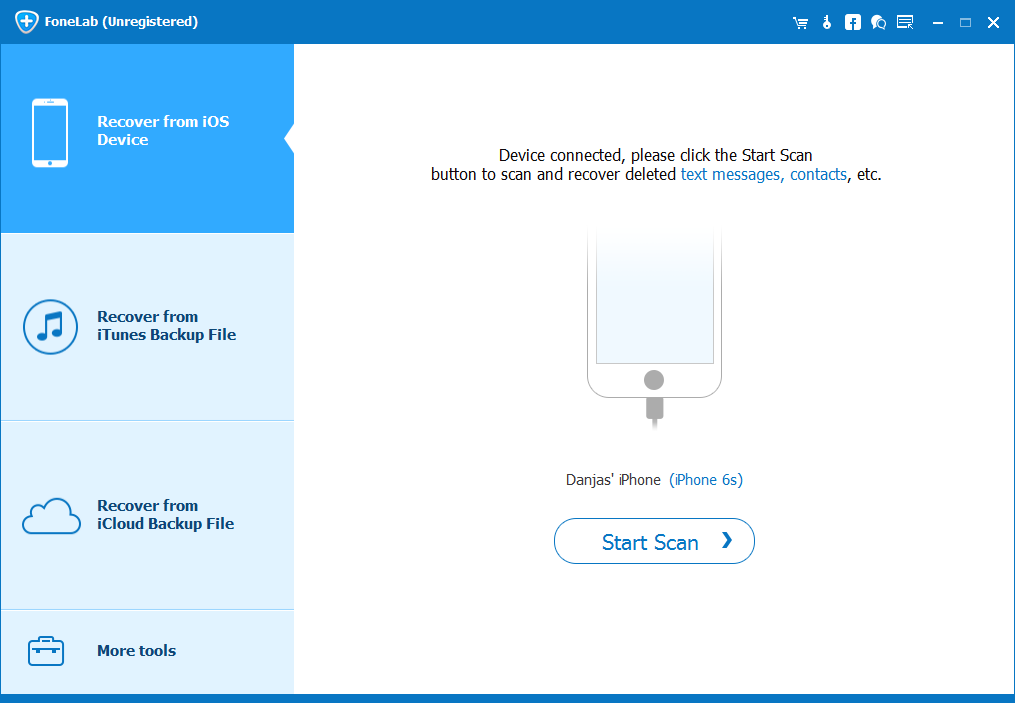
Step 3: Scan your iPhone
Once you have successfully connected, click 'Start Scan'. During the scanning process, if you see that the files you need have already been scanned, you can click "Pause" to end the scan.
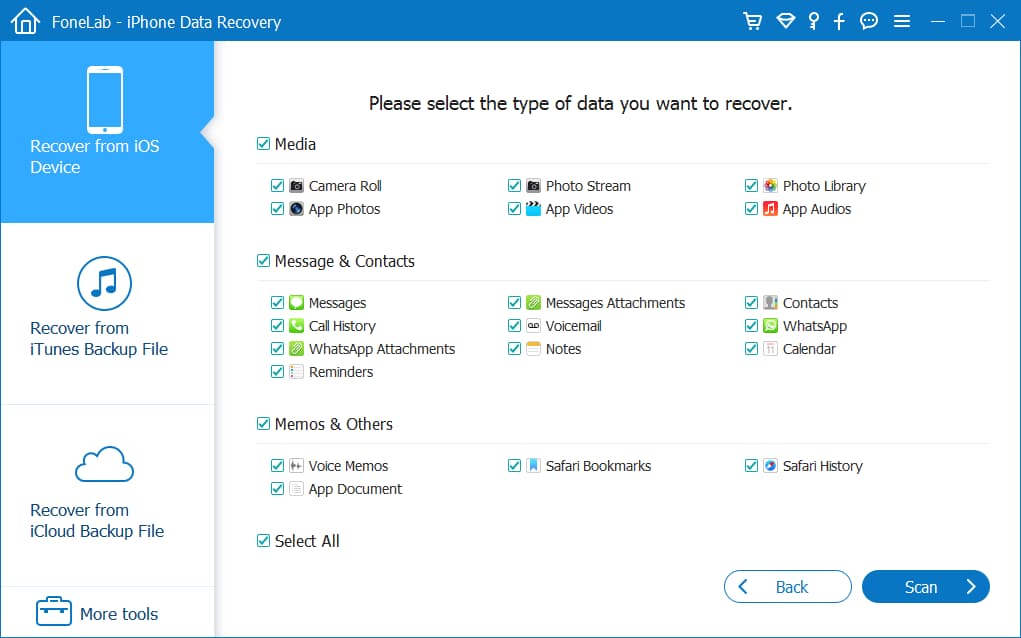
Step 4: Preview files
Once the scan is complete, all the results will be displayed in categories and you can preview almost all of the data. Select the parts we need and click on "Recover".
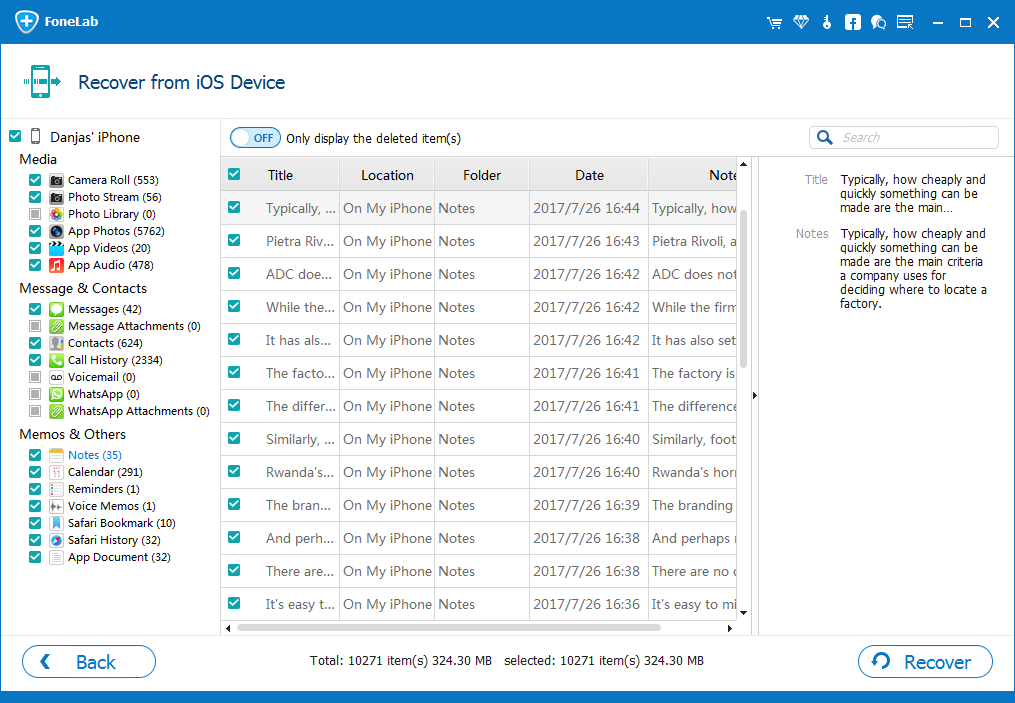
Note: When you click on "Recover", a window will pop up with two options "Recover to computer" or "Recover to device". To recover data to your phone, click on 'Recover to device'.
Method 2: Extracting lost iPhone data from an iTunes backup
If you have backed up your data in iTunes to your computer, then using iPhone Data Recovery will help you to easily retrieve your files.
Step 1: Select a mode
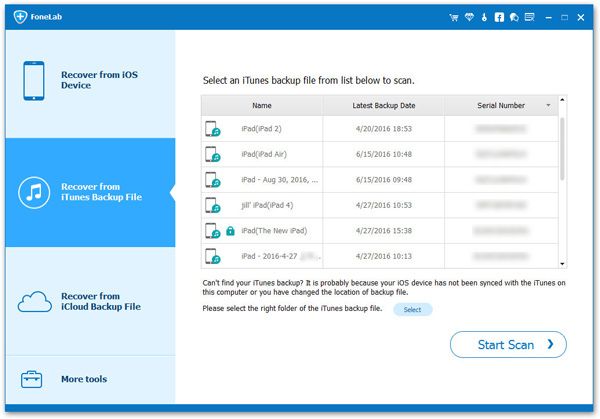
Select "Recover from iTunes Backup" from the program's home page. The iTunes backup files on your computer will be scanned and displayed in the box on the left.
Step 2: Scan the files
Select the backup file we need and click "Start Scan" and wait for the software to finish scanning.
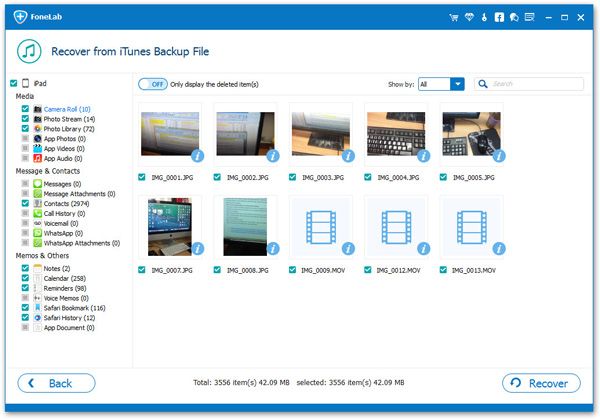
Step 3: Preview the data
Select the target files in the scan result, click "Recover" and the data will be restored to iPhone 8 /X/XR/11/12/13/14.
Method 3: Recover iPhone 8 /X/XR/11/12/13/14 phone numbers with iCloud Backup
One of the official methods Apple offers besides iTunes is iCloud, which can also help you easily retrieve lost data with the aid of iPhone Data Recovery.
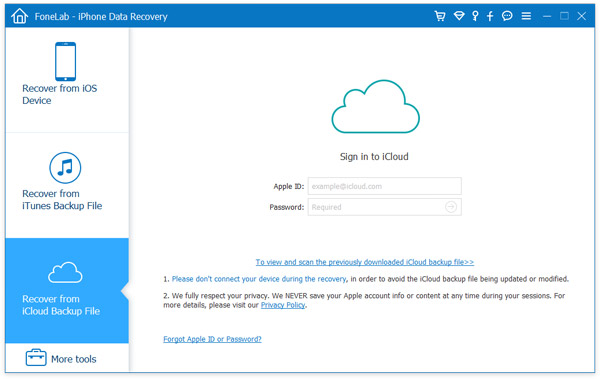
Step 1: Sign in to your account
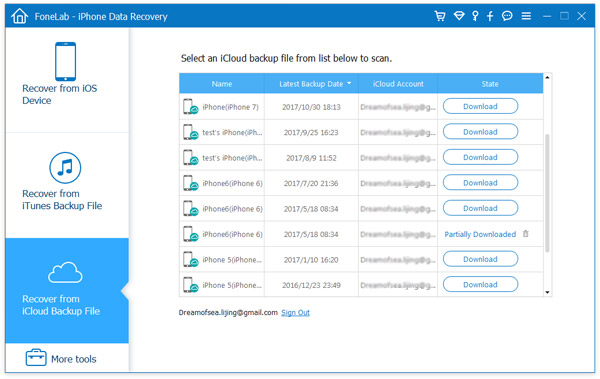
Select "Recover from iCloud Backup" mode on the front page of the software, then log in to your iCloud account.
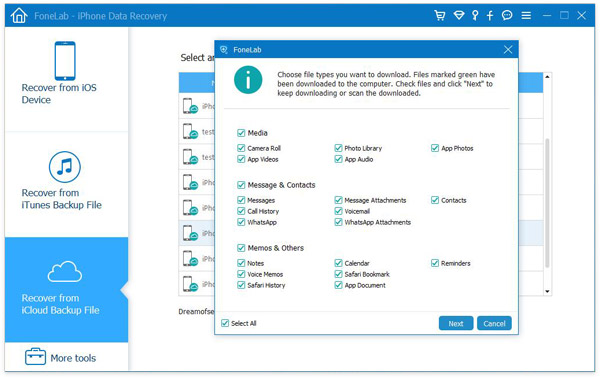
Step 2: Download the required file types
The software will find all the files you have backed up in your account, select the ones we need to download, then select the data you want to scan and click 'Next'.
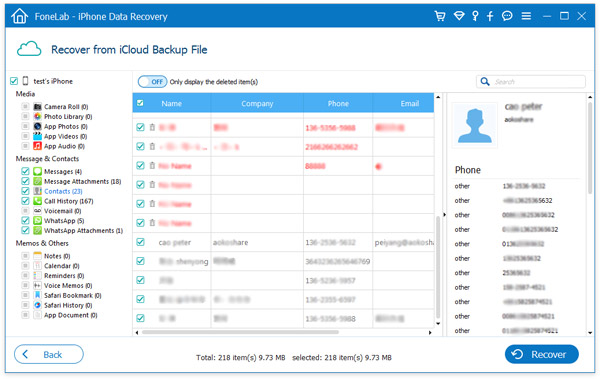
Step 3: Recovering files
Browse through the files, select the correct file and click 'Recover'.
Method 4: Retrieve your iPhone 8 /X/XR/11/12/13/14 data via iCloud Drive
If you don't have access to a computer at the moment, then this next method is perfect for you as it can be used on both your computer and your phone.
iCloud Drive is an Apple-owned product that allows you to work with selected files on your chosen device as you wish. With iCloud Drive you can securely store all your presentations, spreadsheets, PDF files, images and any other formats on iCloud.
It can be accessed on your iPhone, iPad, iPod touch, Mac or PC. You can get 5GB of iCloud storage for free.
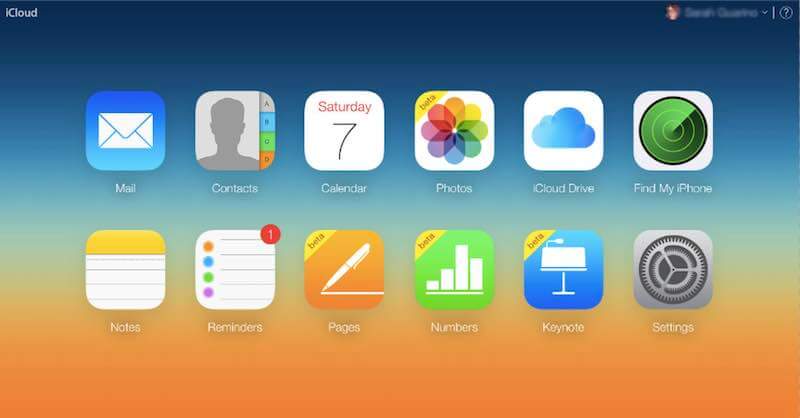
Step 1: Open iCloud Drive.
You can open the software iCloud Drive on your phone or open iCloud.com on your computer.
Step 2: Select Recently deleted
Select the button "Recently deleted" and we will see the files that have been deleted in the last 30 days.
Step 3: Recover data
Select the files we want to recover and click on "Recover" and the data will be returned to your phone.
Method 5: Recover iPhone 8 /X/XR/11/12/13/14 phone numbers with the help of Google Drive
Google Drive is also as good as iCloud Drive for backing up our data and restoring it. If you are used to using Google Drive to back up your data, then your lost files can also be recovered from here.
Google Drive is an online cloud storage service from Google that gives users 15GB of free storage space. If you need more, you can pay for a larger amount of storage. The Google Drive service will be available as a local client and as a web interface, similar to that of Google Docs. It will be available for Google Apps customers, with a special domain name. In addition, Google will provide APIs to third parties to allow people to save content to Google Drive from other applications.
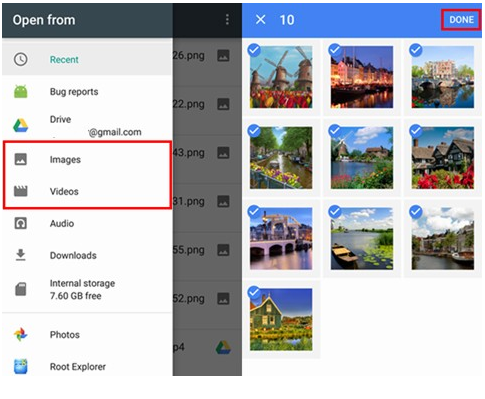
Step 1: Open Google Drive
We can choose to open Google Drive through our mobile app or browser.
Step 2: Sign in to your account
Log in to the account that we have backed up our files to.
Step 3: View files
Browse through all the backup files, find the one we need and click 'Download'.