Overview: If you want to replace Samsung note20 with a new mobile phone, you may need to consider the problem of data transmission. How can you solve this problem easily and quickly? Don't worry, the mobile transfer here can provide you with the simplest and most effective solution
Samsung has two popular and highly configured mobile phones, Note Series and S series, which we are familiar with. This year, Samsung released S20 series, followed by Note 20 series. Compared with S20 series, the configuration and performance of note 20 series may be upgraded and improved. According to relevant information, the configuration of Samsung note20 series has been basically determined, For example, in terms of core configuration, Samsung note20 series will be equipped with Qualcomm snapdragon 865 processor and support 5G network function. It is worth noting that note20 series will also be equipped with at least 12GB + 128GB memory combination. In appearance, it may adopt 2K 120Hz high refresh rate screen. And the screen share will be larger. The edge will be further reduced. The back of the phone will have a glass panel. In terms of photographing, Samsung Note20 series will be equipped with four rear cameras and one front camera, which are respectively 100 million pixels + 12 million pixels + 12 million pixels TOF + 8 million pixels + 40 million pixels. In other configurations, Samsung Note20 series will support wireless charging, fast charging, face recognition, NFC and other functions.
Browse the Android phone you are using now, you will find that there are a lot of different types of data stored in the phone, such as contacts, text messages,documents, photos, videos, applications, etc., which you must use in your daily life and work. Such as precious photos and videos, such as important files, contacts, call records, These data may be very common and important to you. Therefore, when you want to replace a higher configuration mobile phone, you need to transfer these large and complex data to a new mobile phone. For example, Samsung Note 20. Suppose you just want to replace this high configuration and high performance mobile phone now, how will you deal with the data on the old Android mobile phone. Because of the different types and storage locations of these data, there may be some problems, Because many data transfer tools are not compatible with all data types, or your phone. In order to solve these problems more easily, you need a simple and efficient software to help you, I will recommend you to use Mobile Transfer, with which you can easily transfer any data you need from Android to the new Samsung Note 20.
![]()
Best Method: Transfer data from Android to Samsung Note 20 with Mobile Transfer
Using this simple, effective and practical data transmission tool can help you solve problems with the highest efficiency. Mobile Transfer will be the best way to transfer data, which can greatly simplify the data transmission process. In just three simple steps, Mobile Transfer can scan your Android mobile data, and transfer a large number of different types of data at the same time, including contacts, documents, music, text messsges,call records, videos, photos and so on to your new Samsung Note 20. It is simple and easy to use, just a few simple steps, just a few minutes, You can easily solve the problem of data transmission that bothers you. You don't need to worry about compatibility, because it has strong compatibility, and it can be well compatible with almost all Android and iPhone phones, including Samsung, Huawei, LG, vivo, etc. This is a professional data transmission tool with simple operation, practical functions and strong compatibility. With it, you can easily transfer any data from Android mobile phone to Samsung Note 20 and any mobile phone you need. Importantly, it is safe and reliable, and you don't need to worry about any data being damaged or lost.
Models Included: Samsung Note 20/Note 10/Note 9/Note 8/Note 7/Note 6,etc.
Data Included: text messages, call history, contacts, photos, videos,files and more.


Part 1 Directly Transfer Data from Android to Samsung Note 20
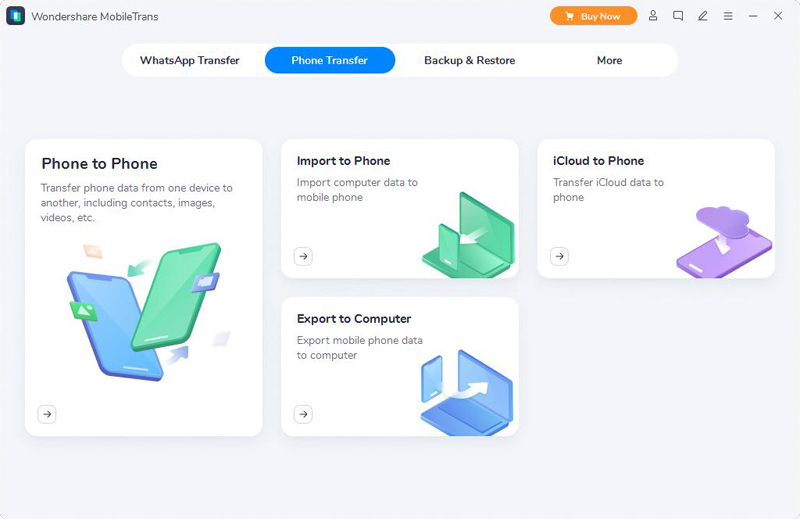
Step 1. To begin with,download and install the Mobile Transfer to your computer. After running it, you can see that there are four options in the page. Please select“Phone To Phone Transfer” then click “Start” to go on.
Step 2. Connect both of your Android and Samsung Note 20 phone to the computer via two USB cables.
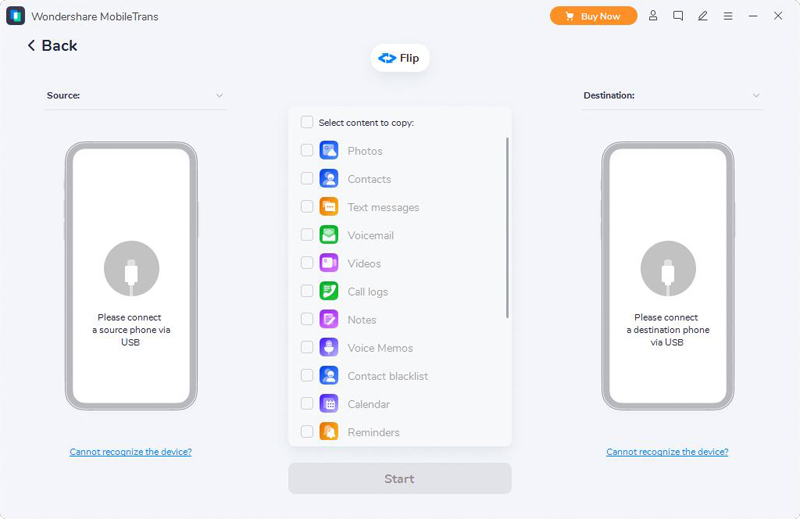
Note: When your two devices are recognized by the program, they will be displayed in the window. The Android phone will be displayed on the left (Source), and Samsung note 20 phone will be displayed on the right (Destination). If the positions of the two phones are reversed, you can click “Flip” to switch.Then just click “Start” to go on.
Step 3. Next, the data on Android will be scanned and displayed.You can preview and select the data you want,then click “Transfer" to transfer them directly to Samsung Note 20.When the transfer is complete, click “OK”.
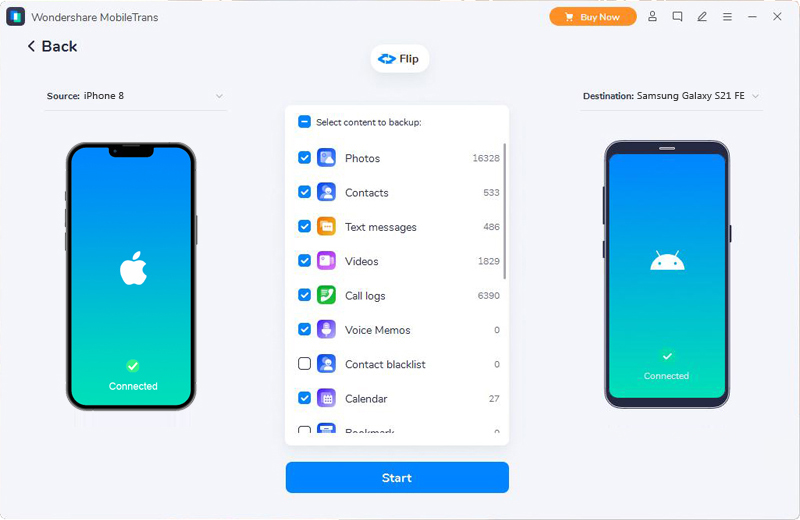
Note: In the process of transferring data, please keep two phones connected to your computer.
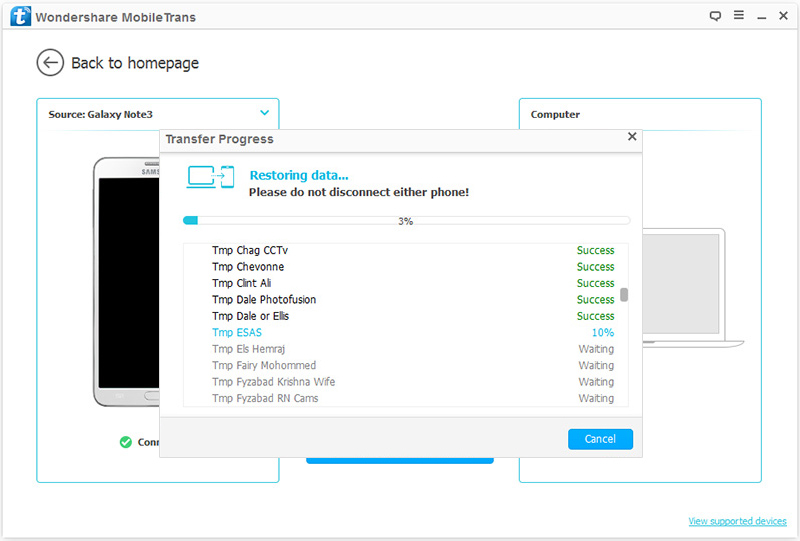
Part 2 Transfer Data from Backup to Samsung Note 20
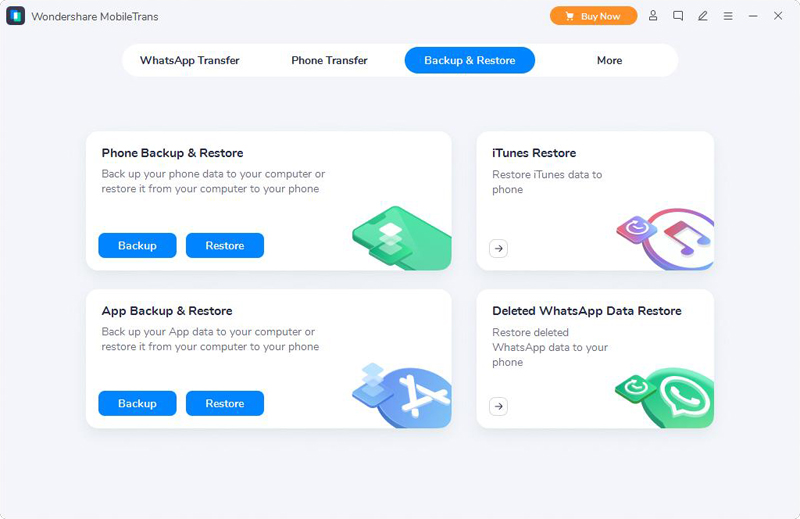
Step 1. Run Mobile Transfer on your computer,select“Restore From Backups”mode from the four options to choose“MobileTrans”.
Step 2. Then,choose the appropriate backup from the backup list on the left panel, and select the data you need then click “Start Transfer” to transfer the data from backup to Samsung Note 20.
![]()
Note: Do not disconnect the phone from the computer during the whole data transfer process.
Part 3 Transfer Data from Samsung Note 20 to Computer for Backup
Step 1: Return to the home page of Mobile Transfer and select the “Back Up Your Phone” option from the four options.
Step 2: Connect your Samsung Note 20 to computer using a USB cable, when it's detected, you can see it display on the left panel and the transferable files on it will be listed on the middle panel.
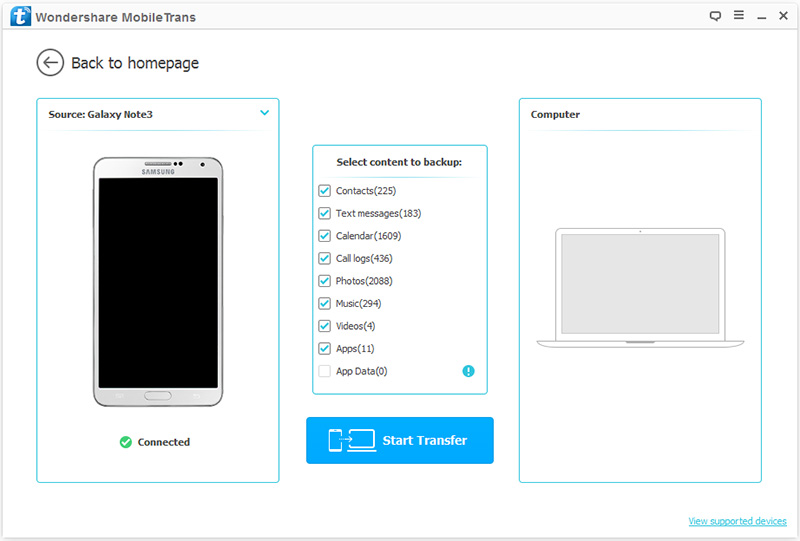
Step 3: Check and select the files you need, and then click “Start transfer” to sync them to your computer.
Note: After the backup is complete, you can click the pop-up window or go to settings to find the backup file, or you can change the path of the backup file there.