Overview: This is an article for you to detail how to transfer data contacts/messages/photos/videos from iPhone 7/8/X/11 to iPhone 12. Advantages of Mobile Transfer: Method 1: Transfer data contacts from iPhone 7/8/X to iPhone 12 via Mobile Transfer Method 2: Backup and restore data via mobile transfer. Method 3: Use Automatic Setup with your iPhone 12 Method 4: Use iCloud to sync data from iPhone 7/8/X to iPhone 12 Method 5: Use iTunes to transfer data from iPhone 7/8/X to the new iPhone 12
The iPhone 12 is an iPhone developed by Apple in the United States with a straight-edge design, 5G support, an A14 Bionic chip, and a dual-lens rear camera system. It supports BeiDou navigation. iPhone 12 is equipped with Super Retina XDR display with 2532x1170 resolution, 2 million:1 contrast ratio, 1200 nits brightness, and supports Dolby Vision and HDR 10. It uses a hexa-core A14 Bionic chip. 5G connectivity and supports more frequency bands than any other smartphone. Dual-lens rear camera system with 12MP ultra-wide and wide-angle lenses and 7-element lens with 27% better low-light performance. Drop resistance is improved by 4 times. The water resistance level is ip68. iPhone 12 has MagSafe feature for enhanced wireless charging using magnetic suction.
In the rapid update of electronic products, how to transfer/convert/sync data between various smartphones or tablets has become a question that more and more people are asking. How to choose the right method and tool for data transfer between devices is especially critical. The quality of the methods available on the web varies. Here we recommend you to use Mobile Transfer, one of the most professional data transfer software.
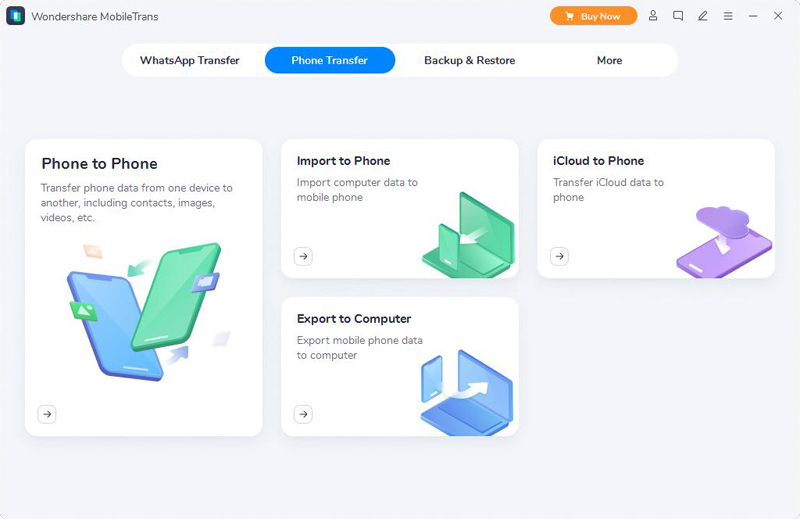
Method 1: Transfer data contacts from iPhone 7/8/X/11 to iPhone 12 via Mobile Transfer (Recommend)
Method 2: Backup and restore data via mobile transfer.
Method 3: Use Automatic Setup with your iPhone 12
Method 4: Use iCloud to sync data from iPhone 7/8/X/11 to iPhone 12
Method 5: Use iTunes to transfer data from iPhone 7/8/X/11 to the new iPhone 12
The best tool for transferring data contacts from iPhone 7/8/X to iPhone 12
Mobile Transfer can help you transfer various types of data between various devices very well.
Easily transfer data between various platforms, such as Android, Symbian, BlackBerry, WinPhone and iPhone.
Supports various types of data such as Contacts, Text messages (SMS), Call logs, Photos, Music, Videos, Apps…
Supports data transfer between two devices on various types of networks such as Vodafone, NTT docomo, T-Mobile, Sprint, AT&T, Verizon.
100% guaranteed no data loss during data transfer
Erase data from your device
Supported Devices: Samsung, HTC, LG, Sony, Google, Vivo, Oppo, Huawei, Motorola, ZTE and other smartphones and tablets.
Supported Data: Photos, videos, contacts, bookmarks, calendar events, call logs, messages, apps……


Note: The data types supported by iOS to iOS are contacts, messages, calendar, photos, music, videos.
Step 1: Click the screen link above to download mobiletrans, install it successfully and run it.
Step 2: Connect both phones to your computer at the same time via USB connection cable, after successful
connection, the corresponding instructions will pop up on the page, follow the instructions to complete USB debugging.
Step 3: Connect the two phones to the corresponding sender and receiver locations correctly. You can click "flip" to change the location of both phones.
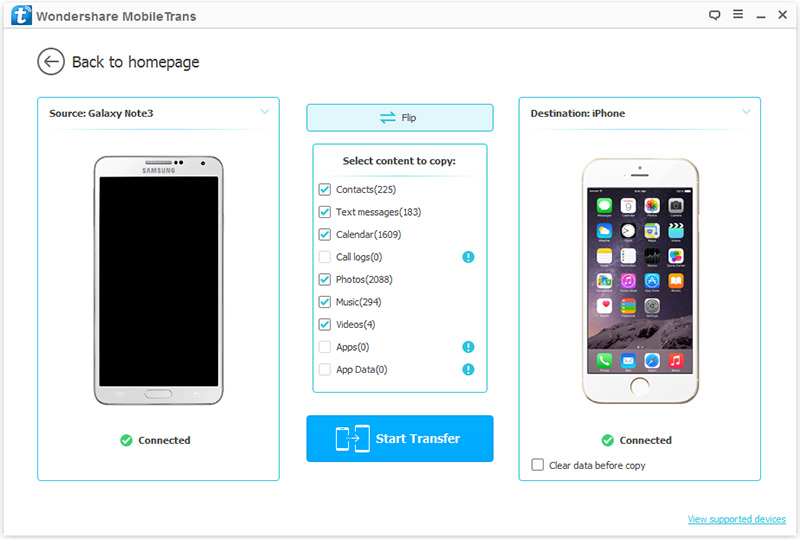
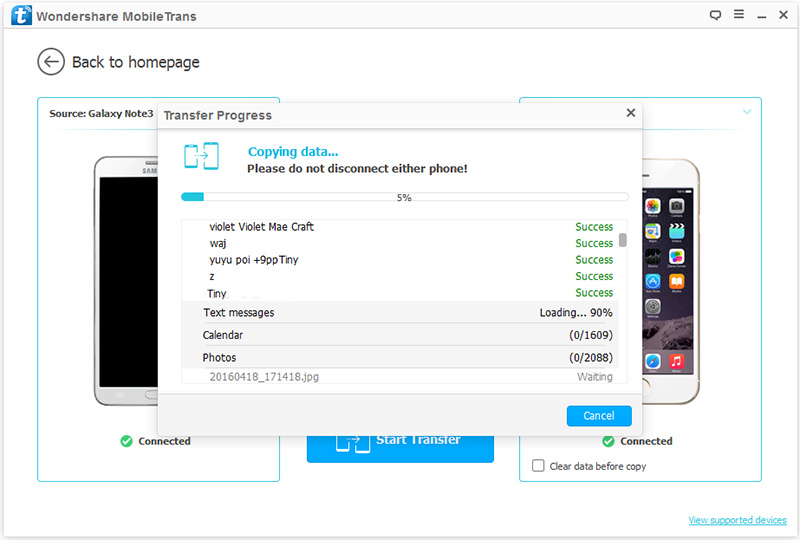
Step 4: Select the appropriate data type in the list and click "start transfer".
This method requires two parts of operation, you need to backup the data in iPhone 7/8/X first and then restore the data to iPhone 12.
Part 1: Backup iPhone 7/8/X/11 data
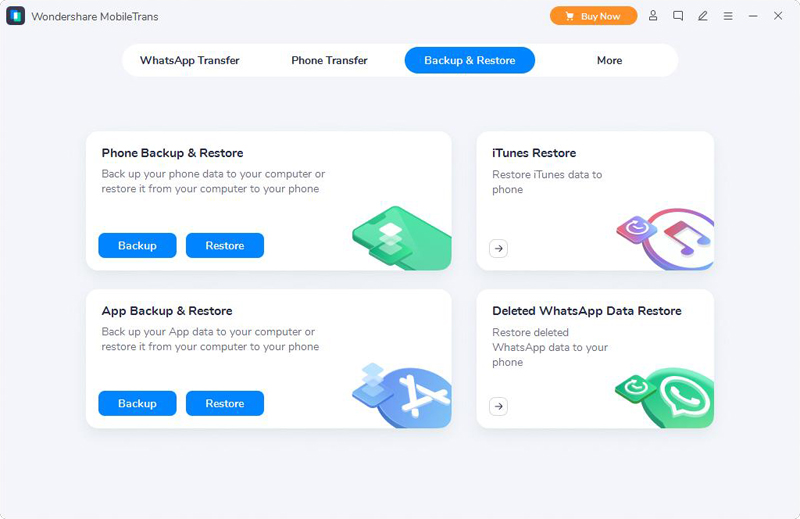
Step 1: Run Mobile Transfer and click "Backup Your Phone" on the home page.
Step 2: Connect your iPhone 7/8/X/11 to the computer with a USB cable. In the USB debugging page that pops up, follow the instructions to complete USB debugging.
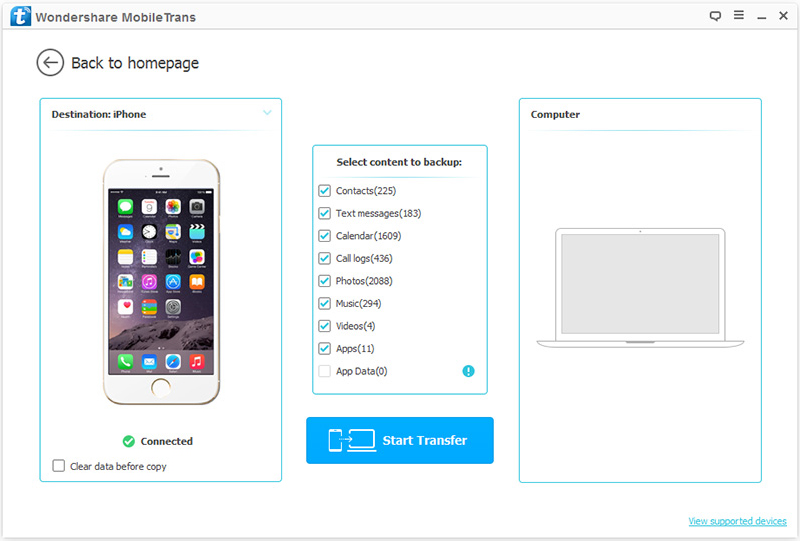
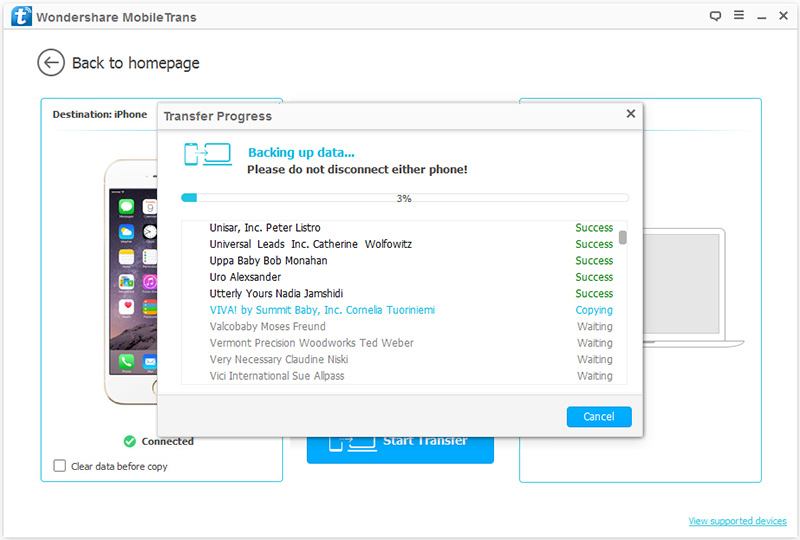
Step 3: Select the files you want to backup. Click "Start Transfer".
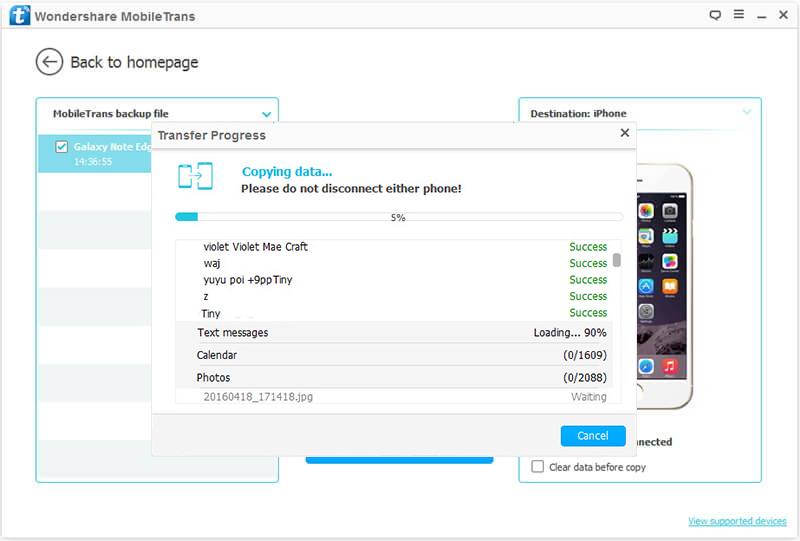
Part 2: Migrate the backup data to iPhone 12.
Step 1: Go to "Restore from backup" and "mobiletrans" on the software homepage in turn.
Step 2: Connect your iPhone 12 to your computer with a USB cable.
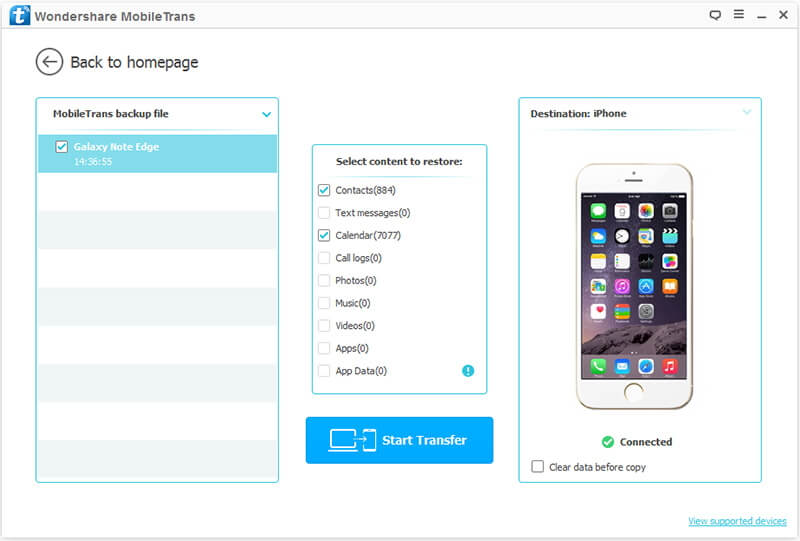
Step 3: Select the backup files from the list on the left, and then select the content you want to restore to your iPhone 12 from the middle list. Click "Start Transfer".
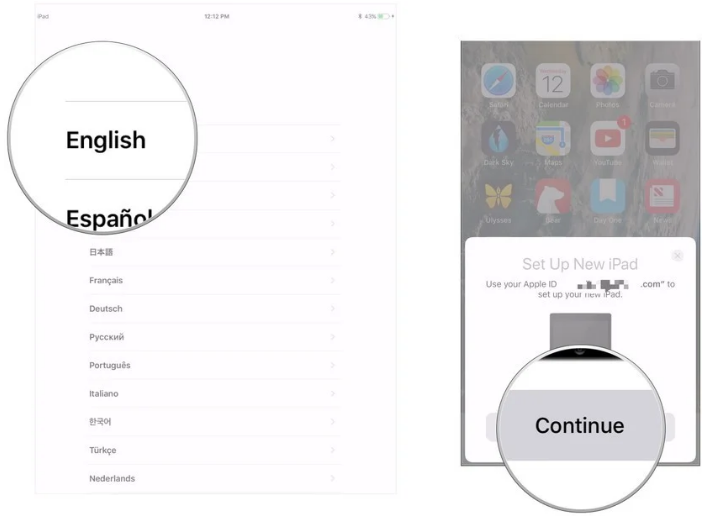
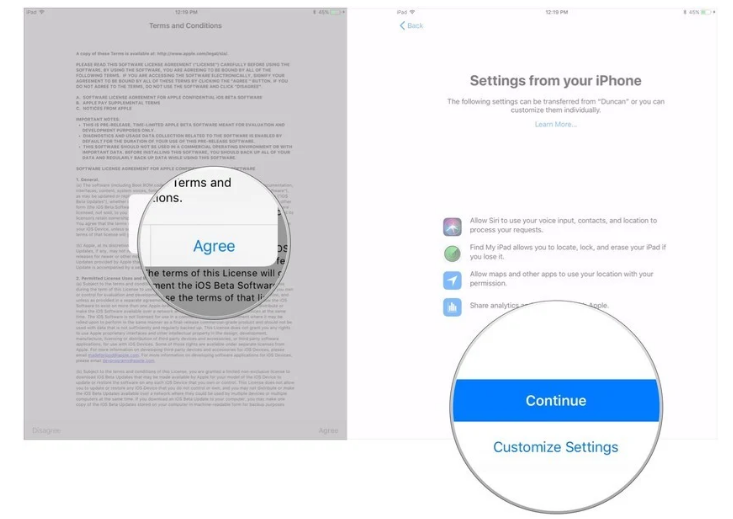
Step 1: Turn your iPhone 12 on and the screen will pop up to set up your new iPhone with Apple ID page, click "Continue".
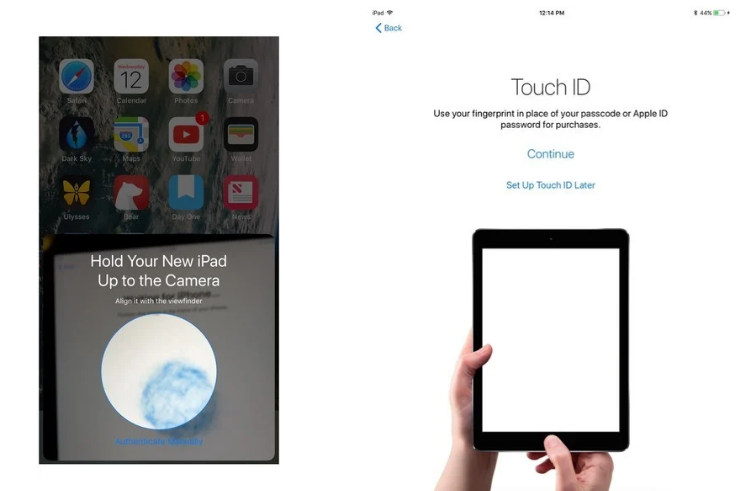
Step 2: Make your old iPhone camera viewfinder frame to scan right in front of the image that appears on iPhone 12.
Step 3: Enter your old device's passcode on iPhone 12.
Step 4: Set up iPhone 12 Touch ID or Face ID.
Step 5: Choose whether to restore from a recent backup to a new iPhone 12 if this option appears on.
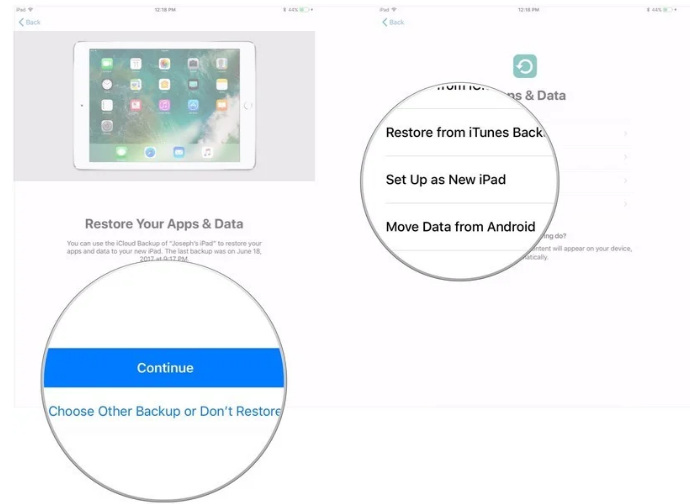
Step 6: Choose to restore data from iCloud or iTunes backup to iPhone 12.
Step 1: Connect your iPhone 7/8/X to WiFi.
Step 2: Open the phone settings, click "Your Name" and iCloud in turn.
Step 3: Select iCloud backup and click "Back Up Now". Wait for the backup to finish
![]()
When the backup is done, you can start to set up your phone and sync your data to iPhone 12.
Step 1: If you are opening iPhone 12 for the first time, first select your country and language.
Step 2: Follow the on-screen instructions to connect to WiFi, set up Touch ID or Face ID, and then create a passcode.
Step 3: When you reach the "Apps & Data" page, select "Restore from iCloud backup“ and sign in with your Apple ID.
Step 4: Select the backup you just completed on iPhone 7/8/X.
Step 5: Wait for the data transfer to complete.
Make sure you have the latest version of iTunes installed on your Mac or PC.
Step 1: Run iTunes. connect your iPhone 7/8/X to your computer using a data cable.
Tip: If there is a pop-up message asking for access to your iPhone, follow the on-screen instructions.
Step 2: Select your iPhone on the top toolbar.

Step 3: If you want to increase the security of your data backup, you can check the Encrypted backup. Then create a password for your backup.
Step 4: Click Backup Now.
![]()
When the backup is done, you can transfer the data from each backup to iPhone 12
Step 1: Turn your iPhone 12 on. The "Hello" screen appears.
Step 2: Follow the on-screen instructions and go through the settings step by step until you reach the "Apps & Data" screen.
Step 3: Click Restore from iTunes Backup.
Step 4: Connect your iPhone 12 via data cable to the computer you used to back up your previous device.
Step 5: Open iTunes and select your new iPhone.
Step 6: Click Restore Backup and select your most recent backup.
Step 7: If your backup is encrypted, enter your passcode.
Step 8: Please do not disconnect iPhone 12 from iTunes and WiFi until the transfer is complete.