Overview: Need to create a how-to presentation for your video teaching or your work? Want to save interesting videos to share with your family and friends? Want to record your game experience and share it on related sharing platforms? There is no better way to accomplish all of the above ideas than recording your screen. And in this article we will tells you some simple ways to capture videos and record screen on your Windows and Mac computer.
For some simple things, maybe we only need a simple description to fully understand, but for some relatively complex situations, even if we use a larger description, it may not be completely understood by others. Imagine you need to show someone how to use an unfamiliar image processing software, or how to use the company's newly built or purchased online management system. Or as an excellent game player, you need to show your fans how to pass levels, how to use the characters and equipment in the game, etc., in order to win the game.
Obviously, this is not a simple sentence or two, or a random operation or two can be achieved. If you want your audience to understand your thoughts clearly and vividly, you only need a simple and efficient screen recording tool to help you record all these operations to show your audience. Next, we will show you in detail how to record screens on Windows and Mac computers and output them into mainstream video playback formats.
- Part 1 Record Your Computer Screen on Windows 10 with Xbox Game Bar
- Part 2 Record Your Screen on Mac Computer for Free
- Part 3 Record Your Windows/Mac Computer Screen with Best Screen Recorder
In the following we will use some screen recording tools, which have been applied to many areas in life, such as recording short videos, TV shows, desktop activities, tutorials, video conferences, etc., all of which need their assistance.
Part 1 Record Your Computer Screen on Windows 10 with Xbox Game Bar
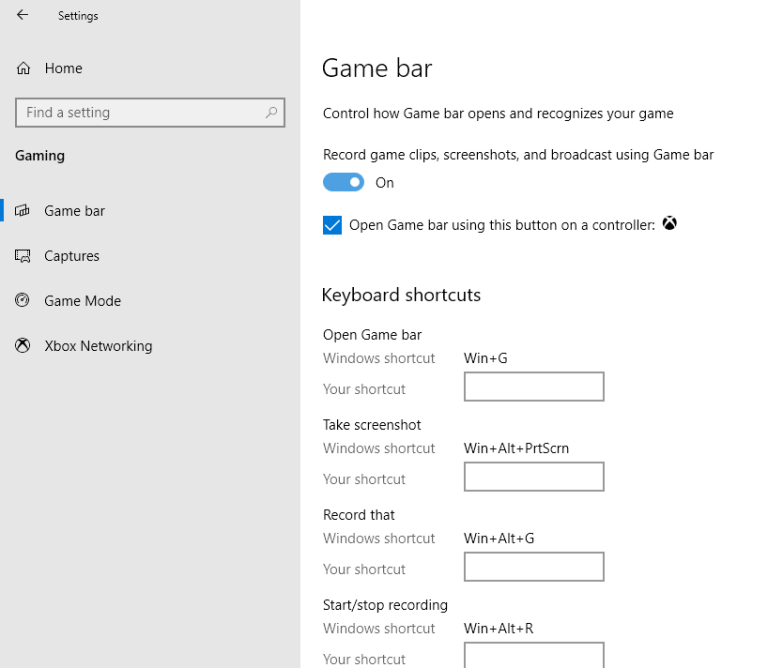
Xbox Game Bar is a game monitoring software built into the Windows 10 system. During the game, it can be turned on through the Xbox handle. You only need to press the round button on the handle to turn it on. On the Xbox Game Bar page, you can check the CPU and GPU usage , You can use functions such as recording screen, capturing screen, and selecting sound source, etc..
While you're playing a game or opening some browser pages, you can follow the below steps to create a screen recording.
- Type “Xbox” into the Windows search bar and launch the app.
- Press the "Win + G" on your keyboard to open Xbox Game Bar.
- Then the Game Bar dialog will pop up, tap on "Yes, this is a game" to go on.
- To begin the recording, tap on the "Start Recording" button or press "Win + Alt + R" on your keyboard.
- To end the recording, please tap on the red recording bar that will be on the top right of the program window. If it disappears on you, press "Win + G" again to bring the Game Bar back.
- All the recorded videos be saved in MP4 format and stored under the Videos folder in a subfolder called Captures. You can also find them in the Xbox app under the Game DVR menu, where you can trim a video and share it on Xbox live (if it's a game).
Tips: If you just need to capture a screenshot for your game and Webs on Windows 10, please press "Win + Alt + PrtScrn" on your keyboard to select the area that you wish to capture, and release.
Part 2 Record Your Screen on Mac Computer for Free
As the same, your Mac also own its build-in screen recording tool on macOS Mojave and higher. To create a screen recording on your Mac is even easier than on your Windows, because you don not need to toggle a setting to set it up. Next, let's show you how to do so.
Use the Screenshot toolbar
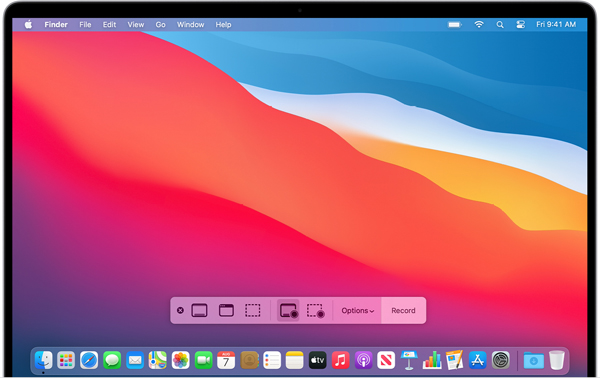
- To open Screenshot toolbar, please press "Shift + Command + 5" on your keyboard, then the capture controls bar will pop up on the bottom of the screen, you can record the entire screen, or just record a selected portion of the screen, and trim, share, and save the video using this controls bar.
- Tap on the "Options" button to choose the save path for your recording and initiate a countdown timer for recording. Ensure to check the related option if you want to use the Mac’s microphone to record your own voice or external audio.
- You are allowed to tap on "Record Entire Screen" or "Record Selected Portion" option to begin recording your screen according to your need.
- Click any screen or tap on "Record" in the onscreen controls to start recording your screen. And press the "Stop Recording" button in the menu bar or press "Command + Control + Esc" on your keyboard to stop recording.
- After stop recording, there is a thumbnail of the video displays transitorily in the lower-right corner of your screen, you can click to play it in your default video player, or directly drag the thumbnail to move the screen recording file to another location as you like, such as to a document, an email, a Finder window, or the Trash.
Use QuickTime Player
You can also record your Mac screen by directly use the QuickTime Player. QuickTime Player is a powerful, scalable, and flexible digital media production platform designed by Apple for its users. Its main functions include video playback, screen recording, video editing, video export/sharing, and so on.
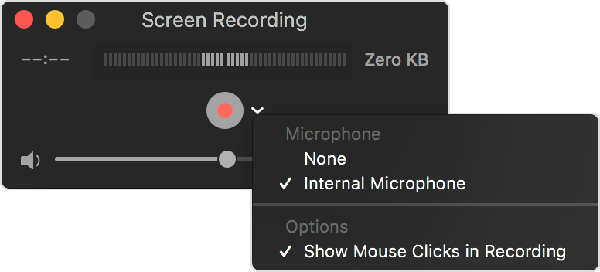
- Launch the QuickTime Player from your Applications folder, then tap on File > New Screen Recording from the menu bar.
- To start recording, click the "Record" button, then you can click anywhere on the screen to begin recording the entire screen, or directly drag to select an area to record, then click "Start Recording" within the selected area.
- To stop recording, click the "Stop" button in the menu bar or press "Command + Control + Esc" on your keyboard.
- After stop recording, QuickTime Player will automatically show you with the screen recording file. You can now play, edit, or save/share to anywhere according to your need.
Note: The first time you use the QuickTime Play to record your screen, you need to grant the permission for recording from System Preferences.
Part 3 Record Your Windows/Mac Computer Screen with Best Screen Recorder
The two methods of screen recording introduced above have certain limitations. In the next method, we will introduce a very useful and reliable third-party screen recording software, which is Best Screen Recorder.
Best Screen Recorder is a popular and all-in-one screen recording tool that is perfectly compatible with almost all Windows and Mac operating systems. With help of this software, you can capture video/audio/online tutorial, record your computer screen, take high-quality snapshots and more with ease. If you want to record meetings, movies, calls, tutorials, TV shows, songs, take snapshot or others, or record your online games including XBox, BattleGrounds, OverWatch, World Of WarCraft, LOL and more on computer, Best Screen Recorder can help you do it within a few clicks.


Before using the below method, please click to download a corresponding version of this recording software, then install and run it on your computer.
Record Your Screen or Videos
Step 1: Tap on "Video Recorder" on the homepage of the software.
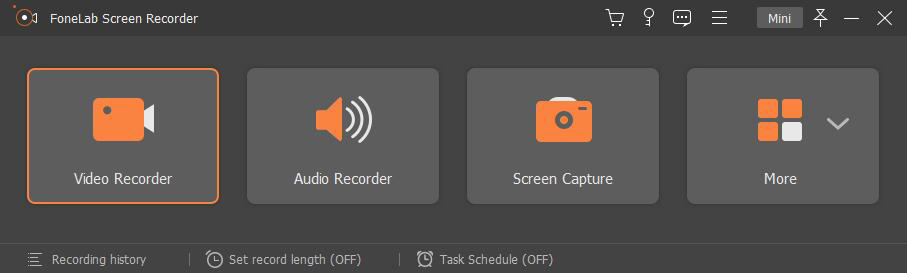
Step 2: Choose either "Full" or "Custom" option to select the area for recording, then enable or disable Webcam/System Sound/Microphone as you like. and tap on "REC" button to start recording.
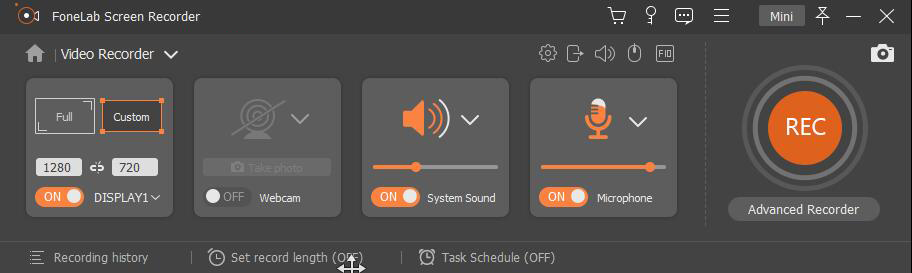
Step 3: To stop the recording, just tap on the stop icon on the taskbar.

Tips: You are allowed to make a schedule for the screen recording process, and take screenshots for some important points and add annotation elements during the screen recording process.
Record Your Audios
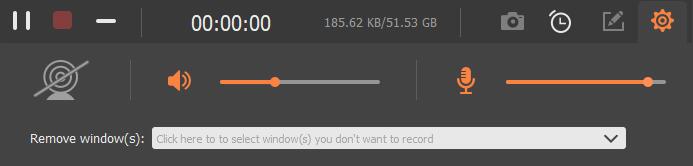
Step 1: Return to the primary interface and tap on "Audio Recorder", if you only need to record sound from your computer, just enable the "System Sound" option, as for video meetings or wanting to add your narration, you have to enable both "System Sound" and "Microphone".
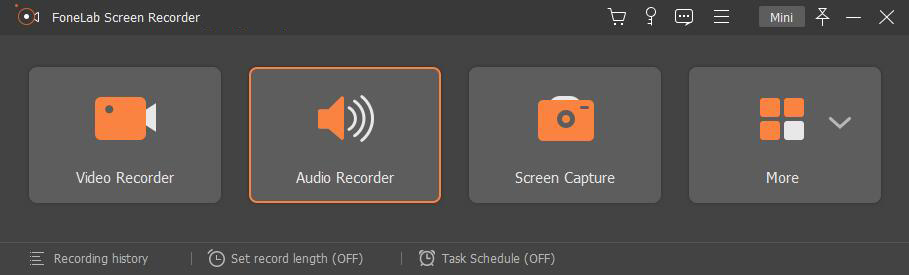
Step 2: After adjusting the volume, tap on the "REC" button to begin recording your audio.

Step 3: To end, just press the stop icon and save the recording file to your computer.
Capture Screenshots
Step 1: Go back to the main interface, and choose "Screen Capture".
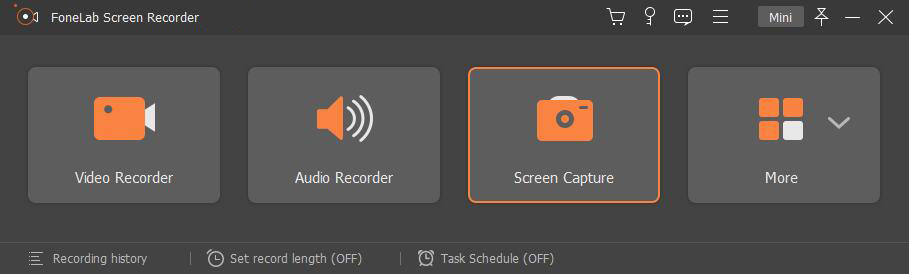
Step 2: Choose the screenshot area as you like, after that, you are allowed to use the built-in tools to edit the screenshot, including add text, arrow, line and other drawing panels.
Step 3: If done, press the save icon to save the snapshots to specified folder.
