Overview: Part 2: How to record screens on Mac laptops
" -I want to explain a new product of my company, so I need to record a video, how do I do screen recording on Windows?"
"-I want to do a screen recording on a Mac so I can make a video and upload it to YouTube, how do I do that?"
What is the best tool for screen recording on a Windows or Mac laptop?
Whether you want to screen record on your laptop, capture video, audio, screenshots, game footage on your laptop, or even annotate the captured video and edit your video, Screen Recorder is always your first choice. With screen recorder, you can record your screenshots in just a few simple steps.
Guideline List:
Part 1: How to record screens on Windows laptops
Method 1: Screen Recording with Screen Recorder (Recommend)
Method 2: Screen recording on a Windows portable computer using the Xbox game bar
Method 3: Using PowerPoint for screen recording
Part 2: How to record screens on Mac laptops
Method 1: Record Screen on Mac with Screen recorder
Method 2: Use Screenshot toolbar for screen recording on Mac laptops
Method 3: Use Quick Time for screen recording on Mac
Method 1: Screen Recording with Screen Recorder
Screen recorder can capture all kinds of images, audio recordings and screenshots of your computer, and thanks to the excellent Blu-ray real-time encoding technology of screen recorder, the captured images and audio are kept in high quality.


The main advantages of Screen Recorder
- Allows you to capture video, audio, online tutorials, etc.
- You can choose your own screen size before recording the screen
- Various video or audio formats
- Support you to edit the recorded video or audio
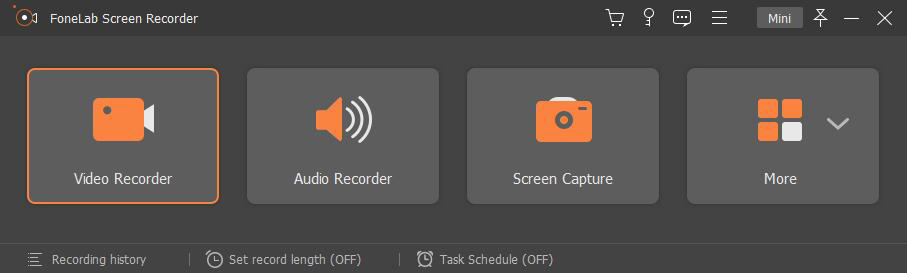
Step 1: After successfully installing Screen Recorder, run it. Select the "Video Recorder" option.
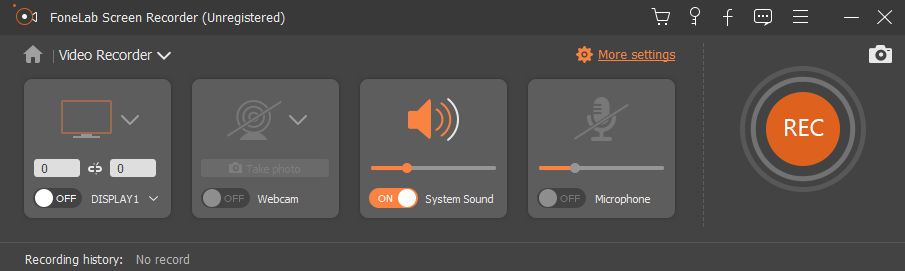
Step 2: You can choose full screen or customize the recording window, adjust the pixel and frame rate to determine the actual screen area you need to record.
Step 3: If you only need to record the system sound, just turn on the system sound. If you are recording a video tutorial or video conference, you need to turn on both system sound and microphone, and then adjust the volume level.
Step 4: You can also set the recording duration. When the above settings are done, click "REC" to start recording.
Step 5: During the recording process, you can add annotations to the recorded video, such as text, annotations, and you can also change the color of these annotations to show them.

Step 6: If you want to stop the recording, click the Stop button on the taskbar. Then save the recorded video to the path you want.

Method 2: Screen recording on a Windows portable computer using the Xbox game bar
Windows comes with a screen recording tool, Xbox Game Bar, which can help us to capture the game screen, in addition to some other software videos, but it should be noted that it does not support some applications, such as file manager and desktop, which is a major disadvantage compared to FoneLab Screen Recorder This is a major drawback compared to FoneLab Screen Recorder. Here are the steps to use Xbox Game Bar for screen recording
Step 1: Press "Win+G" on your keyboard at the same time to open Xbox Game Bar toolbar.

Step 2: Check the box "Yes, this is a game", whether you are recording your screen inside the game or not.
Step 3: Click the "Start Recording" button, or use the shortcut "Win+Alt+R" to start recording.

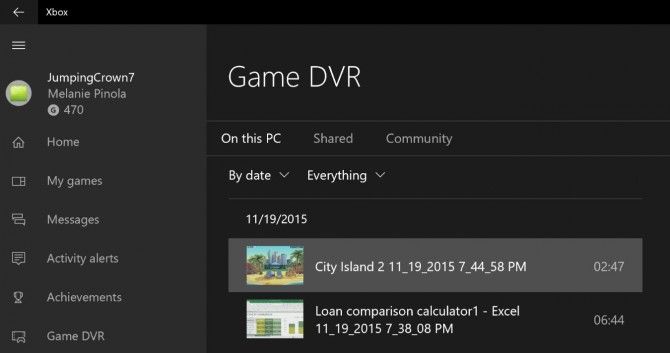
Step 4: The status bar will show your capture status, click the Stop button to stop screen recording. You can click "Capture" > "Show all captures" from the toolbar to find your recorded video.
Tip: Press the shortcut key "Win+Alt+PrtScn" to take a screenshot of your screen.
Method 3: Using PowerPoint for screen recording
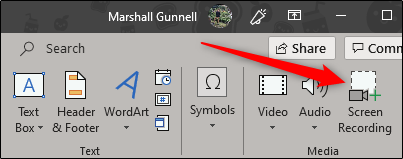
Step 1: Open PowerPoint, select the "Insert" tab and choose "Screen Recording".
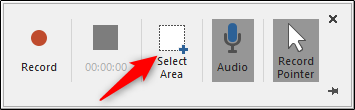
Step 2: Select "Select Area" and determine your screen recording area by dragging your mouse.
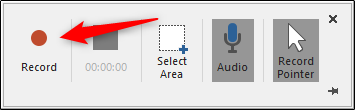
Step 3: Click the red dot "Record" button, or press "Window + Shift + R" to start recording.
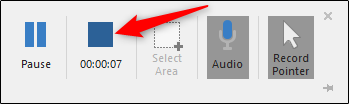
Step 4: Click "Stop" to end the recording.
Step 5: When finished, you can save the recording as a video file (separate from the PowerPoint presentation)
Method 1: Record Screen on Mac with Screen recorder
Screen Recorder for Mac is one of the most worthy software for screen recording on Mac. It can meet our needs for various functions of video, audio and screen snapshot capture.
- Customize the screen size according to your needs
- Customize your personal hotkeys to capture videos more easily
- Rely on Blu-ray real-time encoding technology to ensure your excellent image and audio quality.
- Support editing of your captured Mac screen.
Step 1: Click the third icon to confirm the screen range, you can choose full size, fixed area or custom area.
Step 2: If you need to record video tutorials, or video conferences on your Mac, you need to turn on the second camera icon to activate Face Time HD Camera.
Step 3: You can also click the audio icon to choose to record audio sources outside the system.
Step 4: Click "REC" to start recording. You can edit the video using the tools provided for you in the toolbar.
Tip: During the recording process, you can also click the camera button to take a screenshot of the screen.
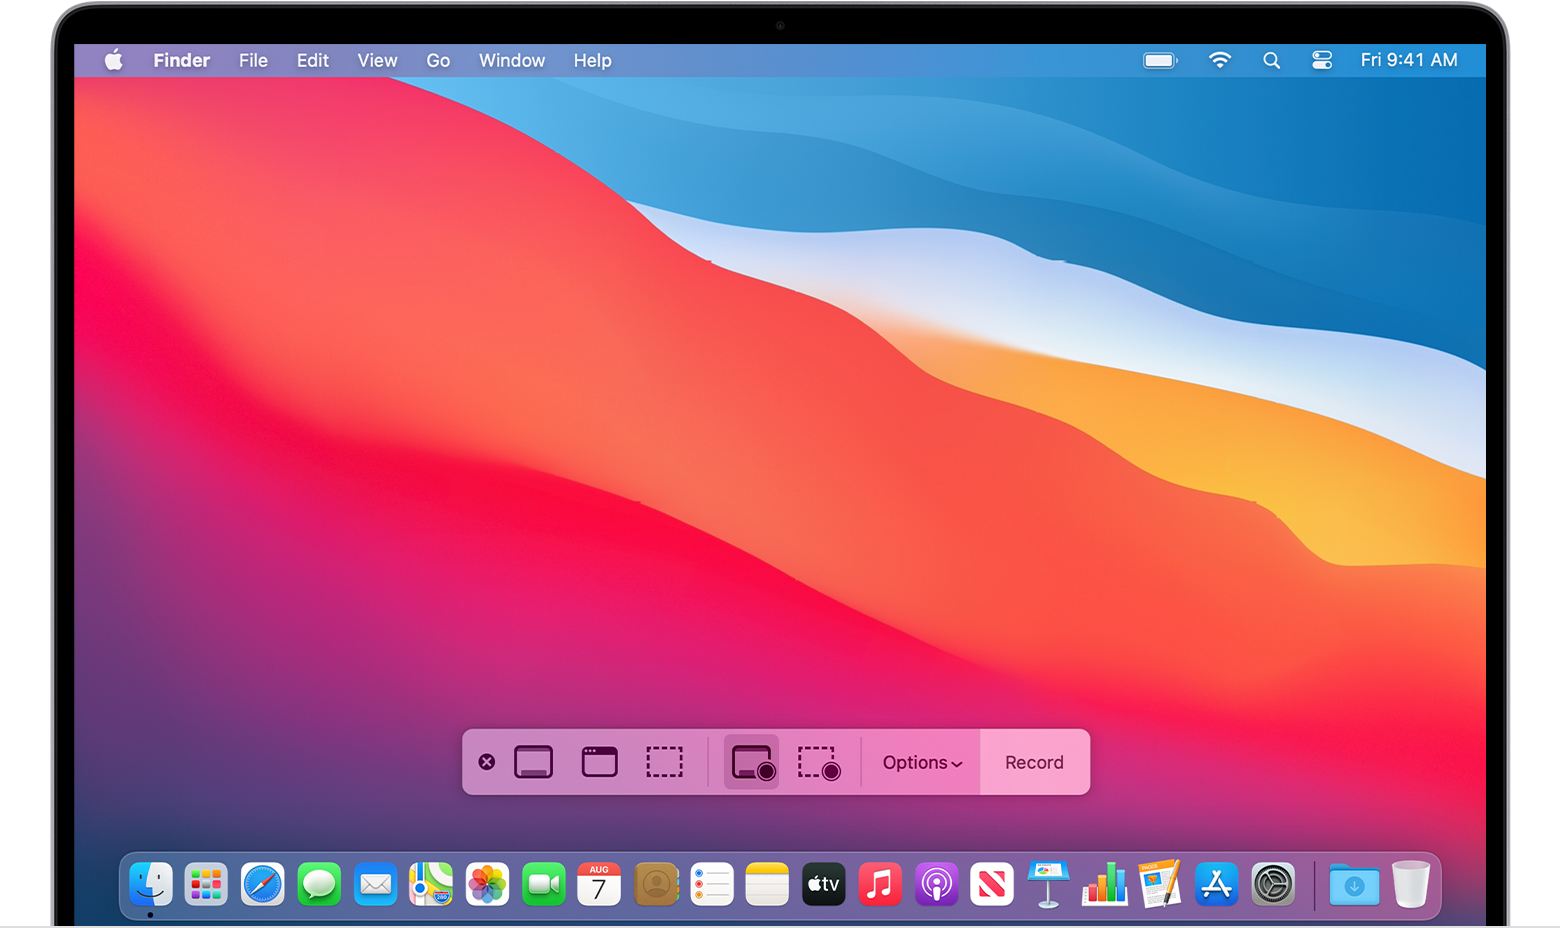
Method 2: Use Screenshot toolbar for screen recording on Mac laptops
Step 1: Press Command + Shift + 5

Step 2: Choose whether you want to record the whole screen or a specific area. Click "Record" to start screen recording.
Step 3: Click Stop to end the recording. Your recording will be displayed as a thumbnail in the bottom right corner of the screen, click on the thumbnail to choose where to save the video
Method 3: Use Quick Time for screen recording on Mach
Step 1: Open the "QuickTime Player" and select "File" > "New Screen Recording" from the menu bar
Step 2: Click the red button to start recording
Step 3: Click the Stop button in the menu bar to end the recording, or press "Esc" on the keyboard.
Step 4: After the recording is finished, Quick Time Player will automatically play your recorded video.
