Overview: Looking for a simple but effective way to restore your lost and deleted data from Mac mini? This article will give you a positive answer. Besides, you can learn how to back up data from Mac mini with ease.
Mac Mini is an excellent desktop computer. Thanks to the eighth generation of Intel 4-core, 6-core processors and Intel UHD Graphics 630 graphics processors, Mac mini has more computing power to handle various industrial tasks. It is equipped with Apple T2 security chip, which provides a solid foundation for encrypted storage and secure startup functions.
But compared to mobile phones, the use of Mac mini is relatively short. Loss of mobile phone data is common in daily use, so is it common to lose data on Mac mini? When Mac mini also encounters data loss problems, the impact may be significant. Because Mac mini stores more information about work. Moreover, it is easy for us to accidentally delete data on Mac mini. So what can we do when we need to recover deleted or lost data from Mac mini?
Best Data Recovery has powerful search function so that it can help us easily retrieve lost data. In addition, its use steps are simple and easy to grasp. And the software will not leak any data on the computer to other servers, which is worthy of our trust. In terms of recoverable data, it can recover documents, images, videos, audio, email and other useful files. The software can be used in all kinds of computers, hard drive and flash drive, such as Apple, Suamsung, Dell, Intel, Microsoft, and so on.


Whether you data lost due to accidental deletion, formatted partition, hard drive problem, RAW hard drive, crashed computer or other reasons, this file recovery software can always be your best choice.
Part 1 Directly Restore Data from Mac mini without Backup
Step 1. Download the software for free on your Mac mini. Then start it after installation as required.
For Mac running Mac OS X El Capitan or later, you need to disable System Integrity Protection firstly for using this data recovery software on your Mac. Check the details here: How to disable System Integrity Protection.
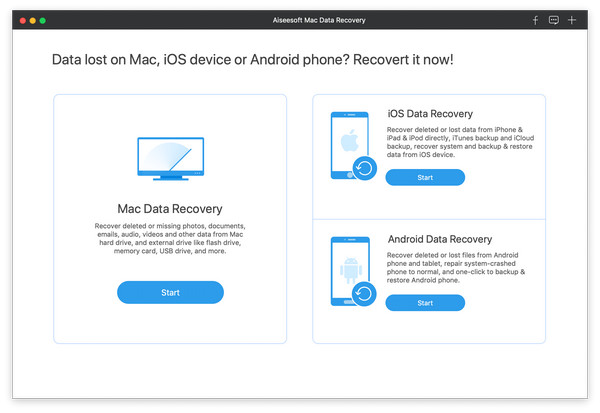
Step 2. Then you can see three items. You need to click "Mac Data Recovery". Next, you need to check the data type and disk drive for scanning. Specific choices depend on your needs. After the check is completed, click "Scan".
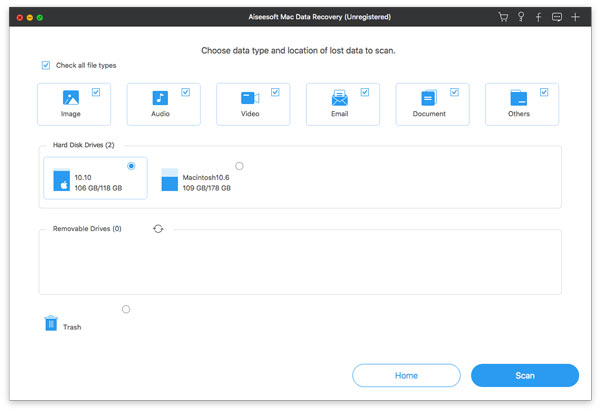
The software also allows you to scan external drives on the Mac, such as camera cards, flash drive cards, etc.
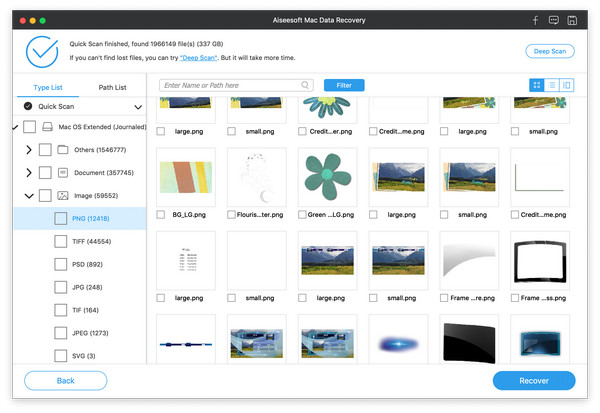
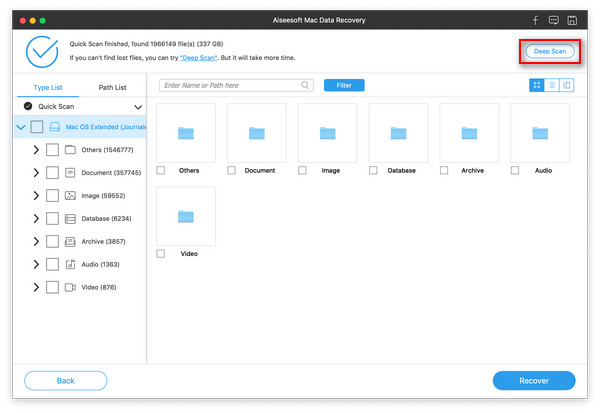
Step 3. When the scan is complete, all the results are listed. There are two lists in the left pane. You can click on them to see the details. Then select the data you need to recover and click "Recover".
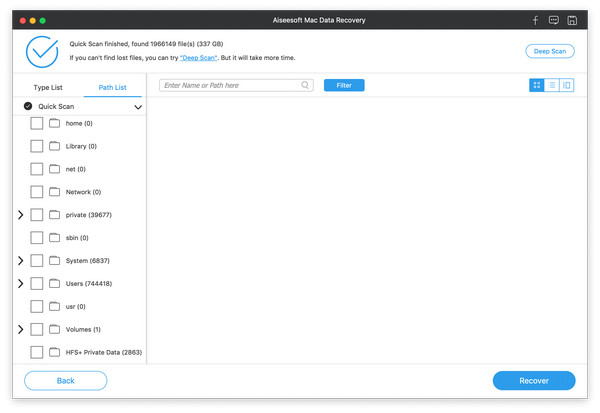
In the upper right corner, there is a button called "Deep Scan". When you can't find the file you need, you can click it to scan Mac mini again. Of course, it will take more time.
Part 2 Back Up Your Data from Mac mini to External Hard Drive with Time Machine
Although there are a lot of data recovery softwares on the market, but develop good backup habits, back up your data regularly, so you can use your Mac mini more confidently.
Step 1. Connect a external hard drive to your Mac Pro via a data cable (usually a USB, Thunderbolt, FireWire drive or eSATA cable, etc.).
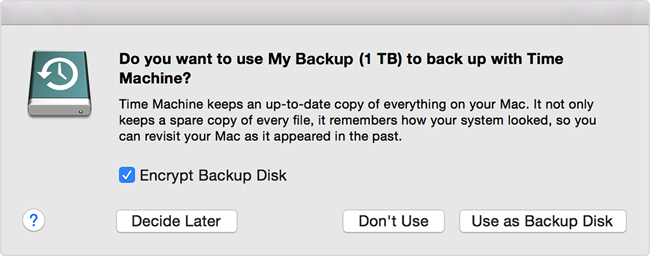
Step 2. When your external hard drive is detected, by defult, a dialog will pop up automatically and ask you whether want to use this external hard drive to back up with Time Machine. Now, please click on "Use as Backup Disk" to go on.
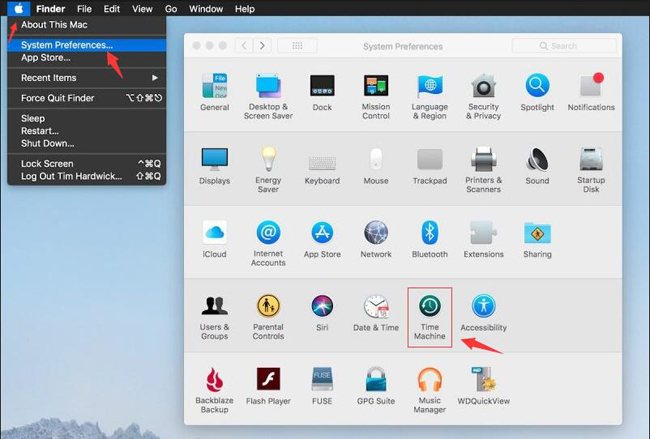
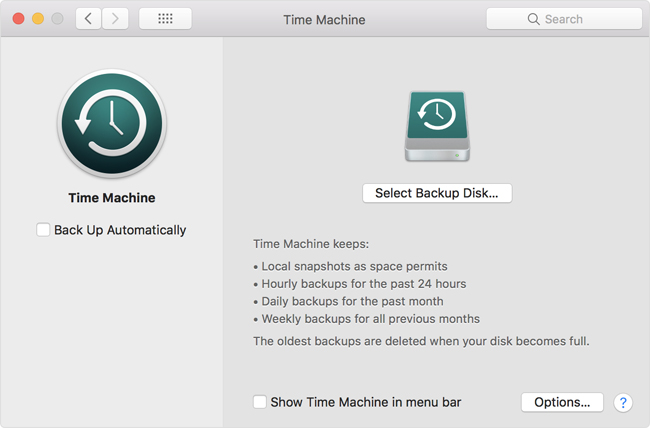
If Time Machine doesn't ask to use your drive, please go to Apple menu > System Preferences…, then click on "Time Machine".
Tips: For older versions of the macOS system and Time Machine, please make sure the "Time Machine" button is enable.
Step 3. Skip to next screen, please click "Select Backup Disk…" (or Select Disk, or Add or Remove Backup Disk).
Step 4. Select a available external hard drive as you like. Then tick the "Encrypt backups" box according to your need and click on "Use Disk".
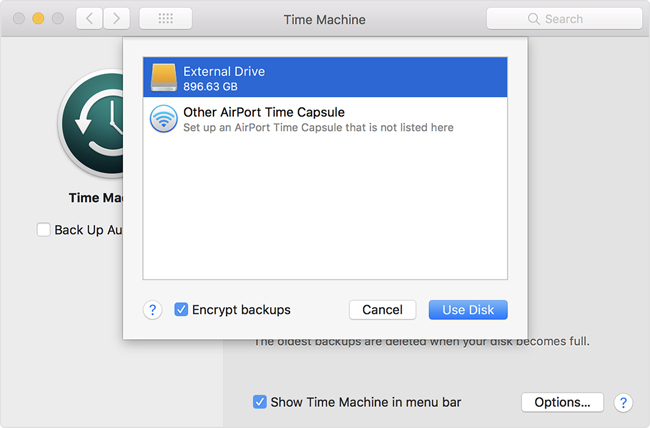
Note: You will be asked to erase the disk first if the selected disk is not formatted as required by Time Machine, just click "Erase" to proceed. If done, the program will automatically back up your Mac Pro, the time it takes to back up will depend on the amount of data you have, please wait patiently until the backup is complete.
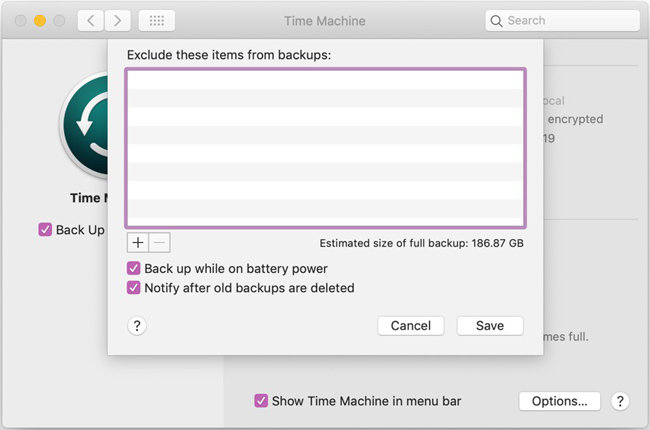
Besides, you can click "Back up automatically" in the main window of Time Machine to activate automatic backup option, and click "Options…" > click "Back up while on battery power" > click "Notify after old backups are deleted" > click "Save".