Overview: This paper is divided into 5 parts, and introduces the methods of transmitting and recover data to vivo iQOO Neo7 from different aspects. It covers the synchronization and recovery of photo albums, audio, applications, calendars, memos and other data.
In terms of screen, iQOO Neo7 is equipped with a 6.7-inch AMOLED straight screen, with a screen resolution of 2K level, and supports a high refresh rate of 120Hz. In terms of camera, iQOO Neo7 is equipped with 50 million IMX766 main camera, 13 million super wide-angle lenses and 5 million black and white lenses. Hardware iQOO Neo7 is equipped with Snapdragon 8Gen1 flagship chip. In terms of battery, iQOO Neo7 has a built-in 5000mAh battery and supports 120W wired fast charging.
iQOO Neo7 has excellent performance, whether it is a screen, camera, battery or chip, and many users will be attracted to buy it. After starting iQOO Neo7, facing the empty new machine, I believe many users will expect to use simple and fast methods as possible to synchronize their desired data to it. This article has prepared the following tutorial, which is long. Please read it patiently.
First of all, a software called Mobile Transfer is introduced to users. Its main function is to scan the original device and synchronize pictures, files, schedule information, messages, memos, applications, etc. to another device for users. The function partition of the home page is clear at a glance and easy to use. Users don't have to worry that Mobile Transfer will reveal their privacy. All the transmitted data is only visible to the users themselves.


Part 1 Transfer Data from Android/Samsung to vivo iQOO Neo7
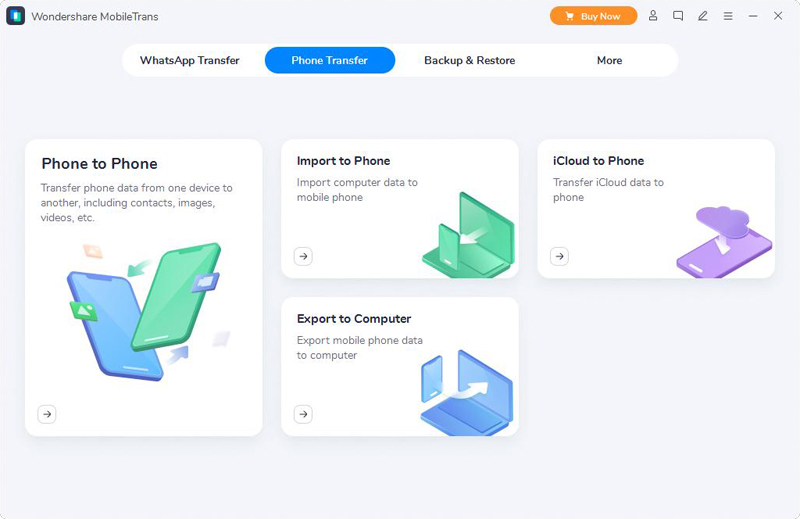
Step 1. After running the mobile transfer software on your computer, click the "Phone Transfer" option on the initial page of the software. Click the "Phone to Phone" option on the next page.
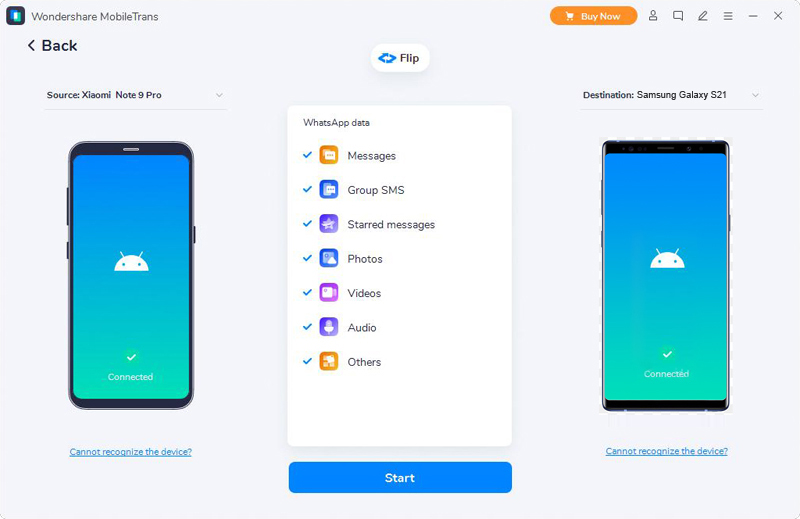
Step 2. Connect the original Android/Samsung device and vivo iQOO Neo7 to this computer with their USB cables.
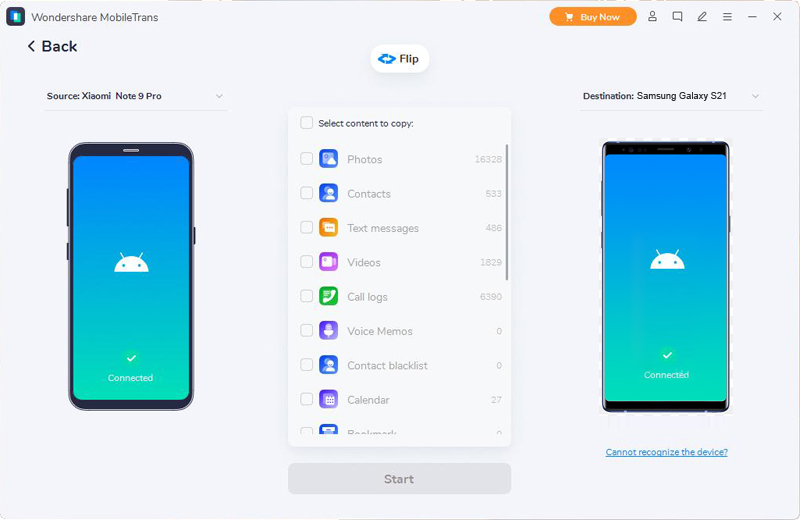
Tip: You can click the "Flip" button to swap the tracks of the original device and the vivo iQOO Neo7 to make sure they're all on the right track for the next data synchronization to go smoothly.
Step 3. Select the data that you want to synchronize with vivo iQOO Neo7 and click "Start" to begin the data synchronization.

Mobile Transfer can also obtain backup information after the mobile phone is connected to the computer by USB cable, and present the existing backup files to users for synchronization to iQOO Neo7.
Part 2 Sync Data from Backup to vivo iQOO Neo7
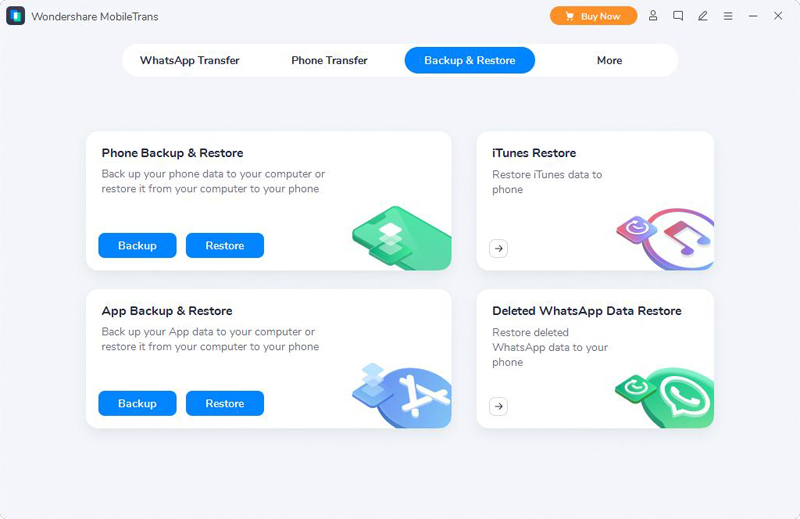
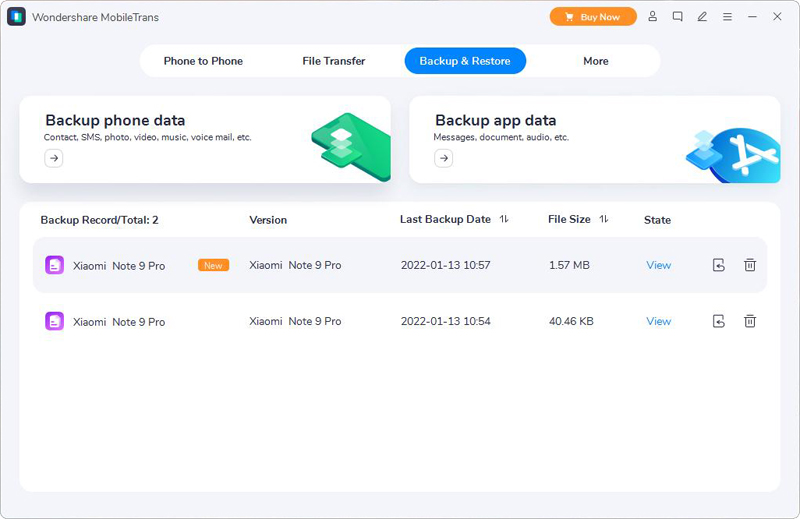
Step 1. Run the Mobile Transfer, click the "Backup & Restore" module on the home page, and then click "Phone Backup & Restore" on the lower page, and finally click "Restore".
Step 2. The software will give a preview list of the files, or you can choose to load the files from the specified path. Click "Restore".
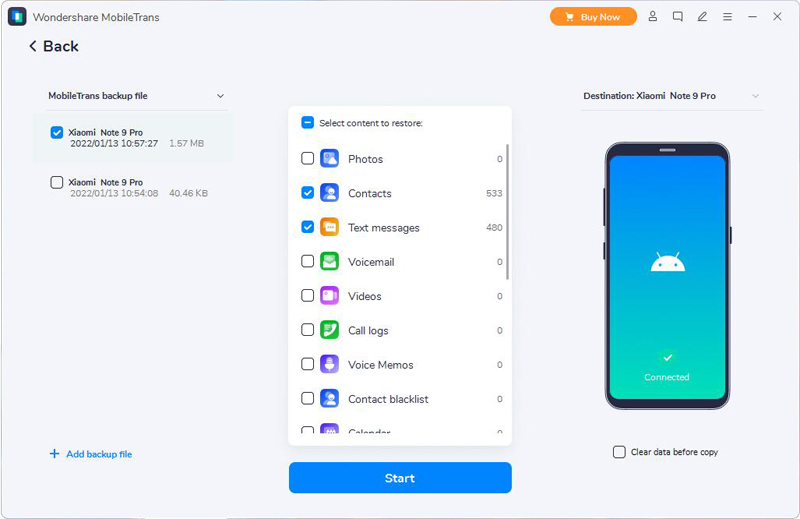
Step 3. Connect vivo iQOO Neo7 to the computer using the USB cable.
Step 4. After selecting the data that you want to restore to vivo iQOO Neo7, click the "Start" option and wait for all files to be transferred.
Part 3 Transfer WhatsApp/Wechat/Kik/Line/Viber Messages to vivo iQOO Neo7
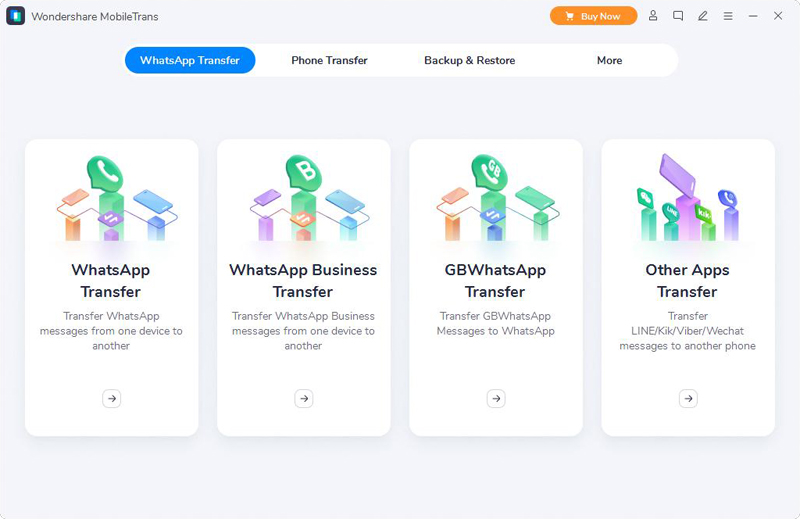
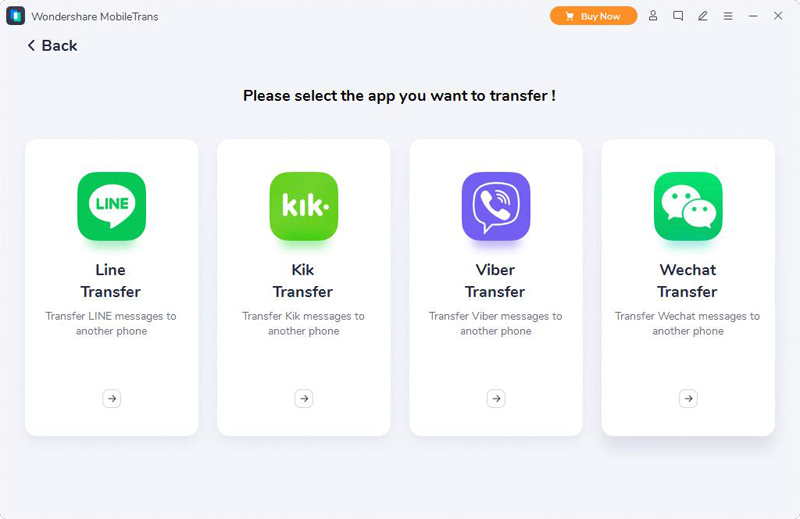
Step 1. Click "WhatsApp Transfer" on the software startup page, and four options will appear on the page: "WhatsApp Transfer", "WhatsApp Business Transfer", "GB WhatsApp Transfer" and "Other Application Transfer". Please select the data type and device to synchronize based on the description of each option.
Tip: The transmission of VIBER software files is one step more than other software, that is, Viber data needs to be transmitted to the computer first, and then synchronized to the mobile phone by the computer.
Step 2. Connect both of your old phone and vivo iQOO Neo7 to the same computer with their USB cables.
Step 3. Check the preview file list and select the data that needs to be synchronized to vivo iQOO Neo7, and then click the "Start" button to perform data synchronization.
What should you do if my mobile phone is stolen or maliciously attacked? Android Data Recovery is of great use when it is certain that the phone will be damaged. Connecting a mobile phone to a computer enables it to scan the phone in depth even if the phone cannot be turned on, and files that have been deleted or formatted by mistake can also be retrieved for users. This article recommends that users install Android data recovery on their computers.
Part 4 Recover Data from vivo iQOO Neo7 without Backup
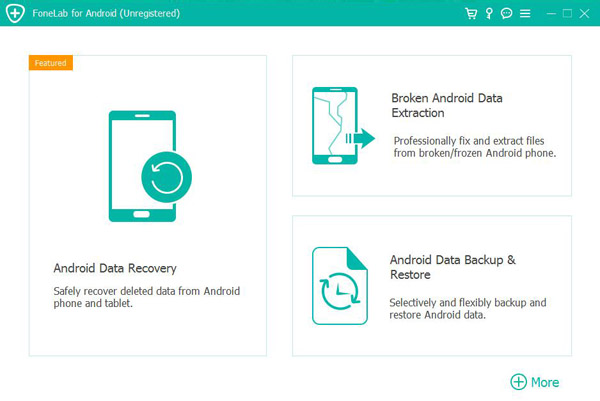
Step 1. Run Android Data Recovery, then click "Android Data Recovery".
Step 2. Connect vivo iQOO Neo7 to the computer with USB cable, please enable USB debugging mode on your vivo iQOO Neo7, and click "OK" after the software successfully detects your device.
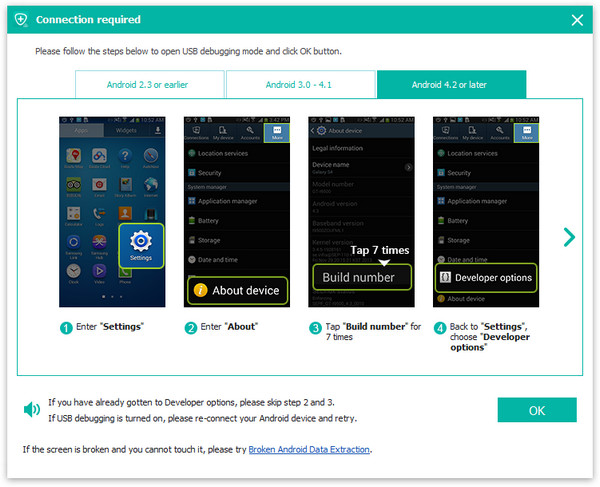
Tip: The USB debugging method of iQOO Neo7 in vivo: Enter "Settings" > Click "About Phone" > Click "Build number" for several times until getting a note "You are under developer mode" > Back to "Settings" > Click "Developer options" > Check "USB debugging". "Device connected, but can't be recognized? Get more help" button can help you solve the problem that mobile phones can't be identified..
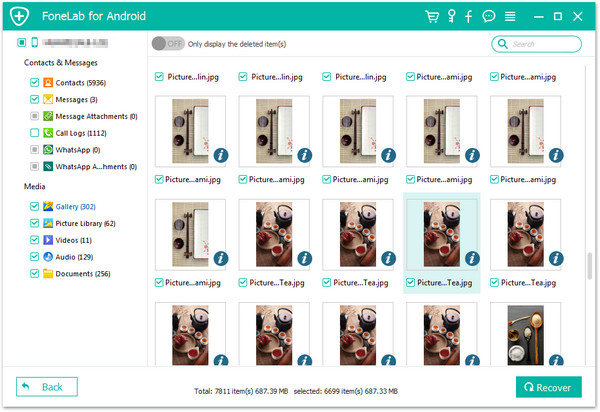
Step 3. Select file types you need to recover, click "Next" to scan your device to seek lost data.

Tip: The "Deep Scan" button can rescan the device, find more content, and conduct a more comprehensive and in-depth scan to help find more files. This will take a long time, please be patient.
Step 4. After scanning, check the data to be restored, and then click "Recover" to finish restoring the files to your vivo iQOO Neo7.
Part 5 Restore Data from Backup to vivo iQOO Neo7
Step 1. Run Android Data Recovery and select the "Android Data Backup & Restore" module on the initial page.
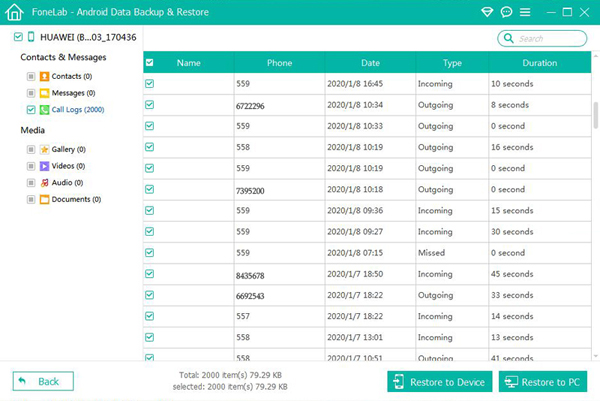
Step 2. Connect the vivo iQOO Neo7 to the computer with a USB cable, and then click "Device Data Restore".

Step 3. Click "Start" after the program successfully identifies the device automatically.
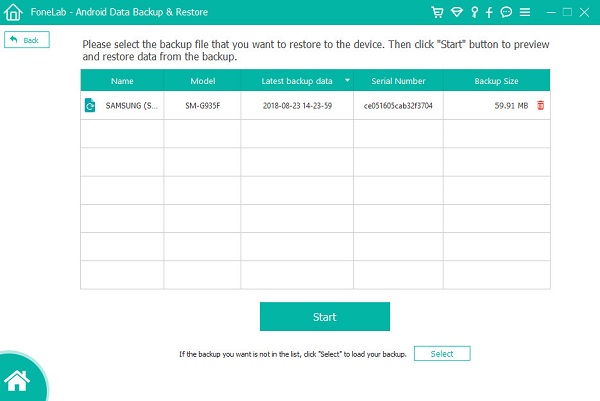
Step 4. After scanning, a preview list of files will appear on the software interface, which is convenient for users to check the data. Check the required data, and then click "Restore to Device".