Overview: When you own a new OnePlus Nord CE 2 5G Data, will you be troubled by data transmission and recovery? Don't worry, this article will introduce you the solutions to these problems from five aspects. Please read the following patiently.
OnePlus Nord CE 2 5G is equipped with a 6.43-inch FHD+ AMOLED display, which supports a refresh rate of 90Hz, with a screen resolution of 2400 * 1080. Its processor is MediaTek Dimensity 900, its battery capacity is 4500mAh, and it supports 65W fast charging. The OnePlus Nord CE 2 5G is equipped with a total of three rear cameras including a 64MP main lens, an 8MP super wide-angle lens and a 2MP macro lens, and a 16MP front camera.
Besides the screen, processor, battery, camera, etc., the Plus Nord CE 25G has good performance in other aspects waiting for you to explore. Considering that you may have a large amount of data to transfer, backup and restore when you get a new OnePlus Nord CE 2 5G, we have prepared the following tutorial for you.
Part 1 Directly Sync Data from Android/iPhone to OnePlus Nord CE 2 5G
Mobile Transfer is a full-featured, safe and easy-to-use data transmission and recovery software. Whether it's photos, music, videos, or WhatsApp/WeChat/Line/Kik/Viber messages and any other data, it can completely transmit and restore data to your new mobile phone. We highly recommend that you install it on your computer for transfer and recover data.


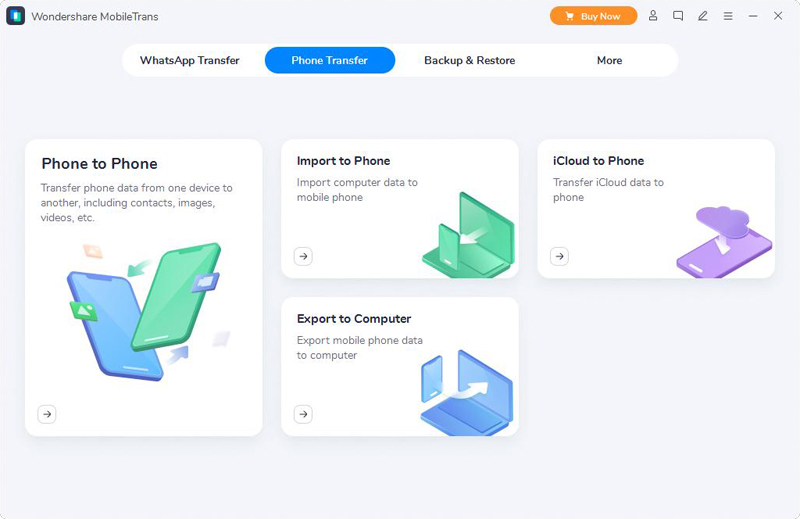
Step 1. Run Mobile Transfer on your computer, and then click "Phone Transfer" > "Phone to Phone" on the home page.
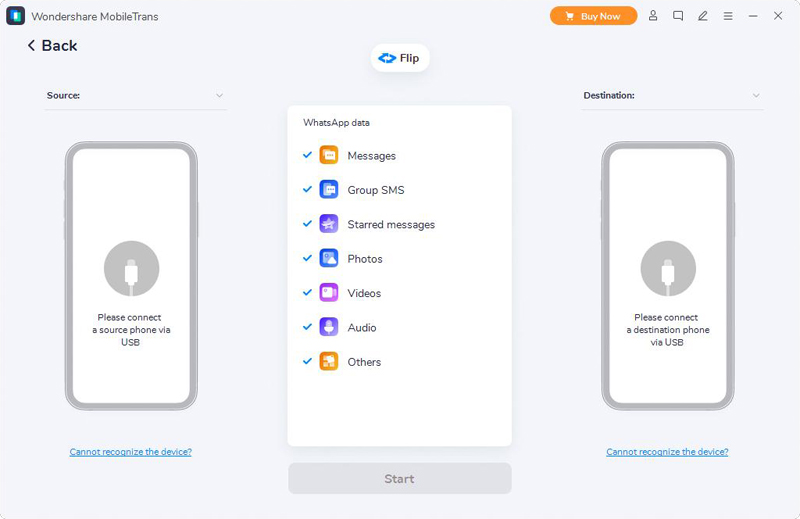
Step 2. Use the USB cables to connect the old Android/iPhone device and OnePlus Nord CE 2 5G to the same computer.
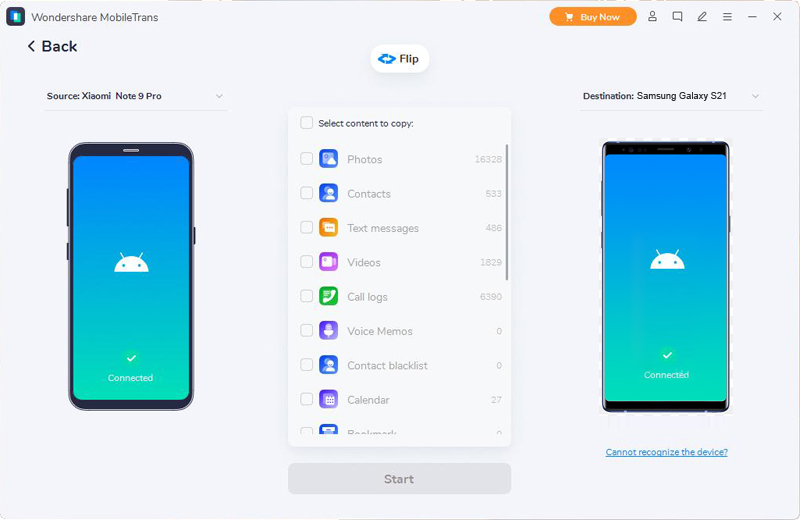
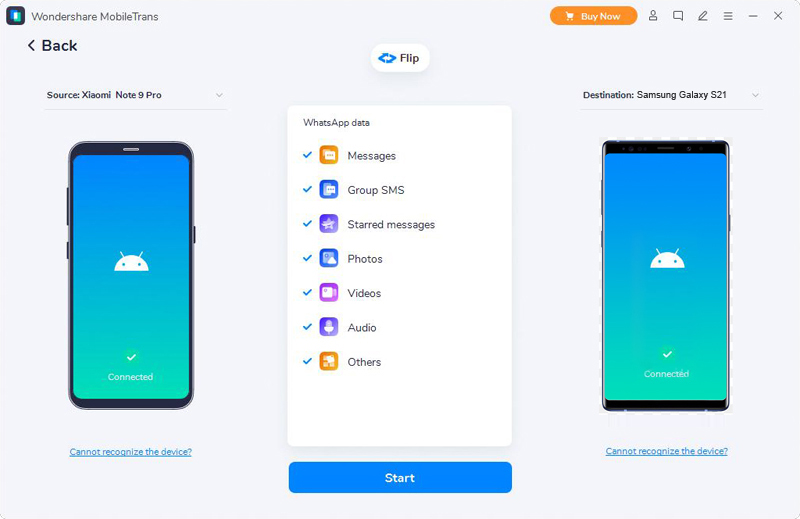
Tip: If your device is connected but not recognized, you can click "Can't recognize the device?" button for help. Once your phones are detected, please click the "Flip" button to ensure that OnePlus Nord CE 2 5G is displayed on the DESTINATION panel.
Step 3. When everything is ready, select the file types you need to transfer, and then click "Start" to transfer them to your OnePlus Nord CE 2 5G.

Part 2 Sync Data from Backup to OnePlus Nord CE 2 5G
In addition to data transmission between different devices, Mobile Transfer can also sync data from backup to OnePlus Nord CE 2 5G. This function is very useful when your design is lost, stolen or damaged. And the operation is also very simple.
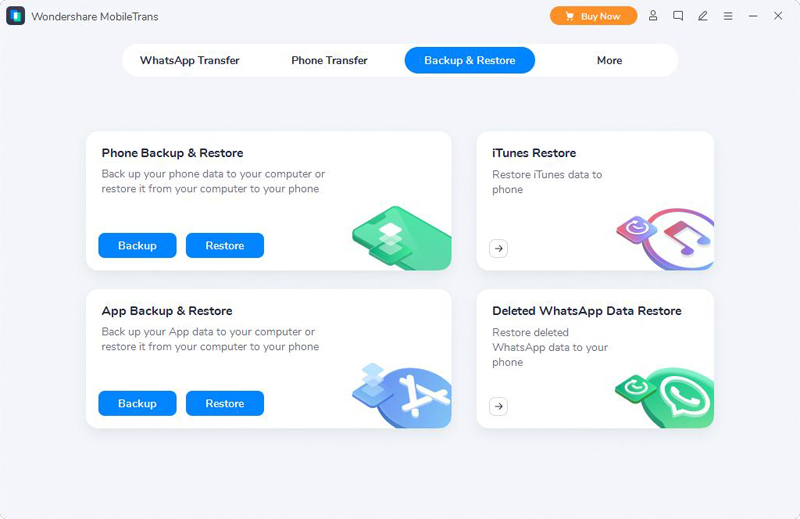
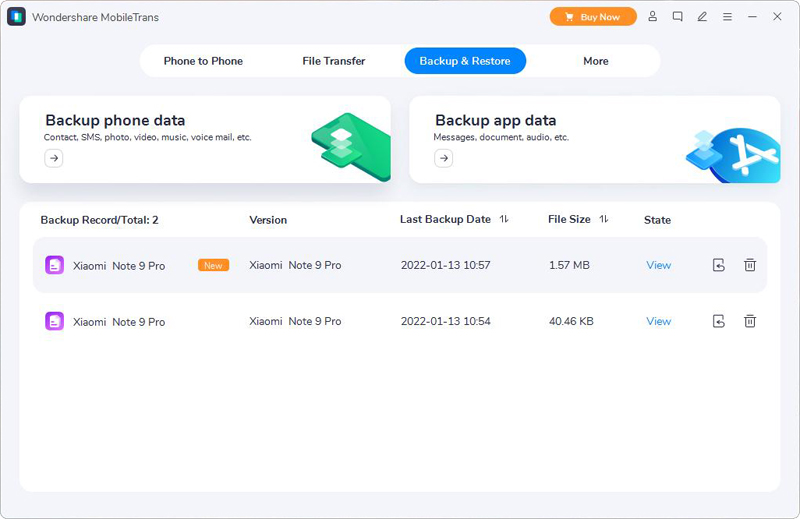
Step 1. Run the mobile transfer, then select "Backup & Recovery" and click the "Restore" button in the "Phone Backup & Recovery" option.
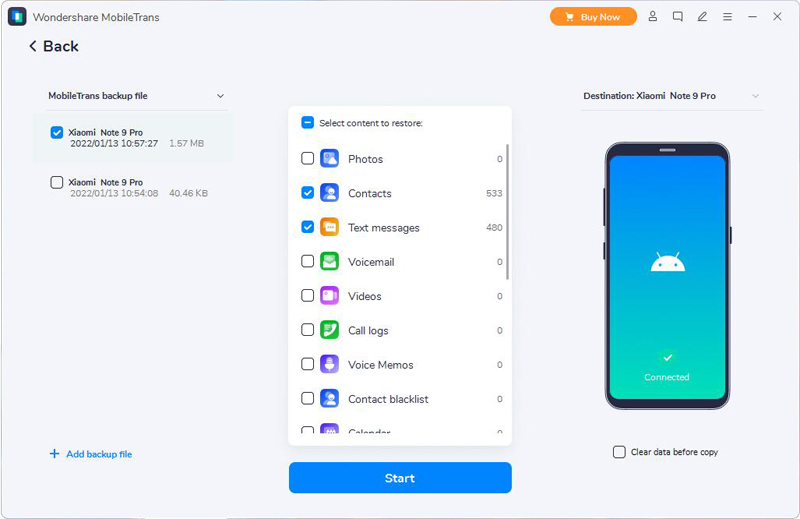
Step 2. Select backup file from the list, and then click the "Restore" button behind the selected backup file.
Tip: If you can't see the required backup, you can click to load it from the designated saved path.
Step 3. Connect the OnePlus Nord CE 2 5G to your computer through USB cable, then select the content to be restored, and click "Start" to sync these data to your phone.
Part 3 Sync WhatsApp/Wechat/Line/Kik/Viber Messages to OnePlus Nord CE 2 5G
As a widely used communication software all over the world, WhatsApp/Wechat/Line/Kik/Viber often has a lot of important messages that need to sync to your new OnePlus Nord CE 2 5G. We also recommend you to use the Mobile Transfer software.
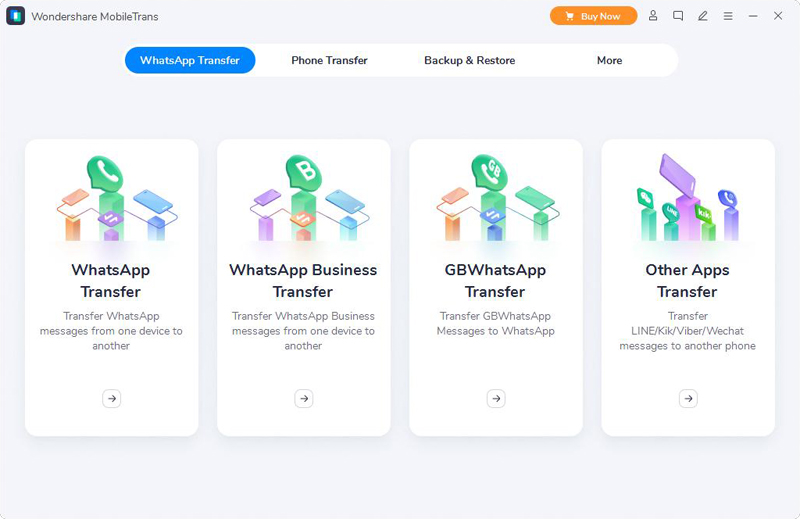
Step 1. Run Mobile Transfer and click "WhatsApp Transfer", then you will find there are 4 items, namely "WhatsApp Transfer", "WhatsApp Business Transfer", "GBWhatsApp Transfer" and "Other Apps Transfer".
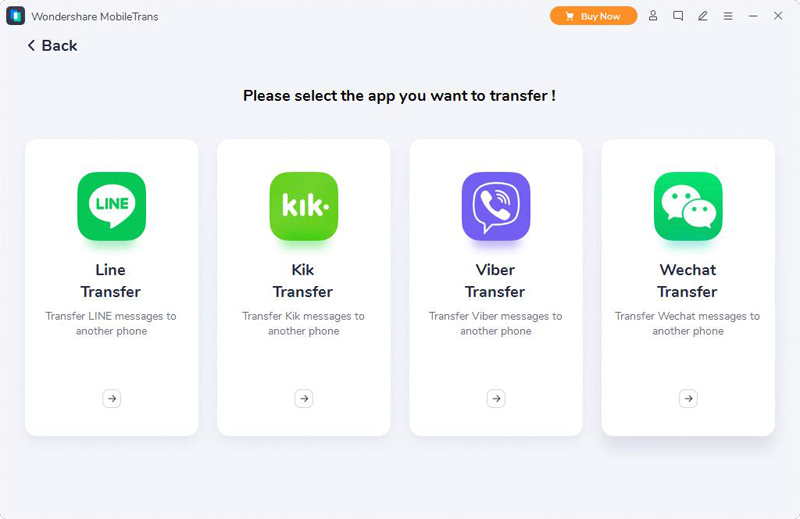
Step 2. Pick the items needed to sync messages to OnePlus Nord CE 2 5G. The first three items are for WhatsApp, and the last one is for WeChat, Line, Kik and Viber.
Note: It's slightly different from others. To sync Viber messages, you need to back up your Viber messages from the old phone to your computer before synchronizing them from backup file to your new phone.
Step 3. Connect OnePlus Nord CE 2 5G and the original device to the same computer by using their USB cables.
Step 4. Click "Start" after selecting the data to be synchronized to OnePlus Nord CE 2 5G.
Part 4 Directly Recover Data on OnePlus Nord CE 2 5G without Backup
Android Data Recovery is a powerful data recovery software for Android phones. It can detect and recover deleted or lost files from Android devices, and it can complete data recovery with or without backup. And the software interface is simple, easy to operate, and there is no need to worry about privacy leakage. After downloading Android Data Recovery, you can follow the following tutorial to solve the problem of data recovery.
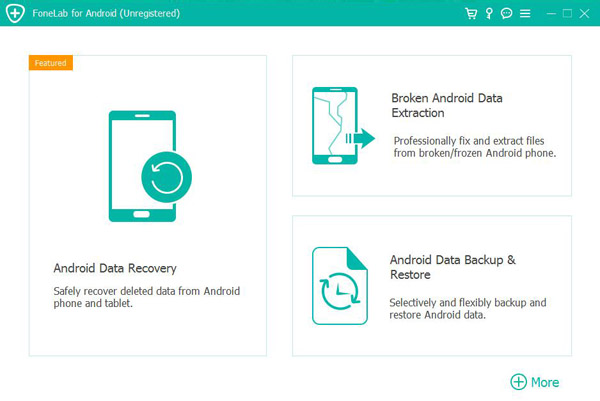
Step 1. Run Android Data Recovery, then click "Android Data Recovery" on the homepage.
Step 2. Connect OnePlus Nord CE 2 5G to your computer by USB cable, please enable USB debugging mode on your mobile phone, and press "OK" after the software has detected your device.
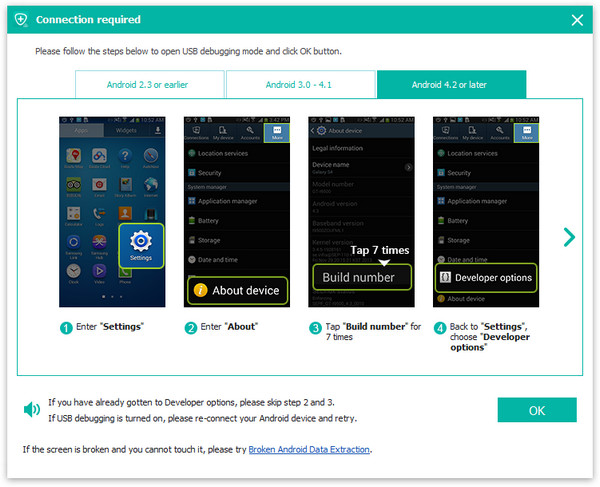
Tip: The way to enable the USB debugging on your phone is: Enter "Settings" > Click "About Phone" > Click "Build number" for several times until getting a option "You are under developer mode" > Back to "Settings" > Click "Developer options" > Check "USB debugging". And if Android Data Recovery can't recognized your device, you can click "Device connected, but can't be recognized? Get more help" and follow the on-screen prompts to make it.
Step 3. After the mobile phone is successfully identified, select the file types you need to recover, and then click "Next" to start scanning the lost content of your mobile phone.

Step 4. Once the scan is completed, click to preview all the scan result and select the required files, then click "Recover" to complete the file recovery.
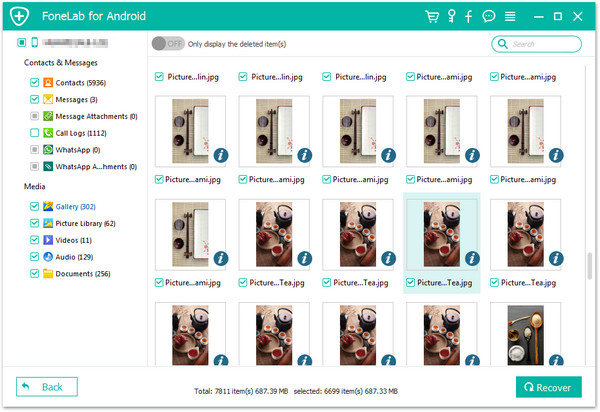
Tip: The "Deep Scan" button can help you to scan your device under the deeper scan mode and find more contents when you fail to find the needed files.
Part 5 Restore Data from Backup to OnePlus Nord CE 2 5G
When there is a backup, the data recovery will be faster. Here, you are still recommended to use the software Android Data Recovery, which only needs 4 simple steps to complete the data recovery.
Step 1. Run Android Data Recovery, then click "Android Data Backup & Restore".
Step 2. Click "Device Data Restore" after finsh the connection between OnePlus Nore CE 2 5G and computer which is linked by USB cable.

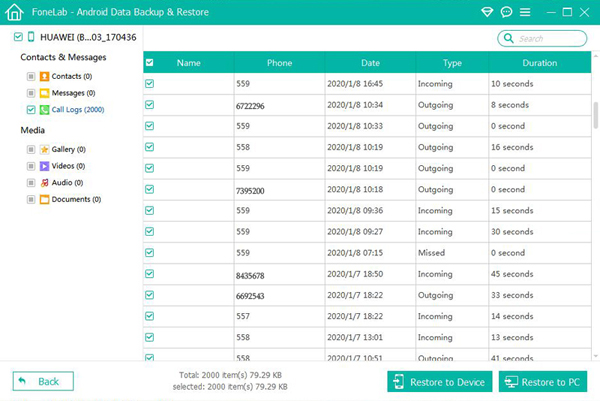
Step 3. After the OnePlus Nore CE 2 5G is recognized, choose the backup files you need to restore and then click "Start" to extract all the restoreable data from the selected backup file.
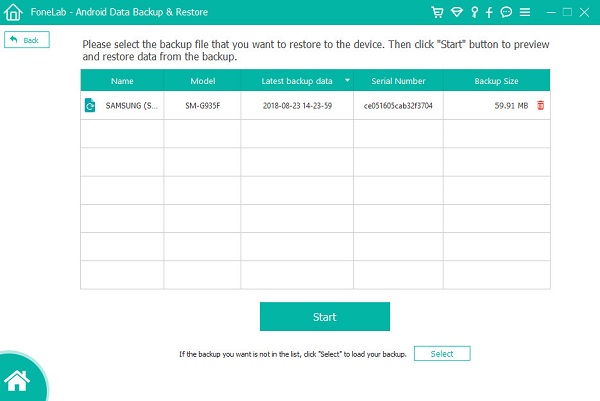
Step 4. After the extraction, select the file you need to restore, then click "Restore to Device" to restore the selected data to your OnePlus Nord CE 2 5G.