Overview: Have you ever incorrectly formatted a partition or folder with important files/photos on your ASUS laptop? Or the computer system is broken or there is no backup, and the pictures has been deleted from the camera? When it happens, you will never think about it, it will attack you.
"A part of the photos was transferred from the camera to the computer, and then the photo was deleted from the camera. But now in order to update the system, is formatting the computer, so lost this photo. How to recover photos or other files deleted from your ASUS computer or camera?"
For a while, I lost all the photos of my parents that were very precious to me, and also formatted and covered the photos during the trip. Unfortunately, disaster happens to everyone, and it's best to know what to do if you encounter a similar situation.
ASUS's notebook is very good But for other reasons, the data could be damaged. It may be lost due to accidental or intentional deletion, system conflict, hard drive formatting or virus infection. So, what's the way to recover the lost Files/photos of ASUS laptop?
"What should I do to recover the deleted photos or files on ASUS laptop?" It really means a lot Please help me Quora.com In "X", we often see people asking such questions. Some people asked about the recovery method of formatted data in ASUS laptop because of system conflict. Some people also asked about the recovery methods of reports, videos and e-mails deleted from ASUS laptops. In fact, all the problems can be combined into one That is, how to recover the deleted files in ASUS laptop. Now, no matter what the lost script is, we will introduce the stage guide of complete and fast recovery methods for videos, photos, reports, files, etc. deleted by ASUS.
Tips: Avoid Lost/Deleted Data Overwritten in ASUS Computer
The first thing to do is to do nothing. Calm down. In other words, when ASUS laptop loses data, it must stop using the computer immediately. This is because if you add a job to the PC, the data will be permanently deleted, and the deleted files from the ASUS laptop/tablet cannot be recovered. If you know how the data store operates, it's important to do nothing until you find the tool you need help with. Please do not look for data anywhere on your computer or use the command line.
Mehtods Outline:
Method 1: Recover Files/Photos from ASUS laptop/tablet/desktop PC with Data Recovery (Recommend)
Method 2: Recover Deleted Pictures from ASUS computer Recycle Bin
Method 3: Recover Lost Files from ASUS laptop from Backup
Method 1: Recover Deleted/Lost Files/Photos from ASUS laptop/tablet/desktop PC with Data Recovery
Not everyone has the habit of regularly backing up computer data.
If the deleted files are not included in the backup, the only solution is to use PC/Mac Data recovery Tool.
Data Recovery is a powerful and secure data recovery software designed to scan computers or hard disks and search almost all deleted files.
PC/Mac Data recovery program for deleting, formatting, and recovering conflicting files from the hard disk drive of ASUS laptop. Can easily search ASUS laptop photos, audio files, video and other data.
PC/Mac Data Recovery Features:
-Please effectively, safely and completely recover all files, photos, audio, music and e-mails lost or deleted from your memory.
-Supports data recovery from recycle bin, hard drive, memory card, flash drive, digital camera and video camera.
-Support the data recovery of sudden deletion, format, hard disk drive damage, virus attack and system conflict in other cases.
Models Supported: ZenBook Classic Series, ZenBook Pro Series, VivoBook Classic Series, VivoBook S Series, VivoBook Gaming Series, Republic of Gamers Series, ASUS TUF Gaming Series, VivoBook Ultra Series, ASUS Laptop Series, ChromeBook,
Files Supported: Documents, Image, Video, Audio, Email, Others
Devices Supported: Computer& Laptop, Recyle Bin, Memory Cards, Flash Drive, Digital Camera Camcorder, Hard Drive, Removable Drives, Mobile Phone
System Supported: Windows 10/8.1/8/7, Mac 10.7 and above


Steps to Recover Deleted/Lost Files/photos from ASUS Laptop:
Step 1: Download and run the software.
Please download the software to your ASUS PC or Mac for installation. Then the software starts automatically.
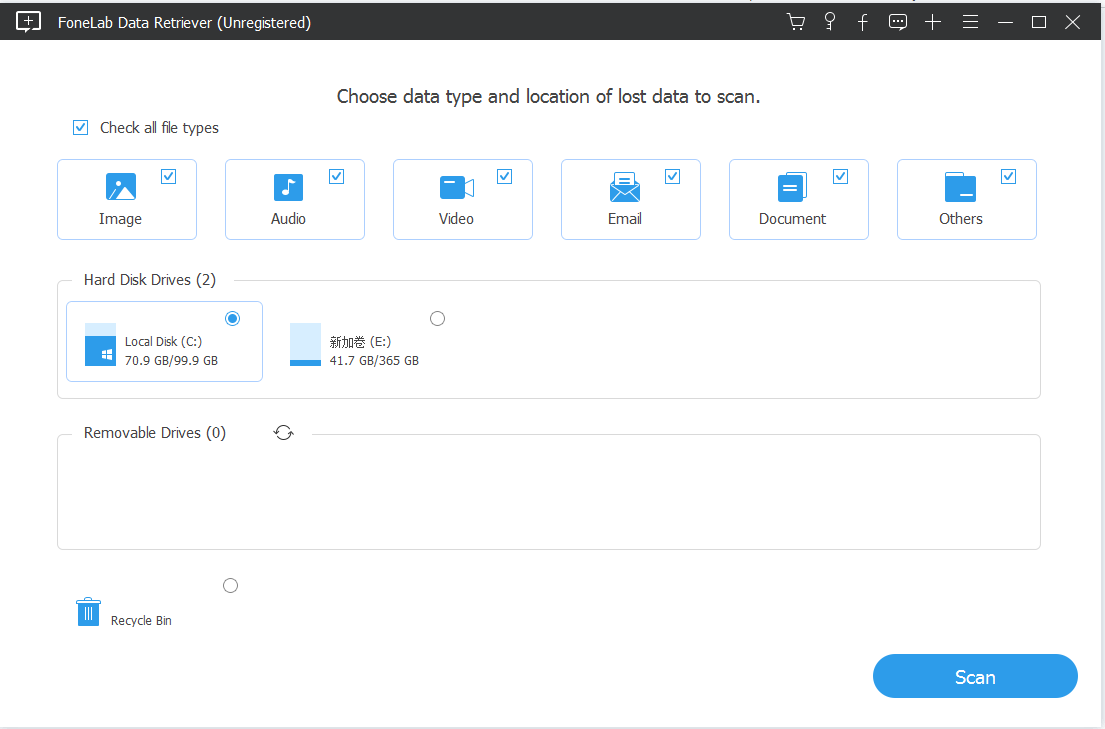
Step 2: Scan the lost data
Please select the files option in the data type section and select the location of the missing data. Then click Scan to start the quick scan process.
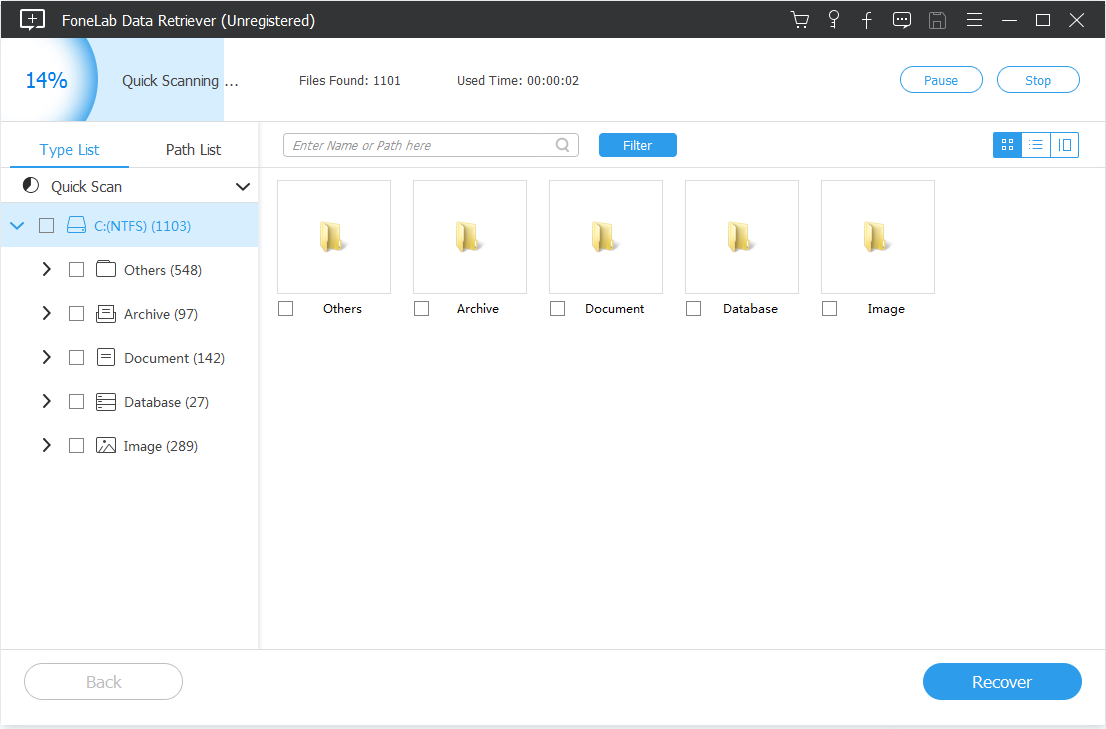
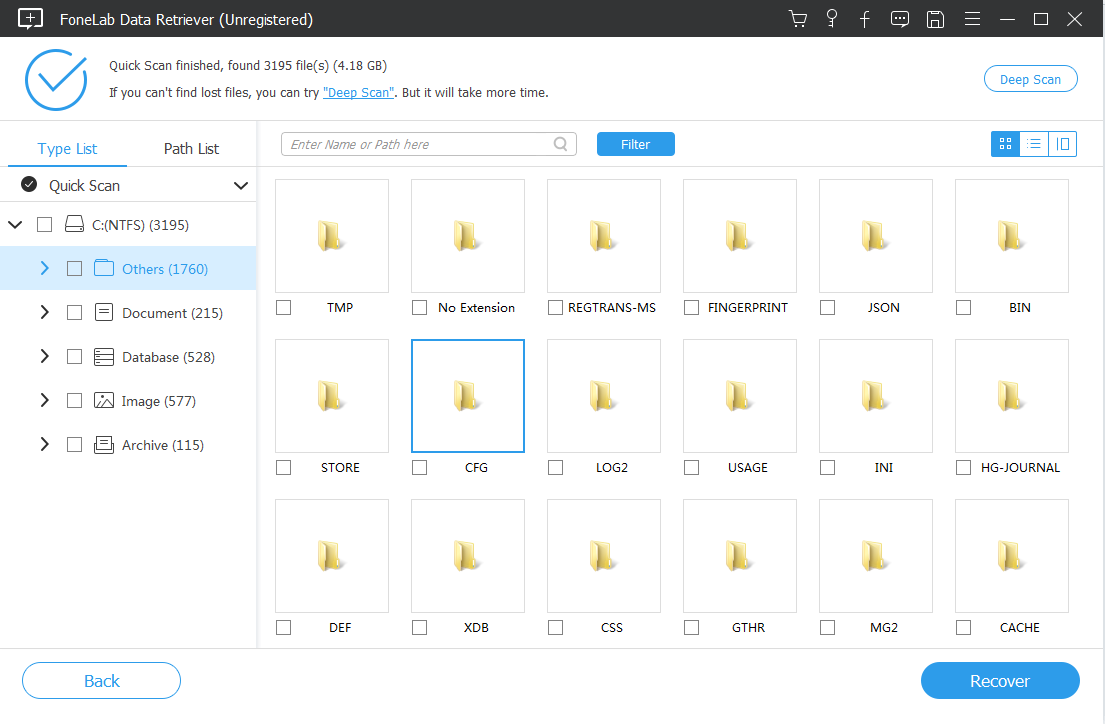
Step 3: Choose the lost Files
After the scanning process, all files will be opened on the interface. You can use the filtering function to quickly find the data to be restored.
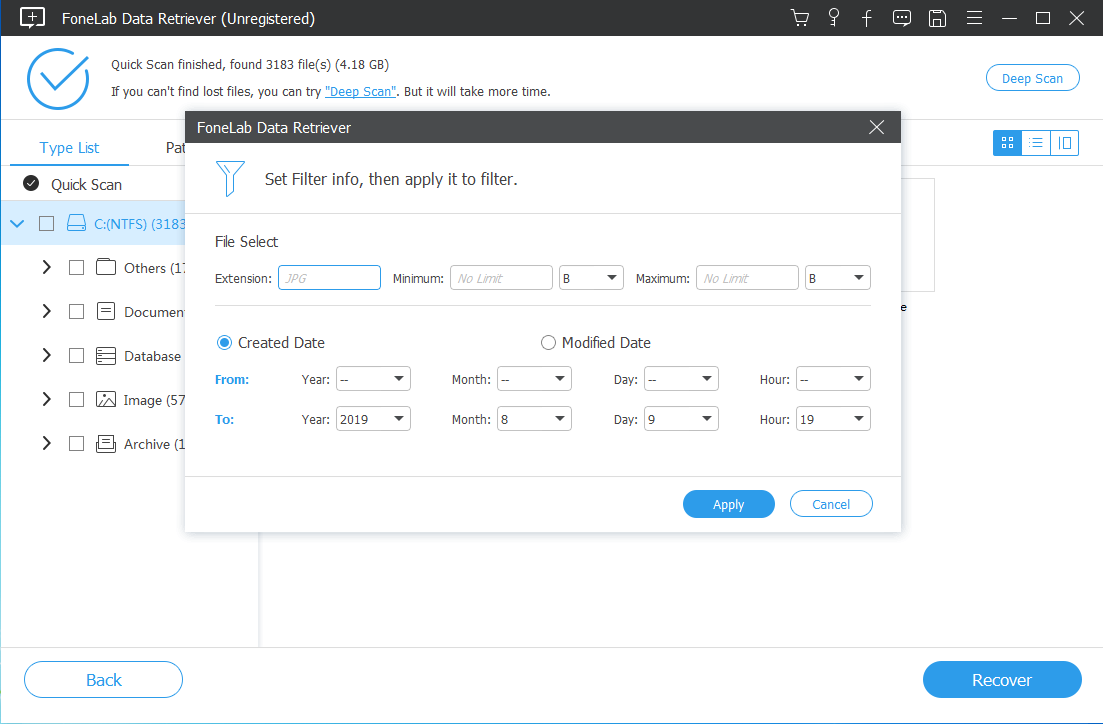
When the fast scan can not get the desired results, you can click the precise scan in the upper right corner to try again.
Step 4: Restore lost files or photos
First view the relevant information, and then select the data to be restored. Then click the recover button to save the selected data to the computer.
Method 2: Recover Deleted Pictures from ASUS computer Recycle Bin
If important photos are lost due to mistakes, the first thing to do is to confirm the trash can.
As you know, after deleting a file, it will be discarded in the recycle bin. In this case, the deleted photos can be easily restored according to the next stage.
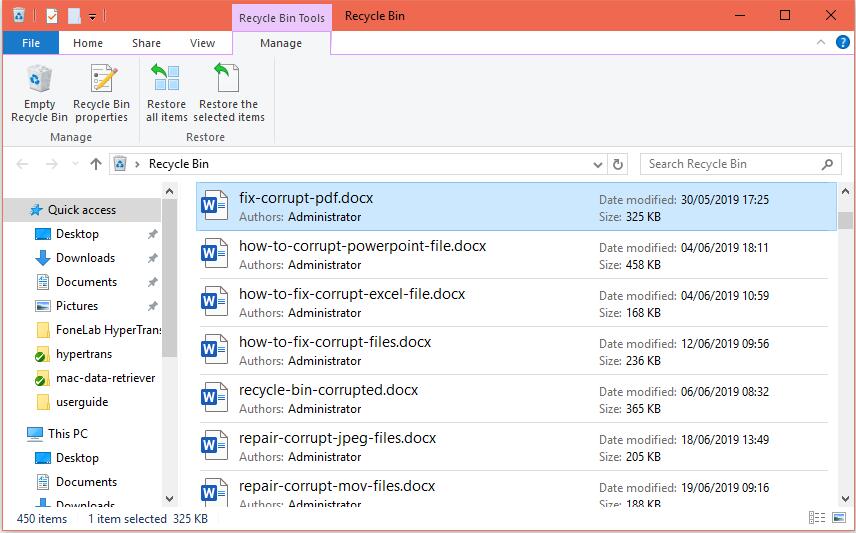
Step 1: Open the Recycle Bin.
Step 2: Find the deleted photo and right-click it.
Step 3: Select Restore.
Look! It's easy to recover images that have been wrongly deleted. However, the solution cannot recover permanently deleted files. If you want to recover permanently deleted files on ASUS laptop, you need to choose the method 1 above.
If you can't find the photos deleted from the recycle bin, or if you want to restore the deleted photos after emptying the recycle bin, please continue to read how to search for permanently deleted photos on your computer.
Method 3: Recover Lost Files from ASUS laptop from Backup
Windows backup is the starting point for all other backups, including all data for the selected folder and file. Because Windows backup stores all the files and folders, the recovery will be faster and easier if you backup frequently. If you choose another backup type, recovery may take longer.
If you have time to do it, windows backup will provide the best solution for data protection.
If you create a Windows backup, you can easily restore deleted files. Otherwise, it can be converted to the next method.
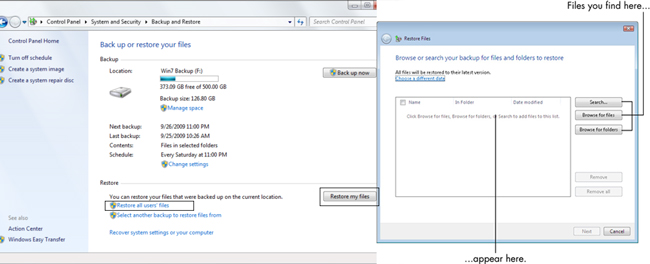
To recover files deleted from the backup.
Step 1: Click on the start menu in the first stage computer.
Step 2: Select control Panel > system and maintenance > backup and restore > Restore My Files.
Step 3: View the Restore backup contents and find the files to be recovered in the third stage backup and recovery window. There are three options for searching the required files: search, Browse for files, and Browse for folders.
- Search: Enter the name of the file to recover. Select the files found or select all and click OK.
- Browse for file: After selecting the backup name, select the folder containing the original file. Mark the found file and click add file.
- Browse for folder: Select a folder to restore all files in the folder. Click Add Folder.
Step 4: Select the location where you want to save the file.