Overview: Changing your phone is a very simple job, however, transferring data between your different phones is obviously much more complicated. This article will describes the best ways to transfer all data from any Samsung Galaxy devices to iPhone 12/12 Pro.
But they are not willing to spend expensive old users to prepare, after all, in terms of overall cost performance, iPhone9 series is still possible. So if you buy iPhone 12/12 Pro, are you worried about transferring data again? Don't worry, Mobile Transfer can help you solve your problems.
Mobile Transfer is a tool used to transfer data. It is now receiving a lot of attention and is well received by users. The reason it is praised is as follows: it is very compatible, not only can be transferred between various Android, but also between IOS, and also between Android and IOS. In addition, it can transmit many types of data, such as contacts, photos, videos, music, text messages, call logs, calendars, applications, application data and more. Importantly, it will not cause any harm to your phone and it can also permanently delete the data of your old Android phone without restoring.


Part 1 Directly Sync All Data from Samsung to iPhone 12
Step 1: Select the transmission mode
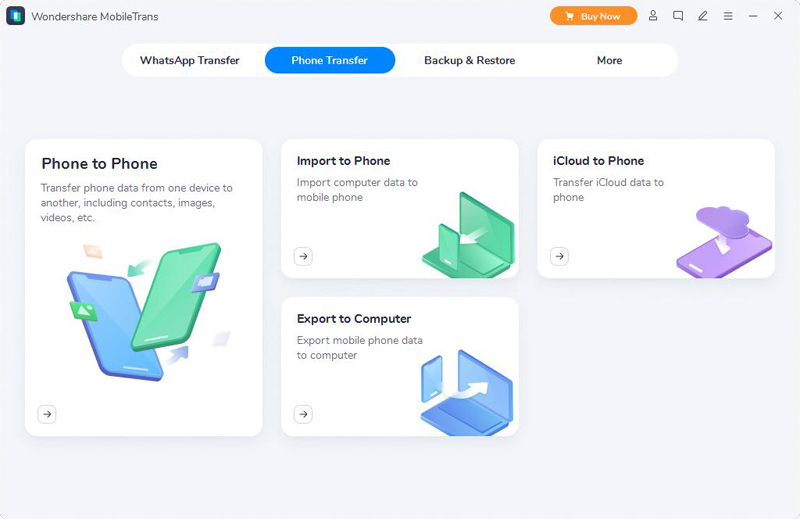
First download, install and run Mobile Transfer on your computer. At this time, there are four modes on the main interface. Please click the "Phone To Phone Transfer" option, and then click "Start" to go on.
Step 2: Connect your devices to your computer
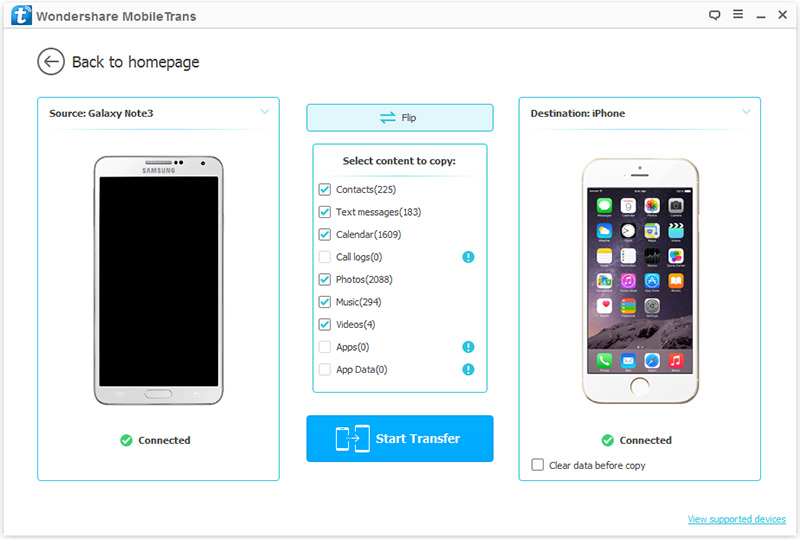
Now, please connect your Samsung phone and iPhone 12 to your computer with a USB cable. At this point, your Samsung phone is displayed on the left of the main interface, and iPhone 12 is on the right. If the order is not right, in order to ensure that the next steps can be performed normally, you need to click the "Flip" button to swap the positions of the two phones.
Step 3: Select the type of data to transfer
The main interface displays a list of data types. Please select the data you want to transfer, click "Start Transfer" after confirmation, and transfer the data to your iPhone 12. At this time, you can see the progress bar of the transfer on the main interface.
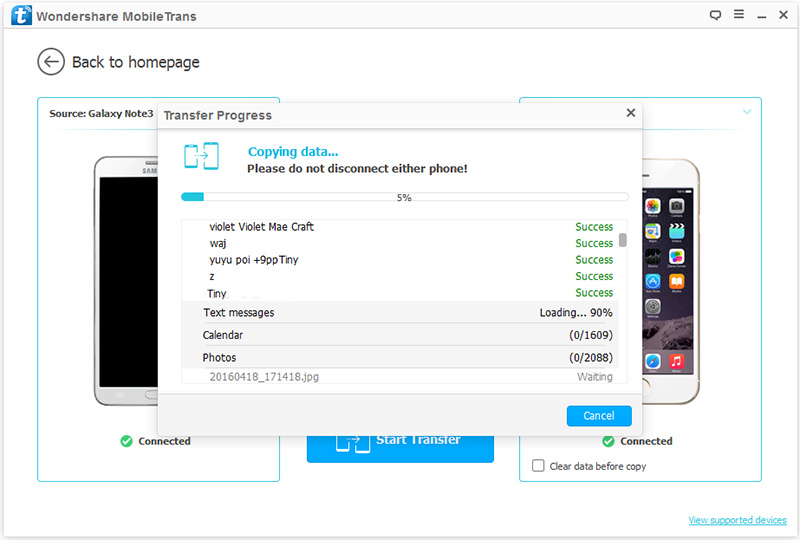
Note: If you want to delete the existing data of iPhone 12 before transferring, you can select the "Clear data before copy" button. Please do not interrupt the connection between your phone and computer during the transfer. Please be patient, the speed of transmission depends on the amount of data.
Part 2 Restore Data from Backup to iPhone 12
Step 1: Select the transmission mode
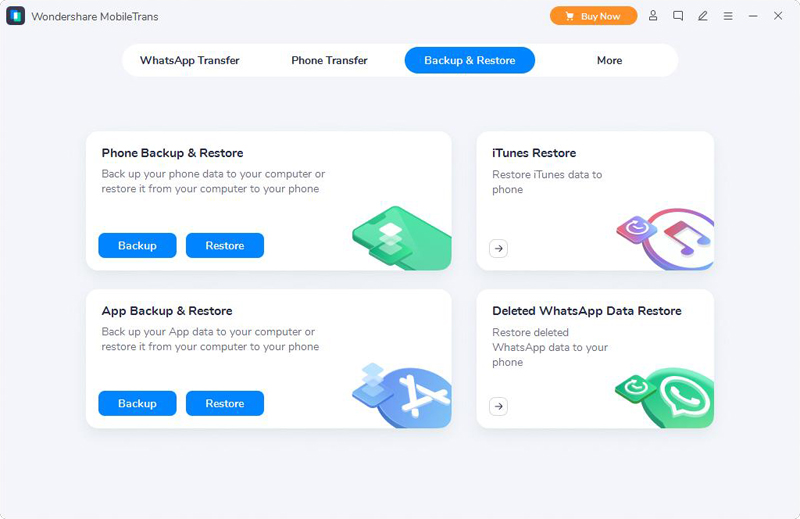
Run the Mobile Transfer on your computer, at this point, you can see that there are four modes on the main interface. Please select "Restore from Backups" and then click "MobileTrans" or "Kies" among all the projects.
Note: The prerequisite for selecting "MobileTrans" is that you have used this Mobile Transfer software to backed up data from your old Samsung phone. Similarly, if you backed up your Samsung with Samsung Kies, please choose "Kies". Of course, the program also supports other backup files such as iCloud backup, iTunes backup, etc. If you get any kind of backup file, you can also choose it.
Step 2: Connect your device and computer
Now you need to connect your iPhone 12 to your computer with a USB cable.
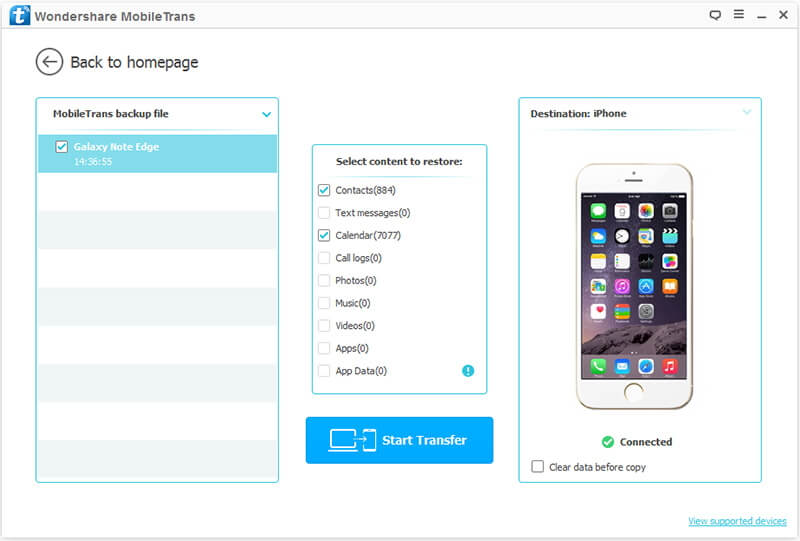
Step 3: Select the type of data to be transferred
All backup files are listed on the left panel, please select one according to your needs. The program will extract all transferable files from the selected backup file and display them to you. Please choose the file type you want to transfer. After the computer detects your device, you can click "Start Transfer" to sync to your iPhone 12. At this time, you can see the progress bar of the transfer on the main interface. Please be patient, the speed of transmission depends on the amount of data.
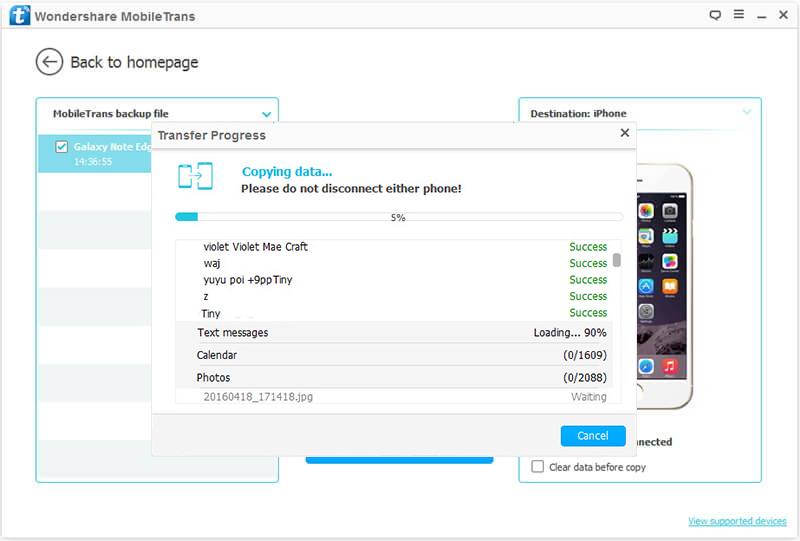
Note: Do not disconnect the mobile phones from the computer during the whole data transfer process.
Part 3 Export All Data from iPhone 12 to Computer
Step 1: Run Mobile Transfer and click on "Back Up Your Phone" among all the options.
Step 2: Using a USB cable to connect your iPhonne 12 to your computer.
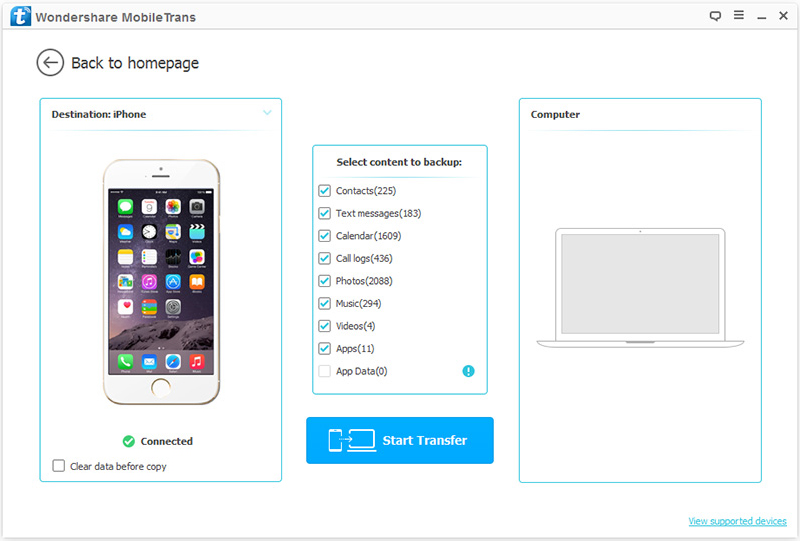
Step 3: Choose the file types that you want to transfer, and click on "Start Transfer" to sync them to your computer.
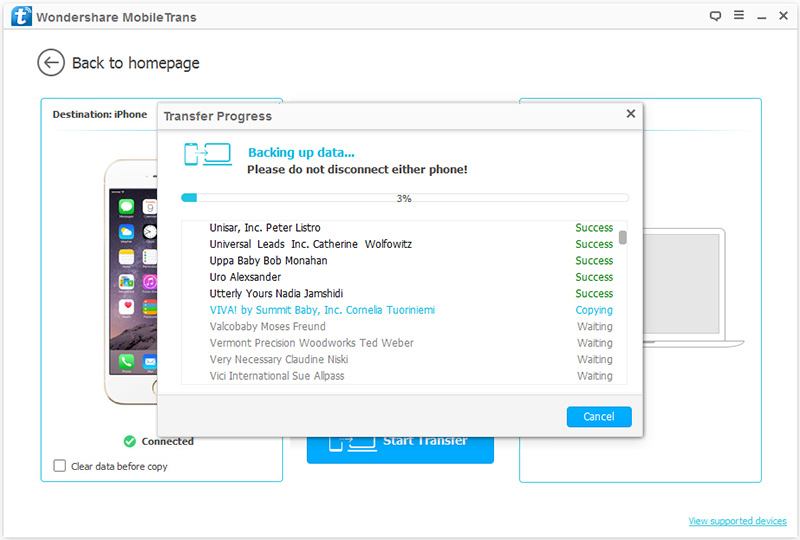
When the backup process is complete, you can click on the pop-up window or go to the settings to find the backup file. Of cause, if necessary, you also can change the path of your backup file there.
Part 4 Restore Deleted Data from iPhone 12 without Backup
For most users, accidentally deleting or losing data is very common, so it is necessary to master how to recover lost data. In case you have no backup at all, iPhone Data Recovery is definitely your best choice.
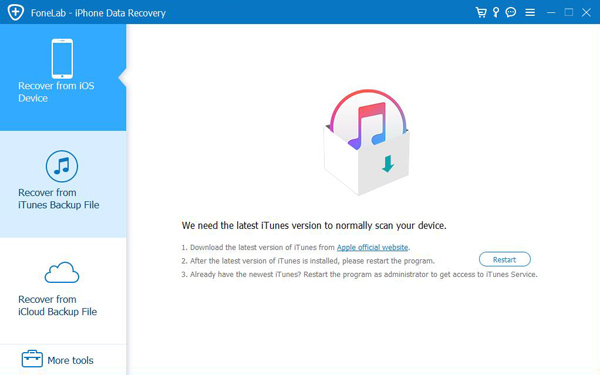
Step 1: Download and install iPhone Data Recovery on your computer and launch it. Then select “Recover from iOS Device” mode on its homepage. Next, please connect your device (iPhone 12) to your computer with a USB cable.
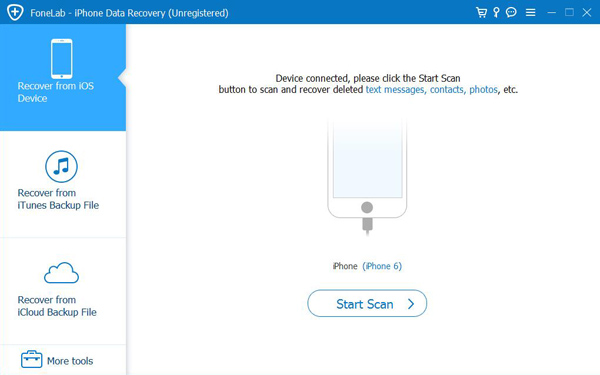
Step 2: After successful connection, iPhone Data Recovery will automatically detect iPhone 12. When the page shows that the connection is successful and your device is detected, “Start Scan” will appear on the page. Click “Start Scan” to start scanning deleted data on iPhone 12
Step 3: After the system automatically scans all the data on the iPhone 12, the left side of the software page will display all the data that can be recovered. Preview the data on the page and select the data you need to restore to iPhone 12. After selecting, click “Recover” in the lower right corner to restore the selected data to iPhone 12.
