Overview: After you fail to unlock, do you know how to repair a disabled iPhone/iPad? In this article, I will introduce you multiple methods to repair a disabled iPhone/iPad.
In order to protect your privacy more securely, you may set a complicated password on your iPhone/iPad to prevent outsiders from entering your device. But an overly complicated password may make you forget it when unlocking the iPhone. After you have tried multiple passwords, your iPhone will be disabled due to the protection mechanism. The time to disable depends on the number of incorrect password attempts. But if you still do not enter the correct password after ten attempts, then your iPhone will be disabled. When your iPhone is disabled, please be patient and read this article. This article provides you with a variety of quick ways to help you fix a disabled iPhone/iPad. You can choose the method that suits you best according to the introduction.
- Part 1 Fix Your Disabled iPhone or iPad with iTunes
- Part 2 Fix Your Disabled iPhone or iPad via Finder
- Part 3 Fix Your Disabled iPhone or iPad using iCloud
- Part 4 Use Recovery Mode to Fix Your Disabled iPhone or iPad
- Part 5 Fix Your Disabled iPhone or iPad with iOS System Recovery
- Part 6 1-Click to Unlock and Bypass the Disabled iPhone or iPad
- Part 7 Recover Deleted and Lost Data from iPhone/iPad
Part 1 Fix Your Disabled iPhone or iPad with iTunes
If you have PC, or haven't updated your Mac to Catalina, you can try this method.
Step 1: Use a USB cable to connect your device-iPhone/iPad to the computer.
Tips: If iTunes does not launch automatically, please run it manually.
Step 2: In iTunes, click on the iPhone/iPad icon near the top left of the page to view information about your device.
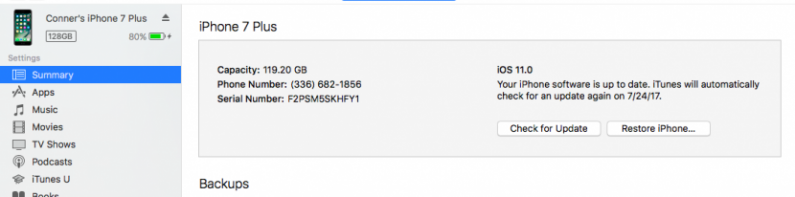
Step 3: Click "Summary", and click "Restore iPhone/iPad". Then follow the instructions on the screen to complete the corresponding operations to restore your iPhone/iPad.
Note: Once your iPhone or iPad has been restored, it will start up like any new device would.
Part 2 Fix Your Disabled iPhone or iPad via Finder
If you have been updated your Mac to Catalina, this method can quickly help you fix your disabled device via Finder.
Step 1: Connect the iPhone/iPad to your computer with a USB cable. Please press "Trust This Computer" or enter the passcode on your device's screen if necessary.
Step 2: Enable Finder on the computer. Then select your device from the Finder menu.
Step 3: Select "Restore Backup" on the page, and then select the backup you need on the page to restore your device.
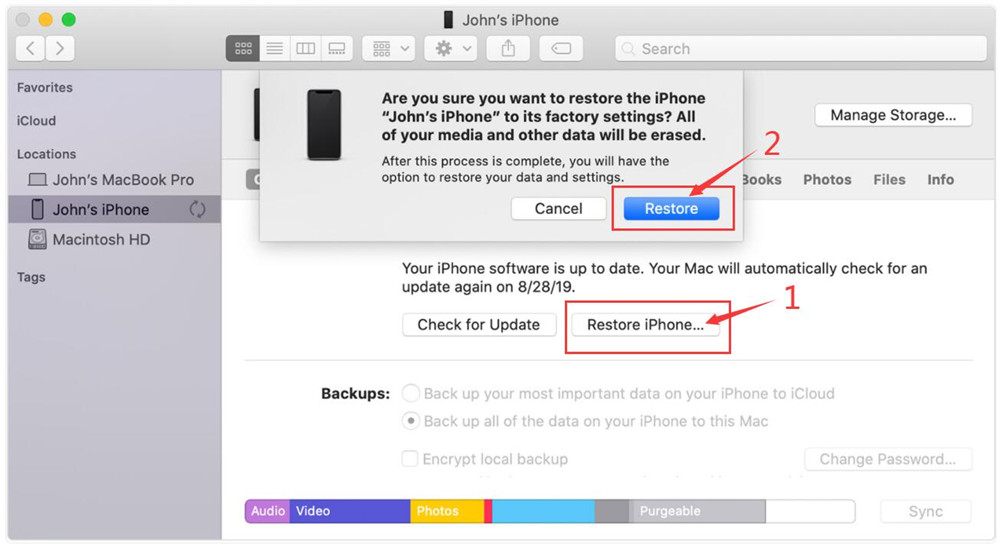
Tips: Please choose the latest backup file was created before your device is disabled. If your backup is encrypted, you need to enter the password on the page.
Step 4: Please do not disconnect your device until it restarts and syncs.
Part 3 Fix Your Disabled iPhone or iPad using iCloud
If you’re signed into iCloud and have "Find My iPhone" enabled, then this method is applicable.
Step 1: Visit icloud.com/find on your computer.
Step 2: After entering the webpage, login to your iCloud account with Apple ID and password. Then select "All Devices" at the top of the page.
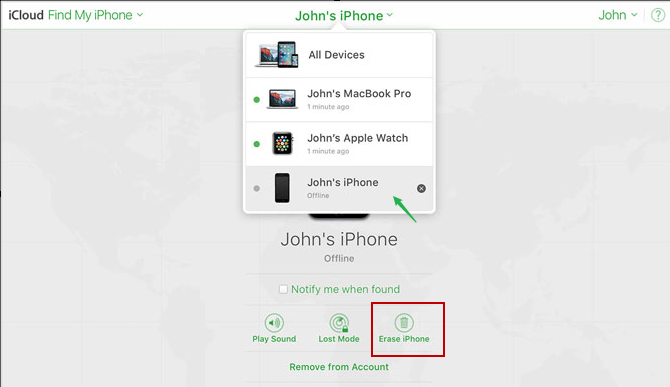
Step 3: Select your disabled device (iPhone or iPad) on this page. After selecting, click "Erase iPhone/iPad" and press "Erase" to repair your device.
Note: You need to enter Apple ID password to authenticate on the page. Once your device has been wiped, it will power up as any new iPhone/iPad would.
Step 4: After setting up your device, you can restore data from iTunes or iCloud backup to your device.
Part 4 Use Recovery Mode to Fix Your Disabled iPhone or iPad
If your computer cannot recognize your device, it may be because your iPhone/iPad is in recovery mode. Through this method you will be able to solve this problem well.
Step 1: Use a USB cable to connect your device to the computer. If the computer does not automatically recognize your device, please open iTunes/Finder. Then force restart your iPhone/iPad.
Step 2: Put your device into recovery mode. Then find your device in iTunes or the Finder and click on it.
Tips: If you don't know how to enter the recovery mode, you can follow the tips below to complete the operation.
- For iPhone 6/6 Plus/6S/6S Plus/5S/5C/5 or iPad with a Home Button: Hold down the Top (or Side) and Home buttons simultaneously. When you see the Apple logo on your screen, do not let go of the buttons. Keep holding both until your device enters Recovery Mode.
- For iPhone 7/7 Plus: Hold down your Top (or Side) and Volume Down buttons at the same time. When you see the Apple logo on your screen, do not let go of the buttons. Keep holding both until your device enters Recovery Mode.
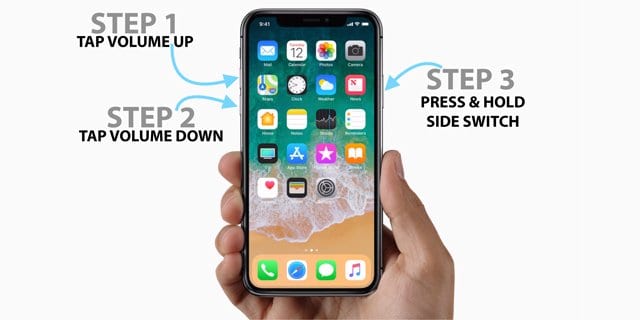
- For iPhone 8/8 Plus/X/XR/XS/XS Max/11/12: Quickly press and release the Volume Up button, followed by the Volume Down button. Next press and hold the Side Button until your device enters recovery mode.
- For iPads with Face ID: Quickly press and release the Volume Up button, then the Volume Down button. Now, press and hold the Top Button until your device begins to restart, keep holding until your iPad goes into recovery mode.
Step 3: Now, a box will appear asking if you want to Restore or Update your device. Please select "Restore".
Note: It may take some time for your iPhone/iPad to download its restored iOS or iPadOS software. If your download takes more than fifteen minutes and exits the recovery mode screen, let the download complete, then try over with the force restart and enter recovery mode again.
Part 5 Fix Your Disabled iPhone or iPad with iOS System Recovery
iOS System Recovery is a software that can help you quickly fix disabled iOS devices. Whether you have iTunes or not, you can use this method to restore your disabled device. This method is actually to restore your device (iPhone/iPad) to factory settings. You can choose this method according to the actual situation.


Step 1: Choose the appropriate iOS System Recovery version and download it to your computer. Then follow the prompts to complete the installation and run it.
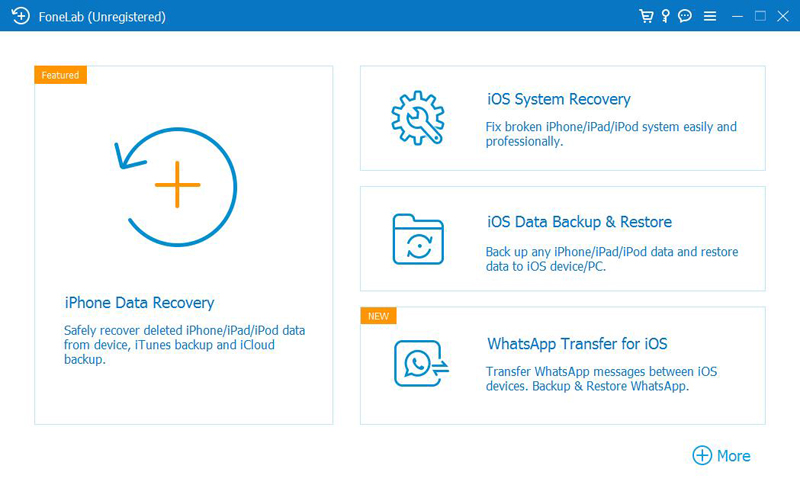
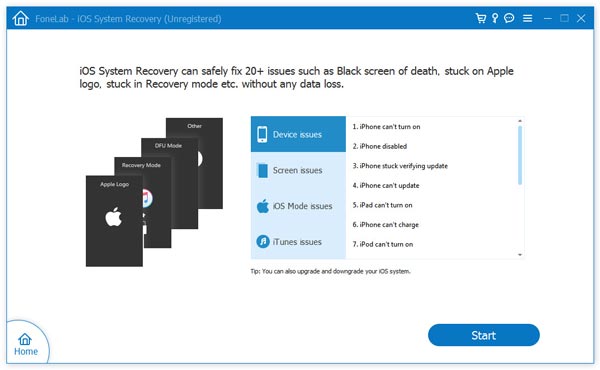
Step 2: When you enter the page of the software, use USB to connect the device you need to repair to the computer. Then select "iOS System Recovery" on the page. Then click "Start" button to begin to fix disabled iPhone.
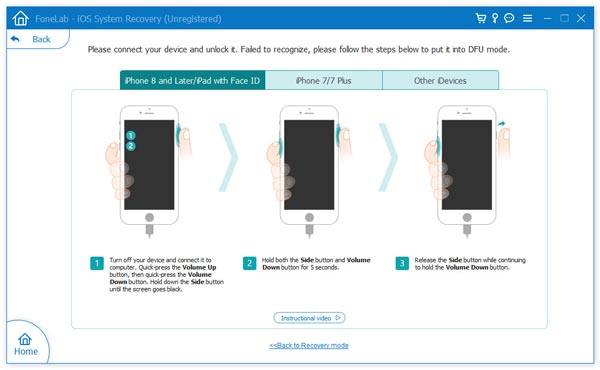
Step 3: Click "Question" button and follow the guide to turn your iPhone into DFU mode.
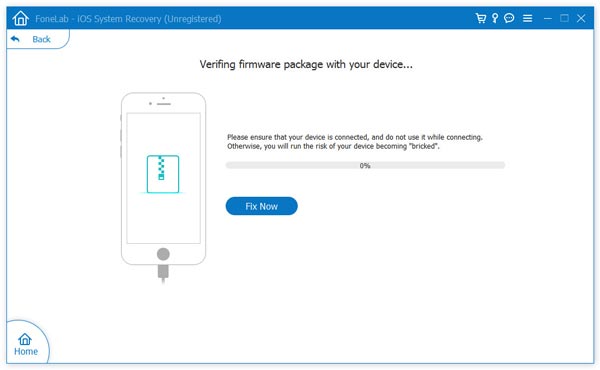
Step 4: Select the appropriate device model on the software page. Then click "Download" to get the required repair plug-in. After the download is complete, the software will help you complete the repair of the disabled device.
Part 6 1-Click to Unlock and Bypass the Disabled iPhone or iPad
If you think the above method is more troublesome, then this method will work for you. With the help of Aiseesoft iPhone Unlocker, this method can help you repair a disabled iPhone with one click.
iPhone Unlocker is a very professional unlocking software. Its operation is very simple, it only takes a few simple steps to repair your disabled iPhone/iPad. No matter your password is 4-digit, 6-digit, customized digit, Face ID, Touch ID, etc, it can be erased easily. As a professional unlocking software, it is almost compatible with iOS devices on the market, including iPhone12/11/XS/XR/X/8/7, iPad, etc.
Step 1: Choose the appropriate Aiseesoft iPhone Unlocker version and download it to your computer, and then follow the prompts to complete the installation.
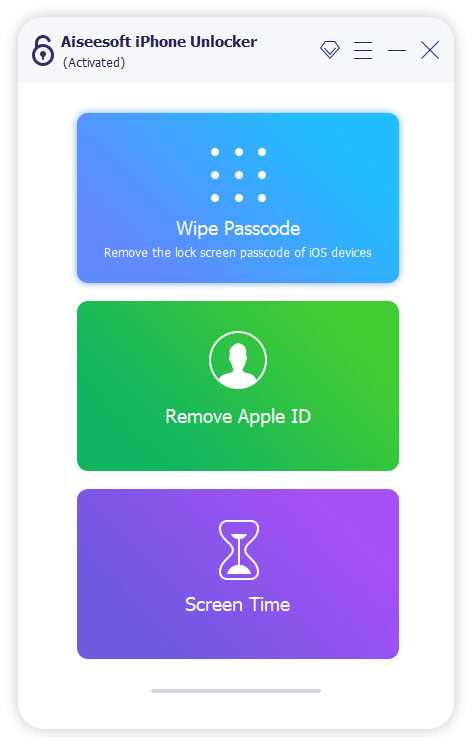
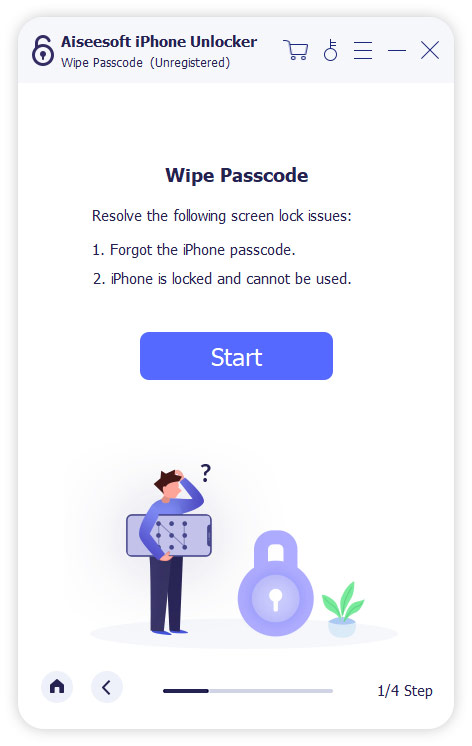
Step 2: After the installation is successful, run it on the computer. Then select the "Wipe Passcode" mode on the page and press the "Start" button.
Step 3: Use a USB cable to connect your device to be restored to the computer.
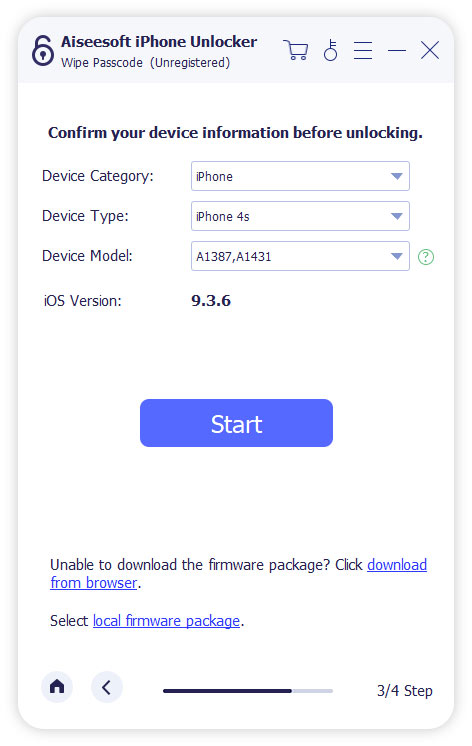
Step 4: Check the detected device information on the page. Please make sure that the device is the iOS device you need to repair. After confirmation, Click Start and this software will start download firmware package.
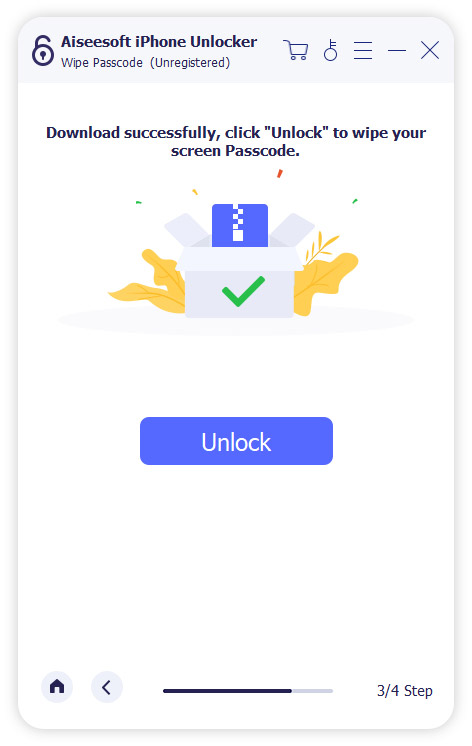
Step 5: After downloading the required plug-in, click "Unlock" to wipe your screen passcode. Then, enter "0000" on the page and click "Unlock" to confirm unlocking. It will take a while to unlock your iPhone, please be patient!
Part 7 Recover Deleted and Lost Data from iPhone/iPad
iOS System Recovery also well-known as the iOS Data Recovery, which allows you to recover deleted and lost data including contacts, photos, text messages, WhatsApp, iMessages, videos/music, call history, notes and more from any iPhone/iPad/iPod touch no matter with or without backup, so if you also looking for a way to recover data from your iPhonr or iPad, please follow the below steps to have a try.
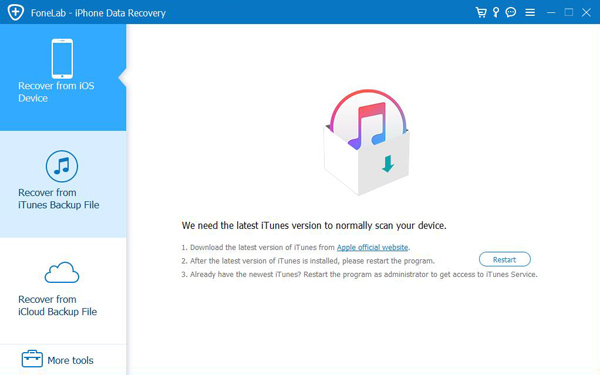
Step 1: Run the software and click on "iPhone Data Recovery" on the homepage, then choose "Recover from iOS Device".
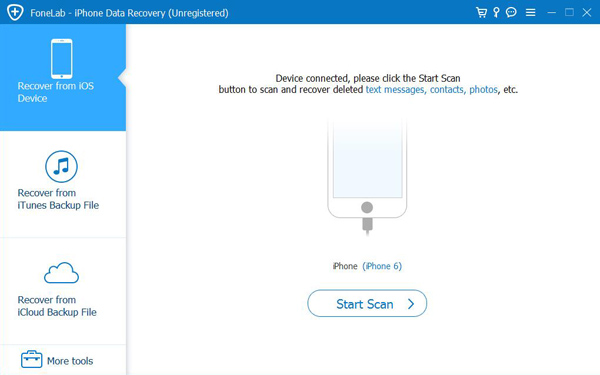
Step 2: Connect your iPhone or iPad to computer via a USB cable, once it's detected, tap on "Start Scan" to begin scanning your device for the lost data.
Step 3: Wait for the scan to finish, you can preview all the found result one by one, after choosing the files you need, click on "Recover" to save them back to your device or computer.
